Disclaimer: This post may contain affiliate links, meaning we get a small commission if you make a purchase through our links, at no cost to you. For more information, please visit our Disclaimer Page.
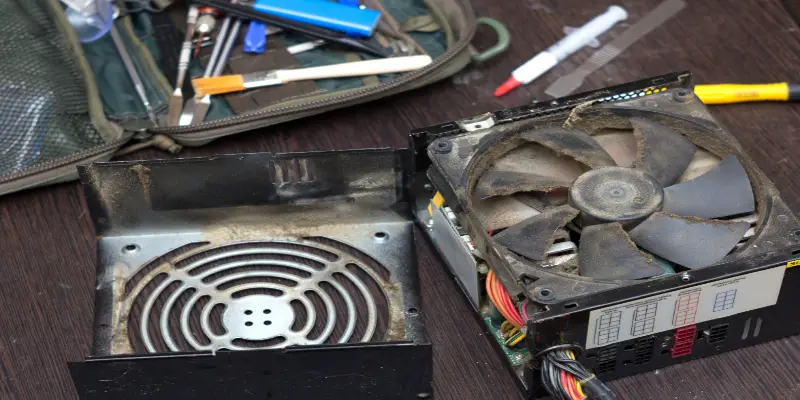
A dirty PC power supply can cause all sorts of problems. The fan might not work, the power supply might overheat, or the power supply might just stop working altogether. Fortunately, cleaning a PC power supply is an easy and inexpensive process.
It is necessary to remove the CPU from your case to clean it thoroughly. It allows you to clean the filter and the side of your computer case, as well as preventing dust from spreading around your computer when you blow it off. You can easily clean your PC power supply in 5 simple steps.
In this article, I am going to discuss how to clean a PC power supply safely and easily.
Table of Contents
Is It Dangerous To Clean Power Supply?
The power supply unit is a vital component that should be cleaned out once or twice a year at the very least. There will be a lot of dust and particles within the device.
The PSU has its dedicated fan and exhaust system, both of which must be free of hair and dust bunnies.
Turn your computer off and unplug it. If you clean the inside of your computer while it’s on or plugged in, you risk getting an electric shock or another injury.
You should have a specialist cleaning aerosol air duster on hand if you’re doing any kind of maintenance on the inside of your PC. It is essential “air in a can,” complete with a nozzle that you can point and squeeze.
These cans are handy for removing dust from your computer and can also be used on your power supply. However, do not direct air into your power supply from outside the PC chassis – the dust will be sucked back into the PSU when you turn your PC back on.
When Should You Clean Your Power Supply?
Your computer will shut down if the power supply is not working properly. For long-lasting power supplies, it is critical to clean the power supply frequently. It is recommended that you clean your power supply every two to three months.
Disconnect your PC from the mains, remove the side, and lay the chassis/computer case on its side with the motherboard closest to your desk or bench to effectively clean your PSU.
Spray a concentrated stream of air at the internal power supply fan to drive dust into the PSU and out the external fan grille.
It’s easier to detach the power supply connections from the motherboard, discs, and other devices, and remove the unit if your PSU has been caked with a lot of dust.
The heavy dust can be sucked up with a vacuum cleaner hose attachment (the kind without a brush) to give your PSU a thorough cleaning.
Do not, however, blow air into your power supply from outside the PC chassis; the dust will be sucked back into the PSU when you switch your computer back on.
Maintaining a clean and healthy working environment, cleaning your desk regularly, vacuuming your floor, and dusting your PC, monitor, and peripherals using an anti-static duster can help decrease dust buildup in your power supply unit.
How To Clean Your Power Supply Unit?
Step 1
When working on the inside of your computer, you should switch it off, unhook it from the wall, and switch off the power at the PSU. Allow it to sit for a minute before attempting to remove the computer case’s side panel.
It permits any remaining power in the machine to dissipate, allowing other components to cool. Always proceed with caution when working with computers.
Step 2
Remove your computer’s side panel. Depending on your computer case, you should be able to remove the panel using screws in the back. Find your power supply unit, which is around the top or bottom of your computer.
It will be at the rear of the computer, where the wall plug joins the computer. Remove the screws at the back of the computer that connects to your PSU with a screwdriver.
If it’s top-mounted, there are usually four screws on the rear and two on the inside.
Once all the screws have been removed, your PSU will be free from the case. Unplug the cords that supply power to your CPU, Motherboard, and other devices.
If you’re unfamiliar with computer setup, keep track of where they go. If you have a top-mount PSU and are concerned about cable management, tape the cables to the top of the case while cleaning it.
Step 3
You will be able to clean your computer once the power supply has been removed. A dust-off container, a microfiber cloth, and a toothpick are all we’ll need.
I wouldn’t recommend using anything other than paper towels to clean because they tend to leave particles on the surface.
I recommend getting one of these if you clean computers frequently. a Datavac duster blower, They blowhard and are less expensive in the long run than buying dust off.
They also come with different attachments for getting to different parts of your computer.
Keep in mind that this is a blower, not a vacuum. When cleaning your computer, never use a vacuum since it causes static electricity.
Step 4
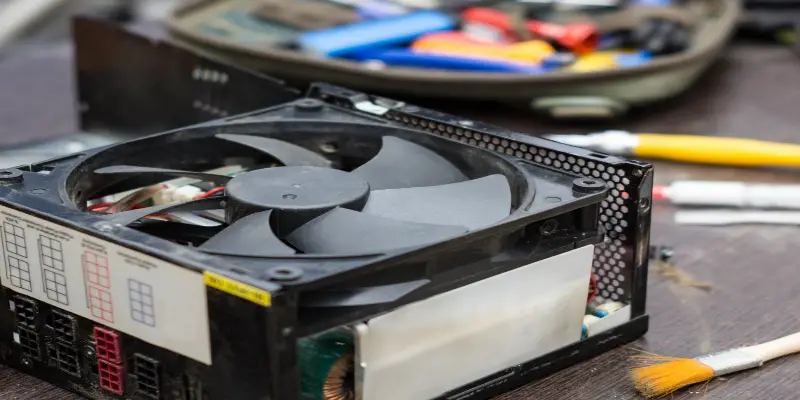
There are intake and exhaust ports on the power supply. The intake is the fan, and the exhaust is the mesh grill. Both of these places must be dust-free and well cleaned.
You will be able to easily access both places now that the PSU has been removed from the casing.
Make sure you’re standing far enough away from your computer or anything else you don’t want to dust on. As dust particles are blasted into the atmosphere.
You don’t need a toothpick to stop the fan from spinning while you blow air into the PSU; simply something small and powerful enough would suffice.
Then blow the dust off of your power supply. Make sure you’re using the straw attachment that came with the dust-off can. Concentrate your spray on the PSU’s corners and interior. Short bursts of spraying are recommended.
Please do not stick the dust straw too far into the PSU, as this may cause harm. Blow in a short burst that does not extend beyond the fan.
Step 5
Remove the fan’s pressure and give it a short spray to get rid of any dust on the fan. Reapply pressure and move to the PSU’s exhaust. Spray with a quick burst once more, attempting to clear as much surface area as possible.
I’d clean the exhaust and intake a couple of times on each side, then repeat the process. Till I am satisfied that the inside of the PSU is clean.
Finally, I wipe down the PSU’s casing with a microfiber towel. Just wipe it down from top to bottom.
How Often Should You Clean Your Power Supply?
One of the most crucial parts of your computer is the power supply. The power supply supplies electrical electricity to your computer, allowing it to function.
A faulty power supply will cause your computer to go down completely. It’s critical to clean your power supply regularly if you want it to last as long as possible. In general, you should clean your power supply every two to three months.
If you wish to clean it even more frequently, go ahead; there is no such thing as an overly clean power supply. If your computer produces a grinding noise when it starts up or shuts down, it’s a solid sign that your time for a power supply replacement.
Conclusion
If you don’t clean your power supply, it could overheat and may fail, putting your entire setup at risk. That is why it is critical to clean it thoroughly and correctly. It is feasible to disassemble your power supply to clean the insides of the unit.
I strongly advise against it. It will void any warranty you may have and puts your power supply in danger of breaking.