Disclaimer: This post may contain affiliate links, meaning we get a small commission if you make a purchase through our links, at no cost to you. For more information, please visit our Disclaimer Page.
What is the Fast User Switching feature? In this article, I’m going to explain it further and guide you how to disable fast user switching in Windows 10.
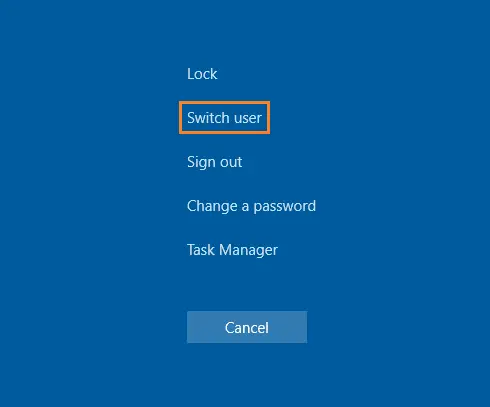
Many users (including me) consider Fast User Switching as a handy function in Windows. It allows users to log into a computer while there are still other users signed in. The advantage of this feature is that you can switch among different users incredibly fast.
Read Related Article: 11 Unnecessary Features You Can Disable In Windows 10
For example, you logged into User A on your Windows computer to do your work. But for a particular reason, if you need to sign into User B to get files or do something else, then switch from User A to User B, it’s better than logging off and signing in again. It helps to maintain what you are doing in the session of User A, instead of closing all programs when you sign out.
However, there are downsides to using the Fast User Switching function, such as more computer resources will be utilized, or unable to restart (or shutdown) your computer without logging out. Therefore, if you don’t want to use this feature, you just need to do a few simple steps, through the Local Group Policy Editor or Windows Registry, and then it will completely disappear from your PC.
But, you should be aware that these methods don’t actually disable Fast User Switching feature in Windows 10. Instead, it will hide all buttons or places that you can click on to use it such as the Task Manager, the Start menu, Ctrl+Alt+Del or sign-in screen. As a result, when you have signed out of an account, there would be no place to click-to-switch to other logged in users. That’s the final purpose of disabling Fast User Switching feature.
Table of Contents
How To Disable Fast User Switching In Windows 10 With Local Group Policy Editor
If you are using Windows 10 Professional or Enterprise edition, you can use the Local Group Policy Editor to hide all entries related to Fast User Switching on your PC. It’s the simplest method so I make it the first option on the list.
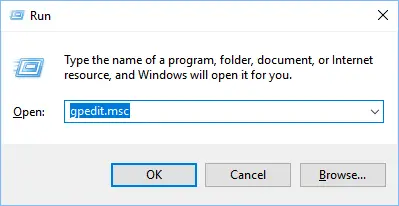
Firstly, press Windows + R to launch the Run dialog box. Then fill in: “gpedit.msc” without the quotes into the text field and press the Enter key.
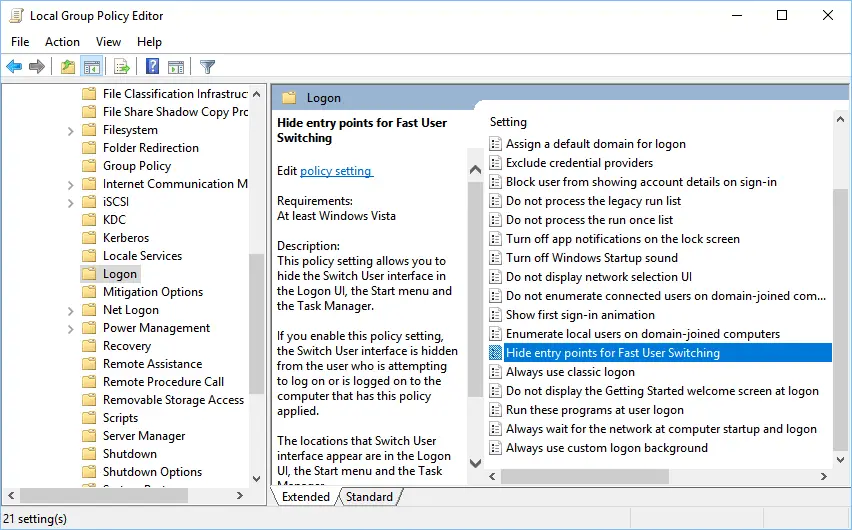
In the Local Group Policy Editor application, look at the left sidebar and then open the option following the address below:
Local Computer Policy -> Computer Configuration -> Administrative Templates -> System -> Logon
Now, look at the primary sidebar, search for: “Hide entry points for Fast User Switching” item and double-click on it.
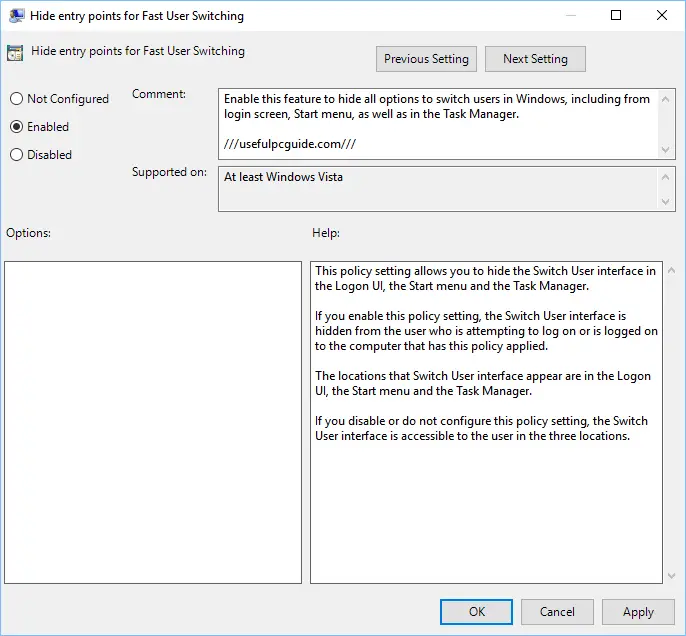
A new window will be opened. Choose the “Enabled” selection box and then click on the “OK” button.
That’s it!
Now, you can disable Fast User Switching in Windows 10 Professional or Enterprise edition. In case you’re using the Windows 10 Home version, you need to upgrade to the higher edition as I mentioned above. Otherwise, you only can modify your registry entry to disable it.
To enable this feature back on your PC, go to the same address above and select the “Not configured” selection box and then click on the “OK” button.
Simple, right?
How To Disable Fast User Switching In Windows 10 With the Registry Editor
If you prefer to use the Registry Editor to disable this feature on your computer instead of using the Local Group Policy Editor, then here is what you need to do.
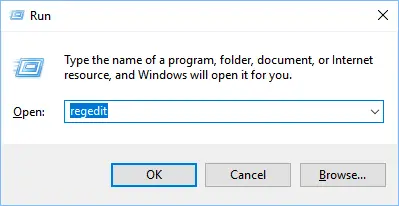
Firstly, press Windows + R to launch the Run dialog box. In the next step, type: “regedit” without the quotes and press the Enter key.
In the Registry Editor window, look at the left sidebar and open the following address on the option-tree:
HKEY_LOCAL_MACHINE -> SOFTWARE -> Microsoft -> Windows -> CurrentVersion -> Policies -> System
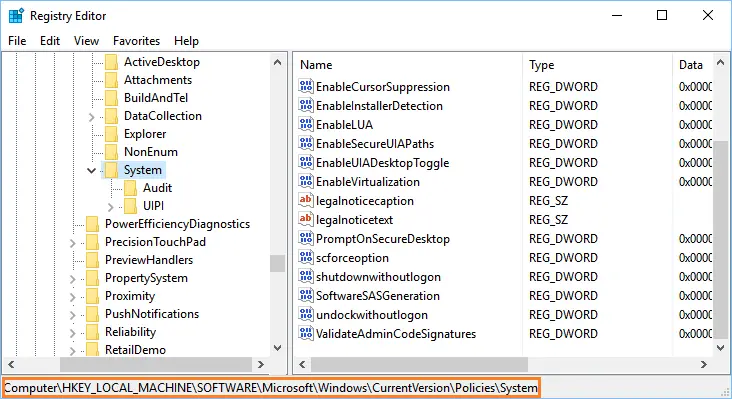
After that, look at the primary sidebar and find the “HideFastUserSwitching” option.
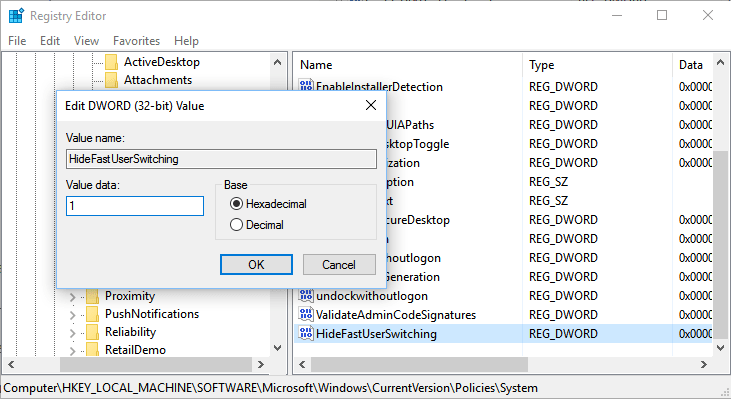
If you found it, you just need to double-click on it and change the value from 0 to 1. In doing so, the Fast User Switching function on your computer will be disabled.
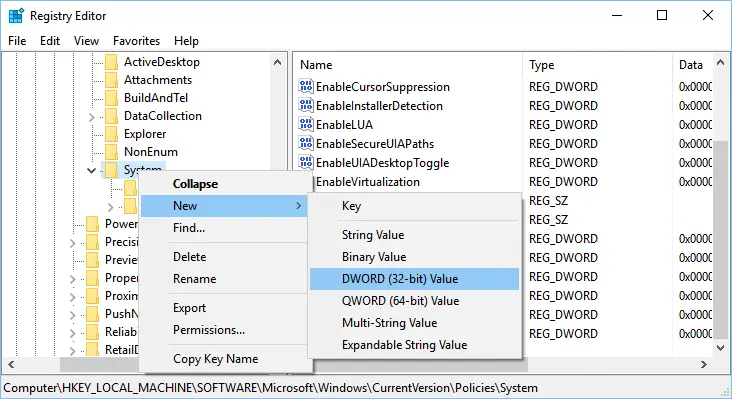
Otherwise, you’ll need to create a new entry with the same name: HideFastUserSwitching.
To do so, right-click on the “System” entry on the left sidebar, choose New -> DWORD 32-bit value. Then enter the name I mentioned above.
After that, double-click on it and adjust the value from 0 to 1 to disable Fast User Switching on your Windows 10 PC. If you change your mind and want this option back, you just need to change that value from 1 to 0, and everything will appear as usual.
How To Disable Fast User Switching In Windows 7 Or Windows 8
In case you haven’t upgraded to Windows 10 yet, and want to disable this option on your computer, then you can use the two methods I wrote above. There’s nothing different.
However, you should be aware that the Local Group Policy Editor isn’t available in a few editions of Windows 7 or Windows 8, such as the Starter or Home version.
Therefore, if you can open the Local Group Policy Editor application with the instructions above, I would recommend using the Registry Editor to disable Fast User Switching.
That’s all!
I don’t know why you’d want to disable this feature on your computer because it’s quite handy for me. However, if your PC lacks resources (such as an old model with less RAM and weak CPU), or you feel this feature is irritating, then probably you need to disable it.