Disclaimer: This post may contain affiliate links, meaning we get a small commission if you make a purchase through our links, at no cost to you. For more information, please visit our Disclaimer Page.
The main joy about laptops is that they are portable- but they become less so when you always have to keep them plugged in.
We’ve got the best troubleshooting options for you if your laptop only works when plugged in and what you can do to fix the issue.

Table of Contents
Why Does My Laptop Only Work When Plugged In?
There are two main reasons why your laptop only works when plugged in:
- The battery is dead
- There are issues with your laptop’s power settings
Laptops receive power in two ways: the battery and AC power. AC power is what it runs off of when plugged into the wall.
When your laptop stops functioning without AC power, there is something wrong with your battery. The issue is either a dead battery or your computer’s power management malfunctioning.
A dead battery can be costly. To try to avoid that cost, you should first troubleshoot.
How to Check Battery Status
Checking your battery’s health is imperative to solving the problem. You can analyze information about your battery with BIOS upon starting your computer.
Follow these steps to check your battery’s status:
- Turn on your computer, but do not let it fully boot up. Once it gets to the logo screen, press F2 for Dell. If you have an HP laptop, press the Esc key repeatedly until it opens the Startup Menu, then press F10.
- On the left side of the screen, select General.
- Search for Battery Information.
The right side of the screen will now show you specifics about your battery’s health. If it says it is in excellent condition, the issue is likely with your AC power source settings. If you use a Lenovo, turn the laptop on and press F1 when the Lenovo logo appears.
You can also create a battery report on Windows by doing the following steps:
- Search for CMD or Command Prompt on the Windows search bar.
- Open the application. You will see a command line with “C:” followed by your account’s username.
- Type “powercfg / batteryreport” then hit Enter.
- The Command Prompt should send a report to a user folder on your laptop.
- Find the folder which will have the title: “C:User<yourusername>”
- The bottom of the report will show your battery’s life estimation.
Restarting the Microsoft ACPI-Compliant Control Method Battery
Your ACPI-Compliant Control Method Battery driver handles all power-related functions on a Windows operating system. It controls power settings, battery driver communications, and more.
If your driver cannot properly communicate with ACPI and BIOS, it will struggle to retain power while unplugged. The issue is easily solvable. All you need to do is disable and re-enable the driver.
Follow these steps to restart your ACPI-Compliant Control Method Battery driver:
- Open your Start menu and type “device manager” into the search box. Hit Enter.
- The Device Manager application will open. From there, find the tab that says “Batteries.”
- Once the Batteries tab opens, right-click “Microsoft ACPI-Compliant Control Method Battery” and select “Disable device.” With the device disabled, your laptop will run only off AC power. You should no longer see a battery icon on your taskbar.
- Next, right-click again on “Microsoft ACPI-Compliant Control Method Battery.” Select “Enable device” to turn connections back on to your battery. You should see your battery icon reappear on your taskbar.
- Unplug your laptop from its AC adapter. It should now hold a charge without being plugged in.
Reset Power Profile Settings
Another possible way to solve your battery issue is to reset your laptop’s power profile settings. Like the previous solution, this one only works for Windows operating systems.
To reset your power profile settings, follow these steps:
- In the Start menu search bar, type “command prompt.”
- Open the application up. You will see a black screen appear with some writing.
- Type, without the quotation marks, “powercfg -restoredefaultschemes”
- Restart your computer.
- Once your laptop restarts, unplug it and see if it will work without the AC adapter.
Check Your OS for Updates
If neither of the above solutions solves your problem, you should check your operating system for updates.
To check a Windows OS for updates, follow these steps:
- Open the Start menu.
- Select Settings.
- Find Windows Update.
- If there are any available updates, your laptop will download them.
To update a MacOS system, follow these steps:
- Open the Apple menu by clicking on the Apple logo at the top corner of your screen.
- Select System Preferences. Once that application opens, click Software Update.
Restart your laptop and unplug it to see if the updates changed anything. If the computer still fails to hold a charge, it’s time to replace the battery.
How to Replace a Laptop Battery
Eventually, batteries die and need a replacement. In this section, we’ll walk you through the step-by-step process of safely replacing your battery on an HP laptop. This guide works great for most laptops that have an easy-to-access slide-out battery.
Step 1: Purchase a New Battery
The first step you must complete when replacing a battery is purchasing the new one.
You will need your serial number to find the right one for you. Searching for the make and model of your laptop online will also help you track down important information.
You can purchase a new battery from online retailers like Amazon or Best Buy.
The cost of the new battery will ultimately depend on the age of your laptop. Older laptops have more expensive batteries. It would be best if you weighed the cost of a new battery with the price of a new laptop.
Step 2: Turn Off Your Laptop
You need to shut down your laptop completely before removing the battery. Turn off your computer and unplug it to ensure no power is charging through the system.
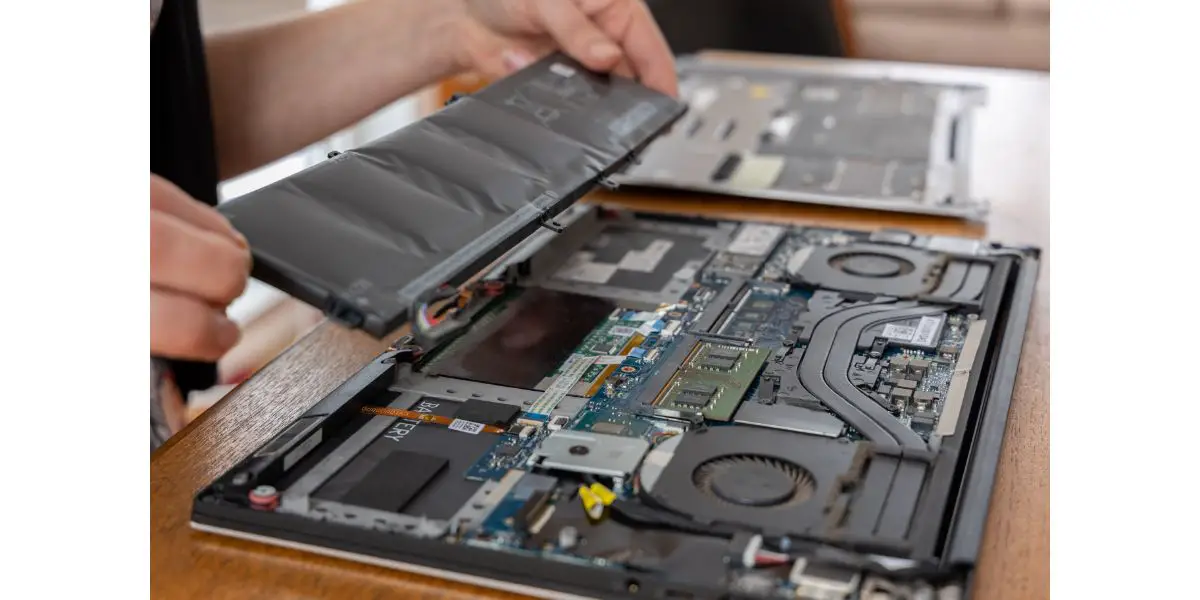
Step 3: Remove the Old Battery
First, you must use a screwdriver to remove the laptop’s back panel. A Phillips-head #0 will work great, or you can purchase a laptop opening kit online. If there are rubber feet on the rear panel of your laptop, you will need to remove those first. Pry them off with a plastic tool.
Once the back panel is off, you will use the screwdriver again to loosen the screws holding the battery in place. Carefully disconnect any cables connected to your battery. If you do not use caution, you may damage other delicate parts of your computer.
Step 4: Slide the New Battery Into Place
After your old battery is gone, you can insert the new one.
Once the new battery is inside and positioned properly, you can start connecting it. Carefully connect the cables to your battery, then screw it into place. Put the back panel back on.
Step 5: Charge the Battery
Once everything is all connected, let the computer fully charge before testing the new battery.
Here’s also a helpful video below on how to do it!
What to Do If Laptop Battery is Non-Removable
You should contact your manufacturer for assistance if you have a non-removable battery, like many new models and most Mac laptops.
Conclusion
You need to check your battery’s health if your laptop refuses to hold a charge when not plugged in. The issue might be a dead battery, but it could also be an issue with your power management system.