Disclaimer: This post may contain affiliate links, meaning we get a small commission if you make a purchase through our links, at no cost to you. For more information, please visit our Disclaimer Page.
When you take new images with a digital camera or a smartphone, it will use lots of storage space on your memory card or the internal storage of your smartphone. Typically, an image that captured by a regular smartphone can have size up to 4MB (megapixel). So can you imagine the size of an image that captured by a digital camera with an 18-megapixel sensor or more, such as 50-megapixel?
When you keep a lot of large images on your smartphone or computer, it will use a large storage space of your device. This could be a big problem when you try to create a backup version of your device to online cloud services. You will need a lot of storage space for saving your backup files on these services, which will cost you up to $15 per month. For example, both Dropbox and OneDrive will charge $9.99 per month for 1TB of online storage space. If it’s not a problem at all, then upgrade your cloud account to having more space.
There is also another good solution that you could use to keep your images with small sizes but still have the same quality. The method is use desktop software, mobile apps or online tools to resize your images without losing the quality. By compressing the size of images, it will help you save a lot of storage space on your device as well as upload files to online cloud faster.
Many methods which you can use to compress your images in bulk. In this article, I will share with you several best ways to resize images on Windows, Mac OS X, Android and iOS. I will also give you a few solutions to reduce the size of images on WordPress or online through the Internet.
Table of Contents
Best Ways To Reduce Image Size Without Losing Quality
You can easy to find software, apps or online tools that help you to resize your images. But there are only several of them that offer the software or services for free. Take a look at methods below and grab an appropriate solution that fit your situation to reduce the size of images on your devices.
How To Resize Images Without Losing Quality On Windows
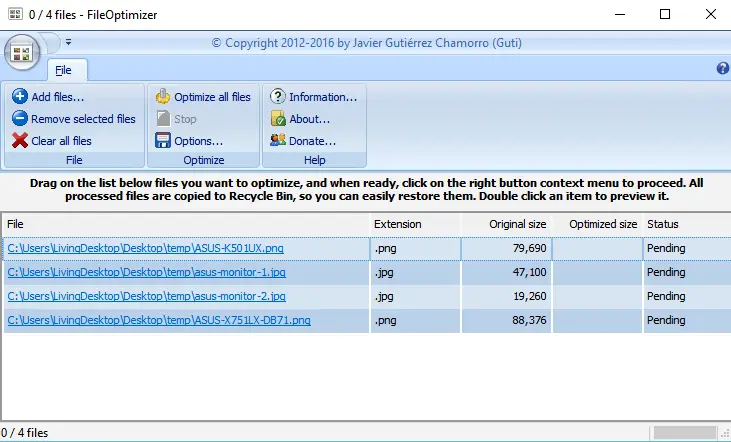
This is the first method in my guide to help you reduce the size of images. To change the size of the images, you need to download a program named: FileOptimizer, and then install and use it to resize your images.
It’s an advanced image compressor program that will help you to reduce images without losing the quality. This program supports more that 200+ file formats and comes with a few recompressions and optimization techniques.
To use this program, click “Add files” to select the images that you want to compress.
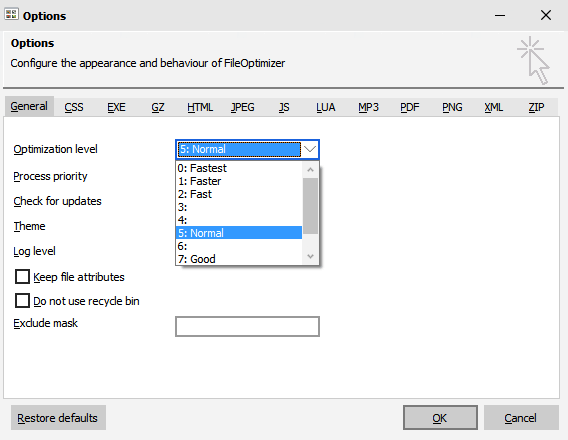
Click “Options” to choose the optimization level you want.
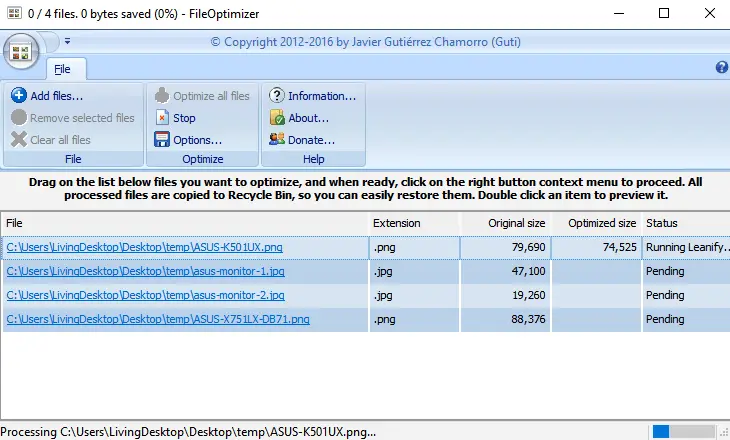
And then click on the “Optimize all files” to start the process. The program will begin to optimize and reduce the size of your images and replace the old file with the new one.
Visit here to download FileOptimizer.
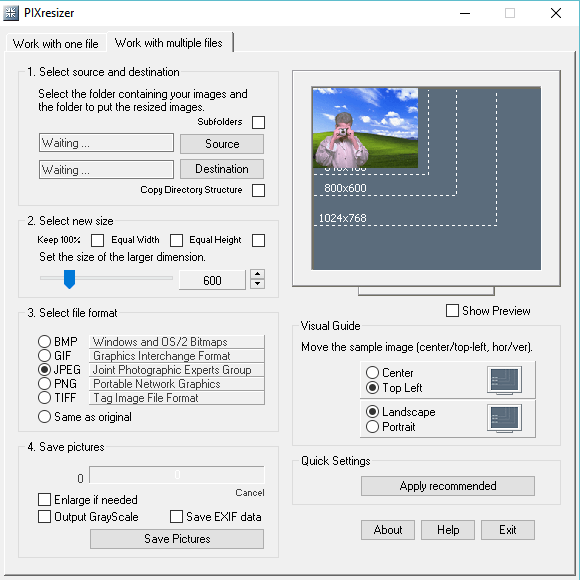
The second Windows-based program you need to know that’s the PixResizer. It provides a simple user interface for reformatting and resizing your images. PixResizer is very simple to use – just select the images you want to resize or reformat, choose the settings and then click “Save Pictures” to start to optimize the images.
Visit here to download the PixResizer program.
How To Reduce Image Without Losing Quality On Mac OS X
If you use a Mac computer, then you might want to take a look at the ImageOptin application. It’s a free app for Mac OS X that designed to compress images in bulk without losing quality.
To use the ImageOptin app, you need to select the source of images where your images are stored, and then click on the “Compress” button. This software can help you to reduce the size of your images without losing the quality of them. The compression rate of ImageOptin is roughly 13 percentages.
Visit here to download ImageOptim application.
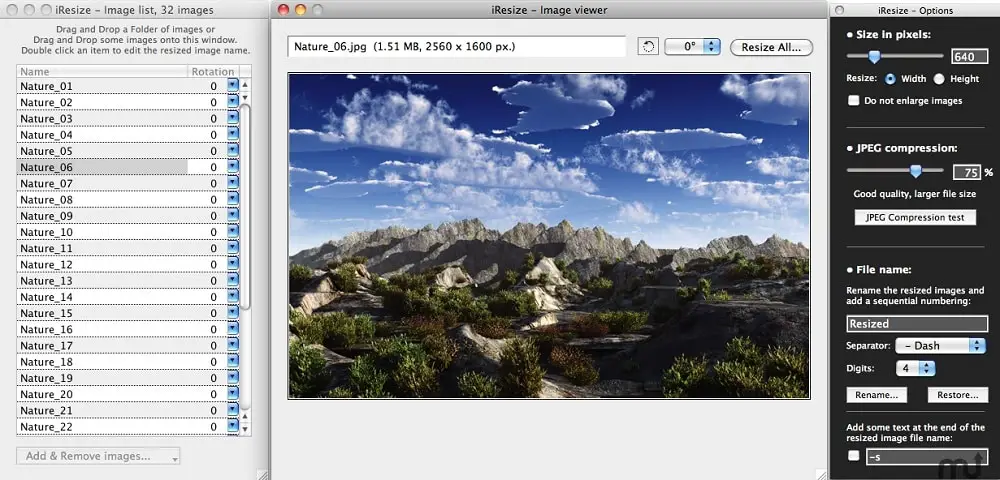
iResize is also a good application to help you resize, compress your images on Mac OS X. It also allows you to adjust the brightness of your images follow the way you want, rename and sequential numbering of the compressed/resized images, or add some text (example: -resized) at the end of the file name. The iResize application requires Mac OS X 10.4 or later to run. Make sure your Mac computer meet this requirement.
Visit here to download the iResize app.
How To Reduce Image Size Without Losing Quality On Android
If you use an Android smartphone or tablet but don’t have much internal storage space, or it doesn’t have a MicroSD card slot to expand your storage, I would suggest you to use Cram to compress your images but still keep the quality of them. It’s an Android-based app, allows you to compress the images on your device without compromising the actual resolution, dimensions or beauty of your images.
With Cram, your images can be compressed up to 60%. It allows you to save the compressed images to a new folder or replace the old images, depends on your choice. After compressing the images, you can share your images through Gmail and many other applications.
Visit here to download Cram for Android.
See Also: How To Use Google Photos To Store Unlimited Photos?
How To Compress Image Without Losing Quality On iOS
One of the most common issues with iOS devices, such as iPhone, is the lack of storage. Many users have bought an 8GB / 16GB iPhone, and then realize that they run out of storage space too fast.
There are a few methods to expand the storage of your iOS device, such as use SanDisk iXpand Mobile Flash Drive, Mophie Space Pack, or online cloud services. However, none of them are cheap. You can try to clean up storage space of your iOS device. But this process involves removing lots of files from your device that you might be not want to do.
As you know, images and videos are two type of files that consume most of your storage. You can try to compress your images and video to having more storage space.
The first app I would recommend you to try is the Shrink My Pictures. It’s available in the App Store for free. With the free edition, you can select one image to compress at a time. Or you might want upgrade to the premium version, which will cost you about $1 (once time fee), to compress your photos in bulk.
Visit here to download Shrink My Pictures app.
If you only want to use free solutions, try these free apps: Resize Image, Minima or Simple Resize.
How To Compress / Resize Images Online Without Losing Quality
If you don’t want to install any software or applications on your device, try two online services below, which will help you to optimize your photos.
Of course, you can easy to find a lot of online services like this on the Internet. But here are two best online optimize and compress image services you might want to try.
Compressor.io
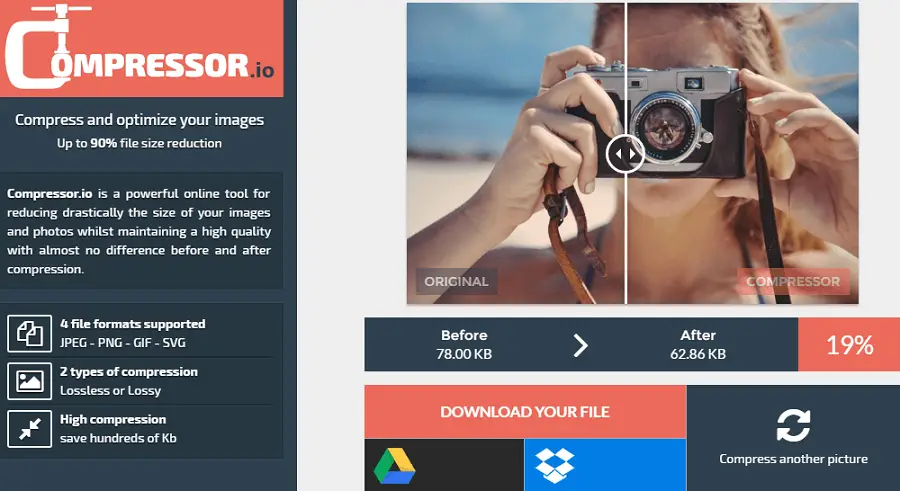
It’s a popular service that most people liked and very easy to use. It supports four types of images: JPEG, PNG, GIF and SVG, and two kinds of compression: lossless or lossy.
Compressor.io is an excellent online tool to help you compress your images without losing the quality. There is no difference before and after the compressing process. However, you can only compress one image at a time. If you want to compress another image, you have to wait until the first process is complete. So if you want to compress images in bulk, Compressor.io is not the service you might want to use.
Usually, the Compressor.io online service provides the compression rates up to 60 percentages. It also allows you to save the images to Google Drive or Dropbox after compressing.
Optimizilla.com
If Compressor.io doesn’t allow you to add more than one image to compress at a time, then try Optimizilla.com. This online image optimizer provides a smart combination of lossy compression algorithms and the best optimization to shrink JPEG, PNG photos to the minimum possible size but still keep the required level of quality. It allows you to add up to 20 images to compress at a time. You can use the slider to adjust the compression level.
How To Reduce Image Size Without Losing Quality On WordPress
The image is one of the most important things of websites. When creating a new web page or a new article, you often add several images into it.
However, if the size of these images is too big, it will make your website load slower. That is a serious problem if you have many images on your website. I think you already know the importance of website load time, and how does it affect your online business.
I would suggest you use above online image optimizer to compress the images before uploading to the website. This process will help you reduce the size of the image and increase the speed of your website.
If you use WordPress blog platform, there are two plugins you should try to compress images on your blog automatically.
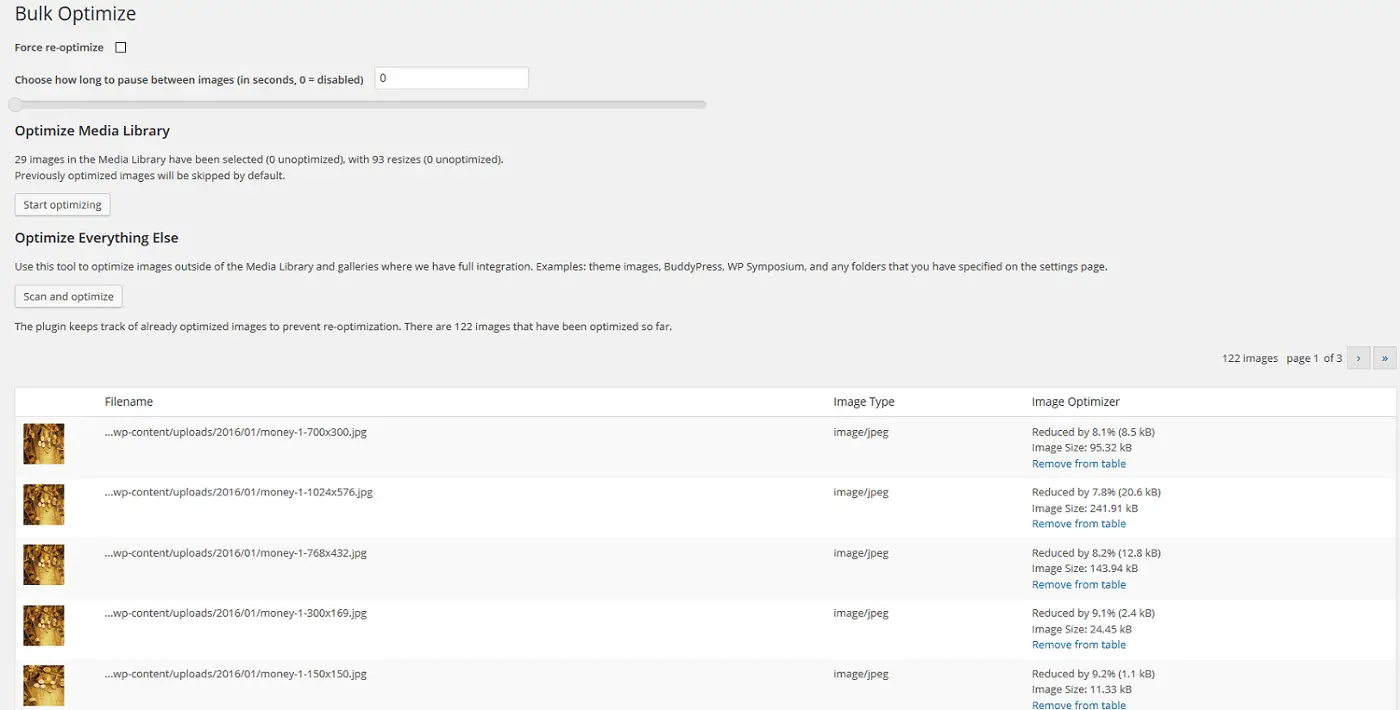
The first plugin is the EWWW Image Optimizer. It’s one of the most popular plugins for WordPress websites to compress the images. This plugin will automatically optimize images when you upload them to your WordPress blog. It also allows you to optimize images that already on your blog.
Visit here to download this plugin, upload to your blog and activate it to use. You can also install this plugin from your WordPress admin panel, simply go to Plugin > Add New > search for “EWWW Image Optimizer” and then install and activate it.
Another plugin that I mentioned above is the WP Smush. It will automatically scan and optimize all images on your website with the incredibly powerful.
You just need to download and install the plugin, WP Smush will do the rest of the work.
From this guide, I hope you will know how to compress (resize) images without losing quality on your computer, Android, iOS device, or on the Internet.
If you have any better methods to compress images, let me know. I will consider to add it into the list.
Was this article useful? Let share it with your friends and other users.


