Disclaimer: This post may contain affiliate links, meaning we get a small commission if you make a purchase through our links, at no cost to you. For more information, please visit our Disclaimer Page.
When you put your wireless earbuds, AirPods or not, in the case, you expect them to do little other than charge. Once they charge, the case becomes a glorified carrying device that looks all glossy and neat. Your AirPods aren’t supposed to start connecting to your phone.
There are several reasons your AirPods may act funny while they’re in the case, including charging problems with the case itself, software updates, the case isn’t closing correctly, problems with auto-ear detection, and more.
Sure, it’s probably a bit surprising to find there are so many different, possible culprits causing your AirPods to connect when they’re supposed to be sitting in the case, quietly charging, bothering no one. If that’s not the case for you, it’s a good idea to check out some of these troubleshooting tips.
Table of Contents
9 Potential Fixes to AirPods Randomly Connect When in Case
1. Software Issues
We bring this one up first and foremost because it’s potentially the most complicated fix. That’s not to say that you need to have a master’s degree in computer engineering to fix the problem.
Not at all. It’s just a little more complicated than, say, removing your AirPods and putting them back in the case.
Since the days of Atari, bugs have always plagued software. If there is a computer, you can bet your bottom dollar it’s had a bug or two from time to time. Most of the time, this happens because you have previously connected your AirPods to other devices and it’s causing an issue with the AirPods while those devices are in range.
You should start by snatching up any devices you’ve connected your AirPods to, so you can disconnect or forget the AirPods from that device. Once you make your way around to the primary device you use your AirPods with, go ahead and disconnect and forget the AirPods as well.
Keep in mind, disconnecting and “forget device” are two different things. The “forget device” option removes the AirPods from your iPhone/iPad as if it were never paired with the AirPods, to begin with.
- Go to your Settings on your iOS device.
- Select Bluetooth
- Locate Your AirPods on the next screen
- Tap the little “i” with a circle around it
- Select “Forget This Device”:
- Confirm
Now, all you have to do is ensure that your Bluetooth is on (with your iOS device) and place your AirPods in pairing mode. If it’s been a while, and you don’t remember how to place them in pairing mode, that’s exactly what we’re here for.
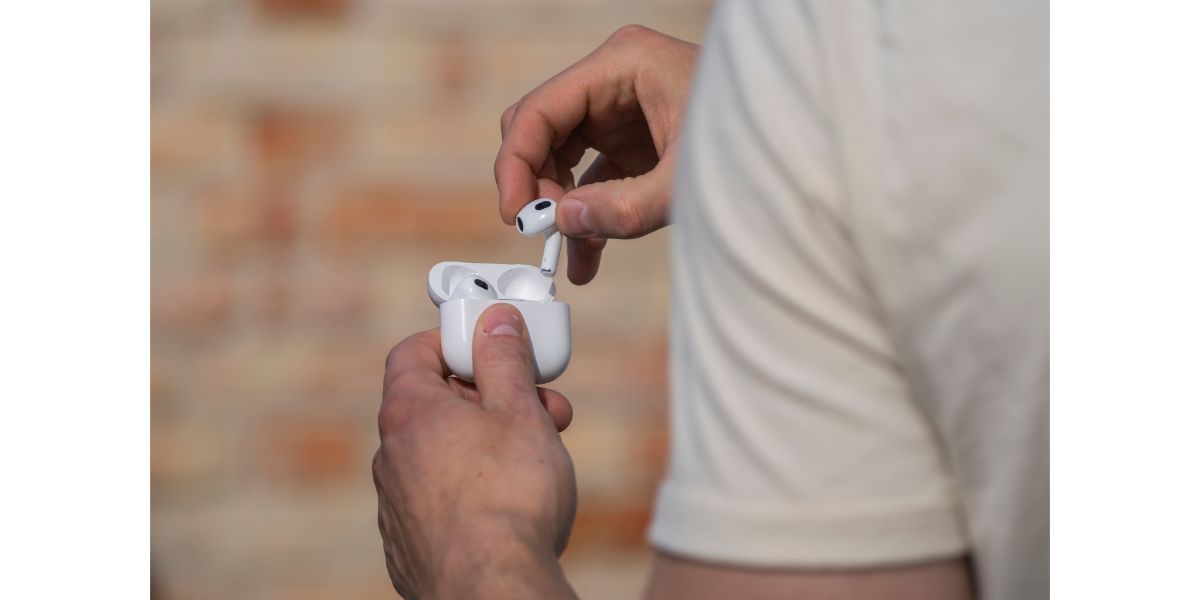
Make sure your AirPods are both in the case. Open the lid. Press and hold the “set up” button on the back of the case until you see a little status LED blinking white. It’s now in pairing mode and should pop up on your iOS device.
2. Check and Clean Your Case
When you close the lid on your AirPods case, it presses the AirPods down, closing the circuit and allowing current to travel through the now closed circuit. This is how the battery from the case transfers power to the smaller batteries in the AirPods.
If the case is grimy, it may not completely close, or the little leads inside, which sit up against the leads on each AirPod, are dirty and not properly charging the AirPods. If the AirPods aren’t actively receiving a charge in their case, they will keep trying to connect to devices they are associated with.
Dirt or debris could also be in the charging port, keeping the case from charging correctly. If the case is dead, then the AirPods will remain active inside the case, seeking out devices to connect with.
The best way to solve this is through preventative maintenance. Keep the case clean at least twice a week or so. You can use Q-tips. Lightly rub any dirt or grime off the leads. If you use any liquids to clean it, avoid getting any liquids in the mesh part, that’ll damage your AirPods.
Inspect the hinge and ensure that the lid is closing properly each time. Also, make sure it remains closed like it’s supposed to and isn’t easily coming open in your pocket.
Inspect the charging port carefully and make sure the LED indicator turns on whenever you plug the case in for charging.
Your iOS device will also tell you the current battery level of your charging case, so make sure that it’s charged or at least has some juice for you to rule it out.
If there is debris or dirt in the charging port, some compressed air is usually enough to clear it out.
3. Auto-Ear Detection
It’s completely understandable that some people would want to turn off the auto-ear detection feature. When it’s on, the AirPods tend to detect an ear whenever they’re not actually in your ears. You can set one down on the table and it thinks it’s in your ear.
Turning off the feature stops all the AirPod, ear-detection shenanigans. However, there are always two sides to the same coin. Turning AED (Automatic Ear Detection) on ironically helps the AirPods to realize they’re in the case and not in your ears.
When AED is off, the AirPods may assume they’re still in your ear or they may assume (off and on) that they’re in your ear. Fortunately, this is not a common problem with Apple’s AirPods, and, when it is a problem, it’s often because the AirPods are on their last legs and it’s time for an upgrade, or they’re dirty.
The best way to fix it is to keep AED turned on and try not to lay your AirPods down on the counter or couch when you aren’t using them. If your AirPods are dirty, see troubleshooting tip number 2 above.
A brand new pair of AirPods should give you plenty of in-ear, music, audiobook, video game, and music-listening bliss for somewhere between 2 and 3 years.
If your AirPods just turned three years old and are beginning to give you connection problems, it’s probably time to upgrade.
4. Turn Off Bluetooth
Yeah, this seems really silly, and it’s not by any means a permanent fix for Apple AirPod connection problems.
However, it is a good temporary fix until you can get done with whatever you are doing and sit down for a more intense look at what’s going on.
For instance, let’s say you’re using your iPhone to cast a movie to the TVs set up in the back, so you can drive and the kids can be entertained. Unfortunately, the AirPods keep connecting, dropping the audio.
You’re driving and the kids are complaining so it’s not something you can fix right now. The best solution is to turn off Bluetooth on your iPhone/iPad simply. You can always sit down and give the problem your undivided attention later.
5. Device Network Settings
One way you may be able to clear up any internal confusion going on between your iPhone and AirPods is to reset your network settings. The term “network” includes your WiFi, cellular, and Bluetooth.
Resetting the network settings is like the old days of resetting the Nintendo. We don’t have to know why it works—we just know that it works a surprisingly high percentage of the time.
- Navigate to Settings
- Scroll down and select General
- Select Reset
- Select Rest Network Settings
- Confirm
Once everything is reset, you must go through the whole pairing thing again, discover the AirPods, connect to them, and save them in your Bluetooth tab under “My Devices.”
6. Reset Your AirPods
Once again we arrive at the good old reset option. This is probably the most tried and true method for troubleshooting electronics in the history of electronics.
Before electronic devices came with reset buttons, the brilliant savants that make up human civilization just kicked, punched, or used a blunt instrument to hit them, effectively resetting them.
The thing is, it works. It works often. So, when the worst comes to worst, reset your AirPods. Sure, it means pairing and reconnecting them again. But, the good news is, Apple makes connecting Bluetooth devices pretty easy when all is said and done.
- Locate the Setup button on the back of the AirPods case
- Press and hold the Setup button until the LED lights up orange and then changes to flashing white
- Release the button
- Place the AirPods back in pairing mode by holding the Setup button again
- When it starts blinking white, it should show up on your iOS device
- Pair the devices
Using this reset method essentially turns back the clock to the day you pulled the AirPods out of the box for the first time.
You know, back when it was all shiny, glossy, and new and you were just ridiculously excited to bust those Pods out and start rocking your favorite beats.

7. Restart Your iPhone/iPad
There’s no difference between the iPhone and the iPad when it comes to resetting unless you have an iPhone or iPad that’s a couple of generations back. In the case of older devices, you can just hold the power button down until the sliding bar pop us.
Simply sliding the toggle on the bar to the right will shut it down. When it completely cycles down, power it back up by pressing the power button until you see the Apple logo in the center of the screen.
Some of the newer generations of iOS devices require an additional button to hold. On either the iPhone or the iPad, press and hold the power and the “volume up” buttons at the same time. Let go when you see the power slider and slide the toggle to the right to shut either device down.
Turning them back on is exactly the same. Wait for it to completely cycle down (Apple devices never immediately turn off).
Turn the iPhone/iPad back on by pressing and holding the power button until the good old Apple logo pops up in the center of the screen.
The best reason for this is that sometimes the connection issue is on the iOS device’s end. It’s rare but it does happen from time to time. Even if it’s not the iOS device, restarting it will effectively disconnect the Apple AirPods from it before it reconnects when the iOS device cycles back up.
8. Software Updates
If you don’t keep the firmware on your iPhone/iPad and the firmware on your AirPods up to date, they will no longer be completely in sync. Without getting into the minutia of software and communication between the iOS device and the AirPod, updating your software is often a safe bet if it’s not up to date.
- Open up the Settings menu on your iPhone/iPad
- Scroll down to General
- Select Software Update
- Select Download ; Install
- Follow the onscreen prompts to update the firmware
The periodic updates that Apple releases for their iOS devices are designed for fixing bugs and other, known issues. If you ever jump on Apple.com and look over their latest firmware updates, you’ll often see that these updates go well beyond just the iOS device in your hand.
You’ll see patches and fixes for Apple Watch connectivity, AirPods, Apple TVs, etc. Since the iPhone or iPad can interact with all of these devices, the iPhone/iPad has to stay up to date in tandem with those same devices.
As far as the AirPods are concerned, the updates Apple releases for them should be automatic. It doesn’t matter what Apple device you have connected to them. It also doesn’t matter how many Apple devices you have connected to them either.
Whichever device is in range and connected to your AirPods should automatically deliver firmware patches to the AirPods when Apple releases them. That includes Macbooks and Macs.
9. Only Use Apple Charging Cables
You can buy lightning connectors that are third-party manufacturers and, most of the time, they will work. At least they will for a time. Apple loves to ensure its customers only purchase Apple devices and not third-party variations.
For instance, if you go out and get a third-party charging cable for your Apple AirPods, it may charge the Pods just fine for a week or so. However, third-party charging cables always seem to stop working after about a month or so.
Next thing you know, you’re assuming that the third-party cable you’ve been using all this time to charge your AirPods stops charging them. You probably won’t even notice the change either, because you’re used to it charging like it’s supposed to.
Without a good charge, the case will die and since there is nothing charging the AirPods, they will continue trying to remain connected with your iOS devices. Your best bet is to either wirelessly charge your AirPods case or only use Apple equipment.
All Things Considered
There you have it, nine different troubleshooting tips for dealing with rogue AirPods that just think they can connect to whatever they want, whenever they want. Honestly, it is an aggravating thing.
When it comes to getting the AirPods working correctly, the above 9 tips will solve the problem 99.9% of the time. If none of the above works, contact Apple customer service, especially if your AirPods are still under warranty or you have an Apple Care + plan.