Disclaimer: This post may contain affiliate links, meaning we get a small commission if you make a purchase through our links, at no cost to you. For more information, please visit our Disclaimer Page.
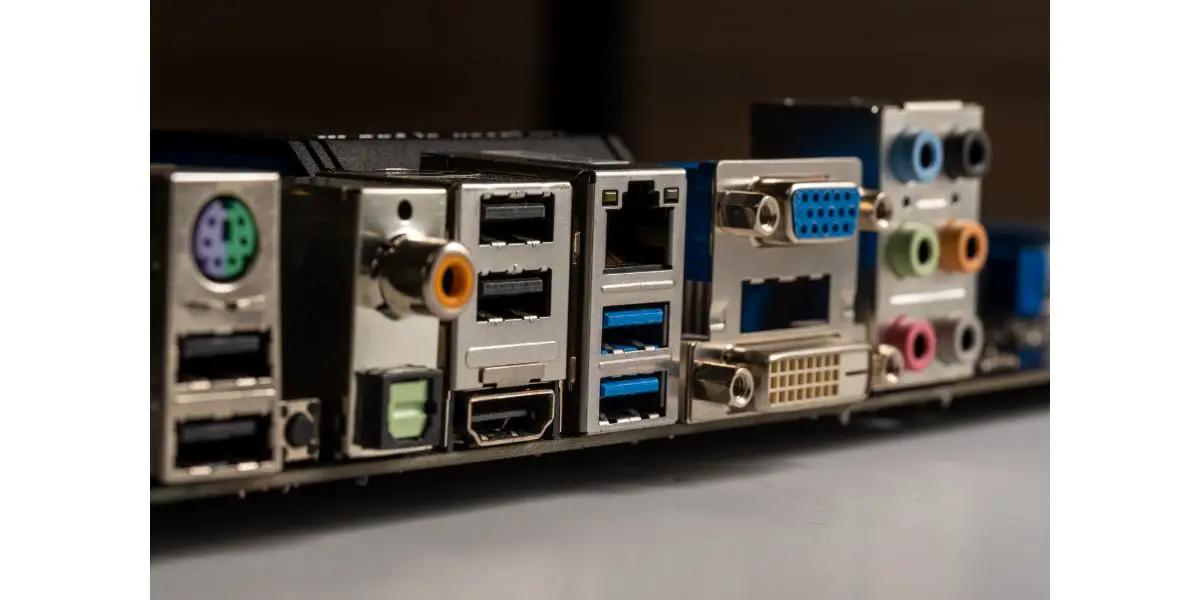
Most motherboards have an integrated HDMI port that allows you to connect a monitor to it and utilize the integrated graphics capabilities of your CPU. However, you may occasionally experience your computer booting up, only to not see anything on your monitor.
Read on to find out more about why your motherboard HDMI isn’t giving you a signal and how to fix it.
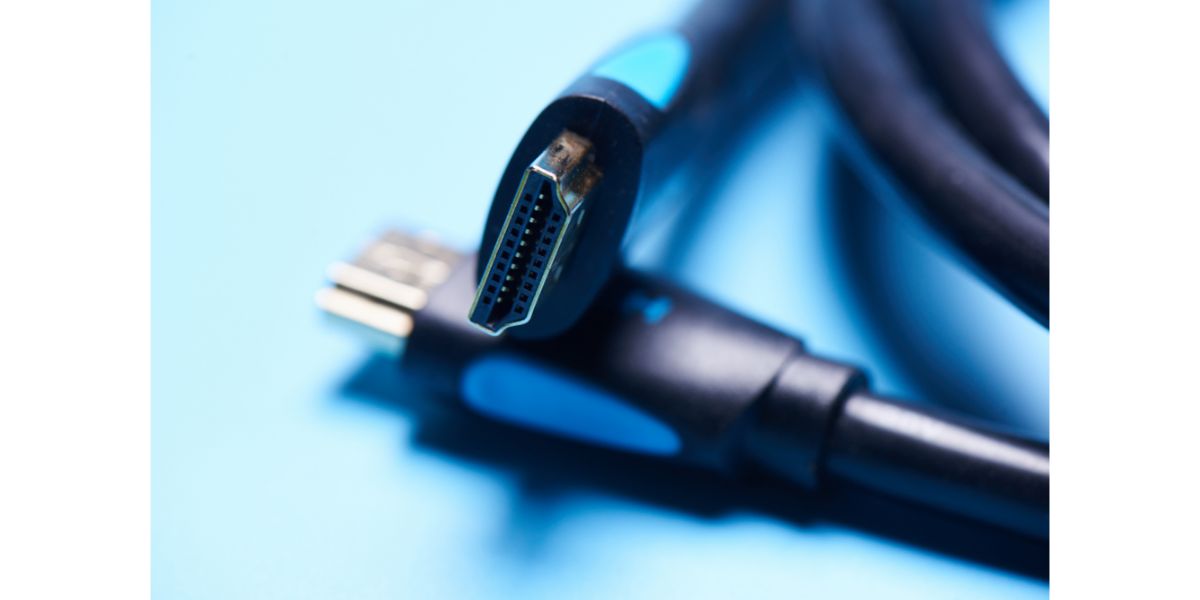
Table of Contents
1. Damaged or Faulty HDMI Cable
If your motherboard HDMI doesn’t work, you’ll want to check the physical condition of the cable first. Maybe it looks worn already, or maybe there’s internal damage. A damaged HDMI cable can give you a poor signal, but you will often not get a signal at all.
How To Fix
The best way to determine whether your HDMI cable is at fault is to plug it into your GPU instead. If your monitor displays while plugged into the GPU but not your motherboard, it’s unlikely the cable is at fault. In that case, other issues are likely at play, but we’ll get to those in a bit.
You can also use a working HDMI cable by borrowing it from your TV or any other HDMI device. If that one works, that’s a good sign you need to replace your HDMI cable.
For example, you can buy the PowerBear 4K HDMI Cable (available on Amazon.com). You can choose between different lengths, and it supports 4k at 60fps. Plus, they’re relatively affordable.
2. Integrated Graphics Are Not Supported
If your HDMI cable isn’t the problem, the next thing to look at is your hardware.
Your CPU may not have integrated graphics capabilities. In other words, you need a dedicated GPU to have any luck with it, so it will inherently be unable to display anything through the motherboard HDMI port.
For the most part, Intel CPUs have integrated graphics capabilities, but some older AMD Ryzen chips don’t have integrated graphics. You might wonder why there’s even a port on the motherboard if this is the case.
In reality, CPU sockets are usually used for at least a couple of generations of CPUs, so newer or more advanced CPUs with integrated graphics can use the socket while older chips may not.
How To Fix
First, check out this list from Xtremegaminerd. If you don’t see your AMD Ryzen chip on the list, you likely have one without integrated graphics — and unfortunately, there’s no easy fix for that. (By “easy,” we mean something that won’t require you to replace the whole thing and burn wads of cash.)
If you have a GPU installed, you can plug multiple monitors into it, but it likely only has a single HDMI port. You may need to invest in a monitor with a display port to use multiple screens.
ViewSonic’s 24 Inch Monitor (available on Amazon.com) has HDMI, DisplayPort, and VGA sockets and is an excellent all-around monitor for your workstation or casual gaming setup. It also features anti-glare technology to reduce eye strain. If you’re concerned about aesthetics, this one also has a frameless design that makes it look better than most monitors.
You may also need a DisplayPort cable if you don’t already own one if you go the monitor route. The BENFEI DP to DP Cable (available on Amazon.com) features high-quality gold-plated locking connectors which support audio passthrough up to 7.1 channels, which is especially beneficial for systems with surround sound.
In this case, you can upgrade your CPU if it lacks integrated graphics support or install a GPU that supports one or more displays, depending on what you need. Both of these options are, unfortunately, expensive.
But generally speaking, a good GPU can be an investment and make a difference in your computing experience.
Buying a GPU
There are so many options to choose from when it comes to GPUs that you may feel overwhelmed by all the pricing and size options, not to mention all the different manufacturers.
Generally speaking, any GPU will be better than nothing if you’re unlucky enough to have built a PC hoping to rely on the integrated graphics.
However, older GPUs can carry a significantly higher power draw than their modern counterparts despite having a much lower VRAM capacity. (I’ll explain how to calculate your computer’s “power draw” in more detail later.)
A GPU with a VRAM of at least 8GB is recommended to futureproof your purchase, such as this Zotac Gaming Geforce GPU (available on Amazon.com).
It is 8K ready and has enough ports to plug multiple monitors in. One downside is that you’ll need a monitor with a display port as it only features a single HDMI port.
Be sure to refer to the GPU’s power rating before purchasing it to ensure you have enough headroom in terms of the power you can supply.
You may have to settle for a more modest card if your power supply isn’t up to the task. It’s recommended that you have 100-200 watts over and above your max power draw to ensure you aren’t straining the power supply (unless you want to upgrade it as well).
Calculating Your Power Draw
To ensure that you will not strain your power supply, you must work out roughly how much wattage you need.
To do this, you must add the watt rating of all your components and subtract it from your power supply’s rating. After this calculation, you should have an overhead of 100-200 watts remaining.
To make life easier for you (or if you’re not comfortable doing the math yourself), Cooler Master has a neat power supply calculator. All you need to do is select your components from the various drop-down menus. It will then recommend a power supply for you.
Based on the above calculations, you can have a guideline and determine whether you’ll need to upgrade your power supply for your desired GPU.
Alternatively, you can settle for a less powerful GPU if you don’t have the budget (or willingness) to upgrade multiple components. Again, note that you’ll have to make many adjustments if you stick with an old GPU.
3. Integrated Graphics Have Been Disabled at the BIOS Level
If you are using a discrete graphics card and want to add a second monitor, you might have tried plugging it into your motherboard only to have just one monitor displaying. That’s cool if you’re using a conventional PC setup — but if you’re a power user, that’s obviously not going to fly.
Your motherboard may have disabled internal graphics favoring a dedicated GPU at the BIOS level. To fix this, you must boot your computer and access the BIOS. Usually, just changing a setting or two in the BIOS menu usually activates the motherboard’s HDMI port.
How To Fix
You must access the BIOS menu to check whether your integrated graphics are activated. This is usually done right after your PC POSTs by pressing one of the keys on your keyboard.
Which key you press varies by manufacturer—it could be F2, Delete, F8, or a combination.
Once in the BIOS menu, look for a setting related to graphics. Again, the exact terminology depends on the manufacturer and model of your motherboard.
If there’s a setting for Integrated Graphics or iGPU Monitor, enable it.
Remember to save your settings when you exit the BIOS. Otherwise, it will revert to the initial setting and disable your motherboard HDMI port.
If your motherboard supports multiple displays, you should now be able to use your other monitor or screen.
4. Your HDMI Port Is Damaged
If you’ve done all the fixes I just mentioned and none of them worked, you may start to suspect that there’s something wrong with your HDMI port. In that case, you might be onto something.
HDMI ports can become damaged for several reasons:
- mechanical damage to the connectors
- wear and tear
- electrical faults
All of the above can cause an HDMI port to stop functioning.
I should note that the symptoms of a damaged port will vary depending on the cause and may be similar to a faulty HDMI cable giving you grainy or discolored graphics.
The monitor HDMI input or the output on your motherboard may be damaged. Depending on your hardware and use case, there may be workarounds for damaged HDMI ports.
How To Fix
There’s unfortunately no good (read: inexpensive and DIY) way to fix an integrated HDMI port on a motherboard if it’s indeed the culprit. You’ll usually have to replace the motherboard if you have no other means of outputting graphics.
Inspect the port to see if you can visually identify any damage. Burnt pins or other mechanical damage are usually easy to spot, but not always. We suggest that you check with a couple of different cables. You can even try a different monitor to ensure that the monitor’s port isn’t damaged.
Some monitors will have multiple ports, giving you an alternate means of delivering the graphics to the screen. This comes in handy if the HDMI port on your monitor becomes faulty. For example, if you have a VGA port on your monitor, you can use an HDMI converter to continue to display your graphics.
Benfei HDMI-VGA Audio Jack (available on Amazon.com) is one option to plug into your monitor’s VGA port if its HDMI socket is damaged. This adapter allows you to seamlessly connect an HDMI-compatible device to a VGA port in your monitor. This solution is fairly inexpensive and allows you to continue to display your graphics on your current monitor.
If your motherboard’s HDMI socket is damaged, it’s usually more of a headache to try to fix than worth it. If your motherboard is otherwise functional, you’re better off investing in a graphics card with multiple outputs.
Replacing a Motherboard
If you decide to change your motherboard, you must ensure it’s compatible with your CPU. To do this, you must first determine which CPU you have and what kind of socket it uses.
Some CPUs use almost identical sockets that are incompatible with each other. For example, 6th and 7th Gen Intel chips are superficially similar to 8th Gen Intel chips. They all use the LGA 1151 socket, but they require different motherboards.
If you’re unsure about your motherboard or CPU, you can download CPUID CPU-Z. This software helps you identify your computer’s specifications without manually tearing them apart.
Replacing your motherboard is no small task and will require you to dismantle your computer entirely, fit the new motherboard into the case and reinstall everything.
You may also have to reinstall Windows, so be sure your product key is saved somewhere or linked to your Microsoft account. Remember to back up your important files as well.
We recommend the Seagate Portable 2TB External Hard Drive HDD (available on Amazon.com) to back up your precious data. You can actually pick a drive that can store up to 20TB, though that depends on stock availability.
Also, note that the 1-year warranty is valid from the date of purchase, not from the date you use the hard drive, so plan your purchase carefully.
There are many safety and compatibility considerations you must account for when replacing a motherboard beyond the scope of this article. Here’s a guide from LifeWire that can give you an idea of what you are against.
Final Thoughts
A motherboard HDMI issue can be troublesome, but usually, it’s not a death sentence—unless your HDMI port is damaged or you have a CPU that doesn’t have integrated graphics.
If you’re lucky, you may only need to enable integrated graphics in the BIOS or replace your cable to fix this issue; however, you may have to give up on your motherboard HDMI ambitions and upgrade your GPU for better results.