Disclaimer: This post may contain affiliate links, meaning we get a small commission if you make a purchase through our links, at no cost to you. For more information, please visit our Disclaimer Page.
In our previous reviews of the Acronis Disk Director, we always found it to be a very useful hard drive management utility. The tool allows you to partition, move, resize, clone and dual boot a hard disk with little or no technical background. Disk Director is known for its ease of use, speed and stability.
The new version adds new key features that make it easier than ever before to modify your partition structure and boot new operating systems. Here are some of the new features of Disk Director 12:
- Add/break mirrored Volumes
- Clone disk to a replacement Hard Drive
- Dynamic disk support
- Convert basic disk to dynamic and vice versa
- Span volume across multiple physical disks – Supports up to 32 disks.
- Convert MBR disk to GPT and vice versa
For this review of Disk Director, a bootable USB drive will be made, a partition will get resized and then a dual boot environment will be set up with Windows 7 and Vista.
The creation of an Acronis bootable media, whether it be a CD, DVD or USB device is an important step to take before messing with your hard drives. The bootable device contains the Acronis program you are using and may come in handy to undo an operation that may have failed.
Table of Contents
The Bootable Media Creator
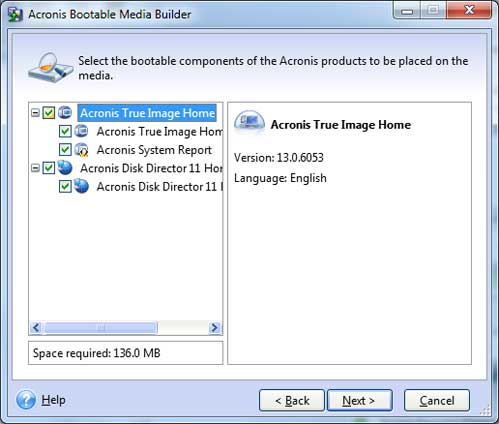
From the Tools menu, choose Acronis Bootable Media Builder.
Everything is the pretty much the same as this review of how to create a bootable USB with the exception of the following screen that allows you to have Disk Director and True Image on the same bootable media because both programs are installed.
Create a Primary Partition
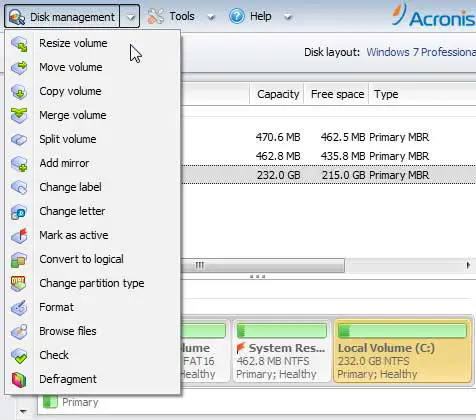
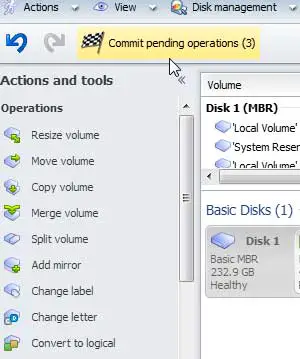
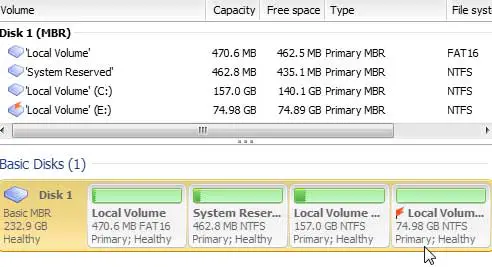
With the bootable USB being created and tested, I can now proceed to the next step. Windows is installed on this computer using all available space on the drive. Obviously I need to free up some space to install another Operating System on this drive. Acronis makes that an easy task. Simply highlight the primary partition, click on Disk Management then Resize Volume. Notice all of the other tools available in the drive management utility.
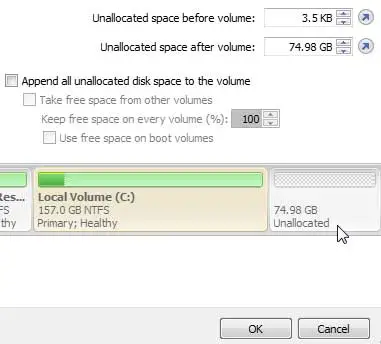
I chose to create a volume that was about 75 Gigabytes to install Windows Vista and smacked the OK button.
After clicking the OK button, there was a notice that a reboot was required to continue the operation so I quickly saved this web page and clicked the Continue button. When the system rebooted there indeed was 75 Gigabytes of unallocated space available. I then went to the All Programs menu > Acronis > Disk Director and clicked to Install the Acronis OS Selector to get ready for the next step.
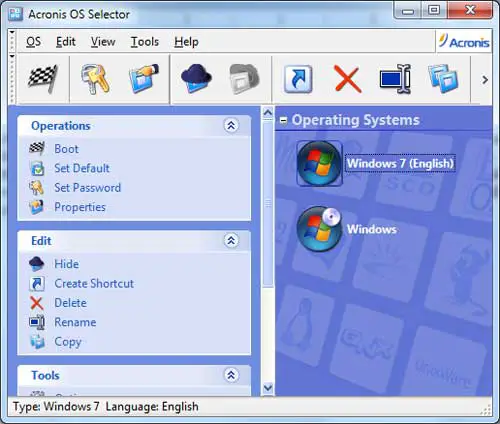
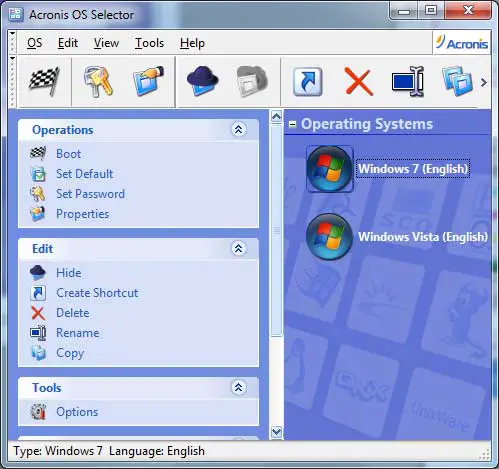
This is a screenshot of the OS Selector with the current Windows 7 Operating System installed. Notice the other entry of Windows on the OS Selector. That is the Windows Vista DVD in the drive so I can select that as a boot up option, a sweet option to have.
The next step is to create a volume from the unallocated space. Right-Click on the unallocated space and click Create Volume.
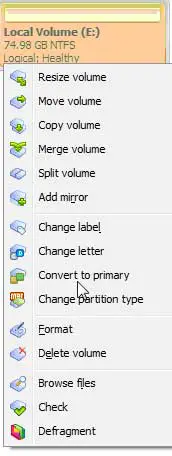
After clicking to create a volume, there were a series of dialog boxes with some options. I just took the defaults and a logical drive was created. Notice that now there are many other options available. I choose to Convert to Primary to load the Windows Vista Operating System on the volume to dual boot this system with Windows 7.
After clicking to create a volume, there were a series of dialog boxes with some options. I just took the defaults and a logical drive was created. Notice that now there are many other options available. I choose to Convert to Primary to load the Windows Vista Operating System on the volume to dual boot this system with Windows 7.
Now there is a perfectly healthy primary partition that is set active and ready to load the new Operating System. I guess I will reboot and do just that. Back in a flash.
Use the Acronis OS Selector to Dual-Boot
After installing Windows Vista on the new partition, it took over the MBR, which deactivated the Acronis OS selector. This was not a surprise and no fault of the utility. The Acronis help file says, “you will not have to reinstall Acronis OS Selector, but to restore it by reactivating it from a bootable media. After loading it, select Activate OS Selector in the Tools section of the main menu.” I did not have that option. I had to install disk director on Vista and activate the OS selector – not a huge deal and as the following screen shows; it works. This system can now boot to two different Operating Systems with the click of a mouse.
This review of the Acronis Disk Director 12 version, showed how easy it can be to make a bootable media, resize and create partitions and dual boot a computer. The only problem I found was with the activation of the OS Selector after loading a new Operating System. The workaround is the same as previous versions, but not what the instructions said to do. Other than that small detail, the Acronis Disk Director gets a thumbs up. Or, in What’s a Byte speak, an Honorable Brontobyte on a Scale of Bytes to Brontobytes.
Acronis Disk Director 12 helps you manage your gigabytes of data fast and efficiently. Whether you need to upgrade your hard drive or dual boot your computer with different operating systems, the Disk Director is the tool to make any byte management task faster and easier than ever before. Check our other reviews of the Disk Director to see this tool in action.
 $49.99

