Disclaimer: This post may contain affiliate links, meaning we get a small commission if you make a purchase through our links, at no cost to you. For more information, please visit our Disclaimer Page.
You may be looking for a way to attach multiple SATA hard drives to your system. You’ve come to the right spot.
To attach additional SATA hard drives, first, mount the hard drives on the empty mounting spaces inside the case. Then attach the SATA cable to the motherboard and power cable to the power supply. Finally, you need to ensure that your OS recognizes the new drive by checking in disk management.
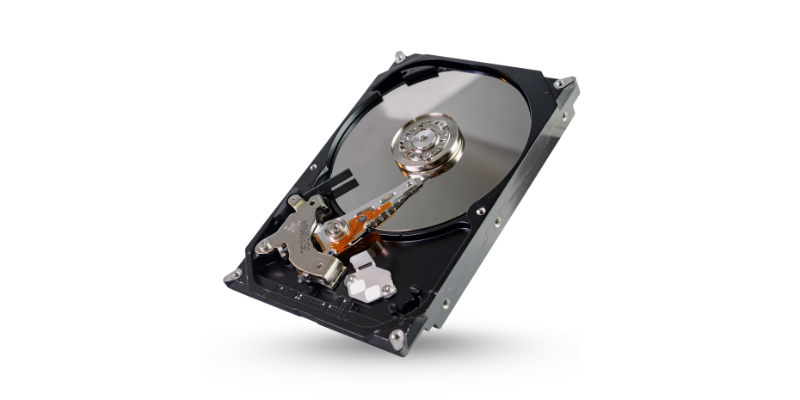
Table of Contents
What Is a SATA Hard Drive?
Well, SATA is a type of bus interface which is used to connect various components to the motherboard. SATA happens to be one of the most widely used varieties of such interfaces.
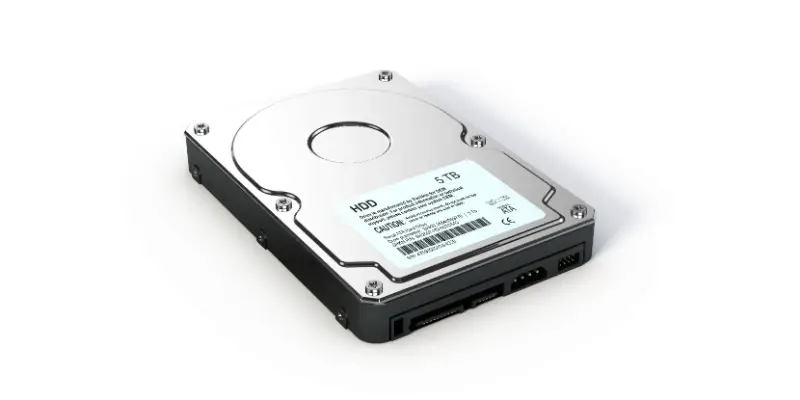
So, hard drives that can only be connected to SATA ports are what we call SATA hard drives. Since the SATA interface is so popular, a lot of the hard drives and even SSD (solid-state drives) you will find on the market are compatible with only SATA.
When installing this type of hard drive, you will also need a SATA cable, which connects the drive to the port on the motherboard.
How Many SATA Drives Can I Connect?
This depends entirely on the number of SATA ports available on the motherboard, which the manufacturers determine during production. Though there are some consistencies in the motherboards of the same brand. These ports are also known as bays or controllers.
For example, Intel motherboards typically have a total of 6 different SATA ports for the user. However, not all of the ports are similar or for the use of plugging a hard drive. On some boards, a couple of the ports are eSATA, which you use to connect external storage devices such as flash drives.
Now, remember you can only connect one drive per SATA port. Technically, you can attach as many drives as you want, if there are enough ports. But you cannot attach multiple cables to the same port.
Of course, there are ways to connect to an external storage device that utilizes multiple drives. But even then, you can only connect one SATA cable to one port.
How to Attach Multiple SATA Drives: Step-by-Step?
Installing a hard drive is a fairly uncomplicated process. And if you can attach one hard drive properly, you will be able to attach multiple. Now, the method for installing an SSD or a solid state drive is similar to hard disk drives (HDD).
So, here is a step-by-step foreplay of attaching multiple SATA drives to your computer.
Step 1: Take Proper Precautions
There are a couple of precautionary measures you have to take before starting anything.
First, turn the power off on your computer. Just to be sure, unplug the motherboard’s power supply from the socket as well. Otherwise, you run the risk of getting electrocuted during the procedure. Even if the hard drives are hot-swappable, you should still not take the risk.
Second, properly ground yourself by wearing an anti-static wrist band. This part is very important yet easy to overlook. Since the internal components require a very small current to flow, they are very sensitive to static electricity. Even a little spark can destroy the drive and lead to an expensive repair.
Step 2: Open Up the PC Case
Take a screwdriver and unscrew the panel on one side of the case. Internal 3.5 hard disks are mounted on the front of the case, usually away from the other components and close to the fans.
Of course, the exact makeup of the case can vary significantly from brand to brand. But they are hard to miss and will have space for multiple drives.
Step 3: Mount the Drives
This is probably the most physically challenging part. You will need to put some force but be careful not to damage any of the parts.
The drives are kept in place usually with screws. There are some cases that provide tool-less brackets that make the process very easy. But screws are usually more secure, particularly if you move around the case frequently.
If there is a faceplate, take it off. Slide the drive into the slot with the side that has all the connections going in first. Then use a screwdriver to attach the screws, which are usually 4 in number; two on each side.
Make sure the screws are properly tight else you will have to endure plenty of unwanted noise when you run the computer. Hard drives tend to move around plenty on their own and generate a noticeable amount of noise.
Now, some people will tell you to attach the SATA port with the lowest numerical number first. But that is not much of a factor as long as the speed of the ports is the same. This way, mount all the drives you are planning on using.
Step 4: Attach the SATA Cable
You typically get the cable when you buy the drive or you can buy it separately if that is not the case.
The cable has two sides – one side attaches to the drive proper and the other attaches to the port or bay on the motherboard. You can easily figure out which side goes to where if there is any difference at all.
Once again, make sure that the cable is tightly attached on both sides. Otherwise, your computer will not be able to recognize it.
Step 5: Attach the Power Cable
There are actually two cables you have to attach to each drive. The other one is the power cable which will supply the drive with the necessary electricity. The power cable is also in the format of serial ATA or SATA.
You will find additional power cables coming from your PSU (power supply unit). Take one of them and attach it to the SATA power connector on the drive.
This connection is the wider of the two, so you will be able to tell them apart. Basically, if you insert one cable to the connection of the other, you will soon find out that it will not work.
And there you have it. The drives have been successfully mounted and connected. Now you have to check to see if the operating system recognizes it.
Step 6: Close the Case
But first, slide the panel back on the case. Then reattach it with the screw you initially took out. Put your case back to where it was. Make sure there is plenty of room for ventilation.
Step 7: Prepare the Hard Drive for Use
To confirm that your windows has recognized all of the drives, you need to go to the drive manager.
To do this, right-click on the windows startup button. A navigation menu will appear.
From this, select the “Disk Management” option.
A window will appear with all the drives that are currently being recognized by the operating system.
Now, you need to format and partition all the drives to your choosing and they will be ready for use!
If the installation process was incorrect or if there is any problem with the drive or the cable, it will not show up on the drive manager.
How to Find SATA Port Number That Is Connected to a Drive?
There are a couple of ways you can check the SATA port number on your motherboard. Usually, the ports will have labels somewhere around them stating which number of ports they are.
The best way to find this information is to check the manual for your specific motherboard. Then open up the case and compare it to the blueprint.
Conclusion
SATA hard drives and solid-state drives are very common with most PC builds. Hopefully, you can now install and uninstall any number of drives you want by yourself.