Disclaimer: This post may contain affiliate links, meaning we get a small commission if you make a purchase through our links, at no cost to you. For more information, please visit our Disclaimer Page.
Sometimes, you just need a little more space. Or maybe you want something that can store information and be easy to travel with. Not everyone wants to lug around their desktop, and a laptop may not always have enough space for the amount of information you need to store.
In those instances, an external hard drive can be the ideal choice. However, if you choose this option, you’ll need to know how to format the external hard drive. Here, we’re providing a guide on the formats you can use, and how to get your hard drive formatted to fit your needs exactly.
Table of Contents
What is an External Hard Drive?
Many people who use computers or other devices are aware that there is a hard drive somewhere within their device. Some may recognize that they can store things there. However, for most, that is the extent of the knowledge.
An external hard drive is only different in that it’s located outside of your computer. Because of this, it can be more portable than internal options. That makes it a great choice when you need some extra space and want to be able to share the data between multiple devices.
There are a number of things an external hard drive can be used for. For example, it can work well as a backup location for important files. Furthermore, it’s a nice place to store media on when you want to enjoy it from somewhere other than your computer.
Related Reading: How to Recover Deleted Files
Considering the File Format Options
There are a few different formatting options that you can choose from. Each will have a unique purpose, so consider them carefully.
These are some of the more popular options:
APFS
This is the default option for Mac OS devices that are newer. Newer devices use a program known as High Sierra and programs that don’t run that program will not be able to read or write on the hard drive. That said, it’s known to be a reliable choice.
MacOS Extended
Prior to High Sierra and APFS, this is the option used by Mac devices. While it’s an older choice, it is one that can be encrypted.
MS-DOS FAT
This is the ideal option for those who want to share. It’s able to work with Linux and Windows as well as Mac.
Ex FAT
What sets this choice apart is the ability to store files that are larger than 4gb. It can also work with both Windows and Mac.
NTFS
This is typically the option used by Windows. Mac devices will be able to read what is on the hard drive, but they won’t be able to write to it.
How to Format the External Hard Drive
If you’re new to formatting external hard drives, this may seem like a complicated process. However, once you get the hang of it, you’ll know exactly what you need to do, meaning you’ll get through it more quickly in the future.
Related Article: How to Install Exodus on Kodi
Step One
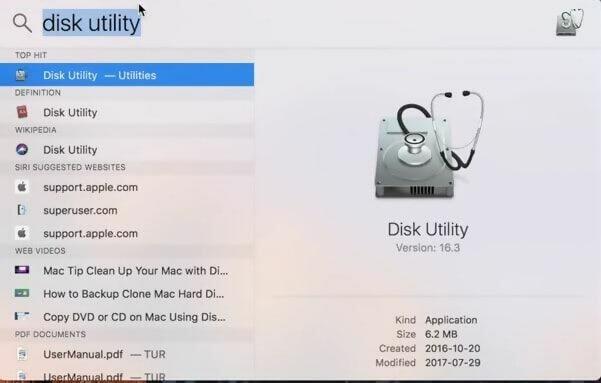
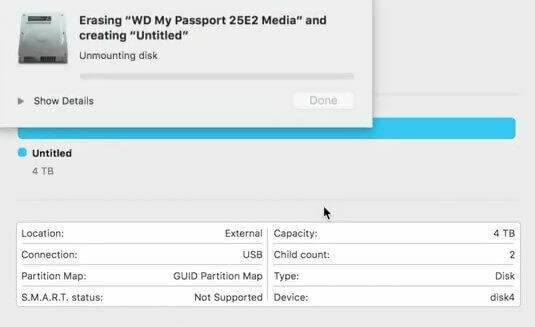
To begin with, you’ll need to go to “Start,” and then look for your applications. Within your applications, you’ll need to find your “Utilities.” From there, click on “Disk Utility.”
Step Two
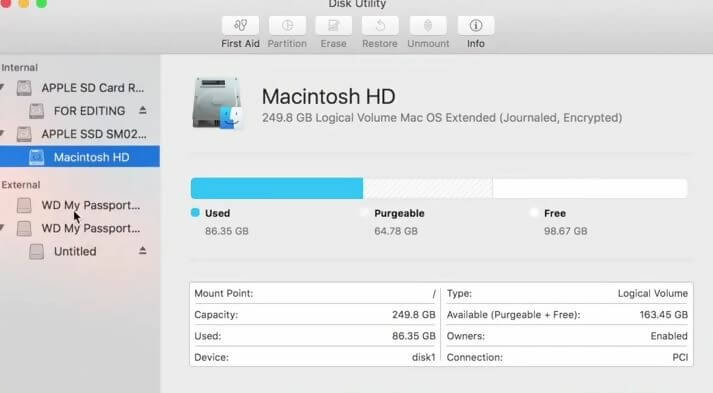
Now, you’ll need to choose the drive that you want to get formatted. Then, click on “Erase.”
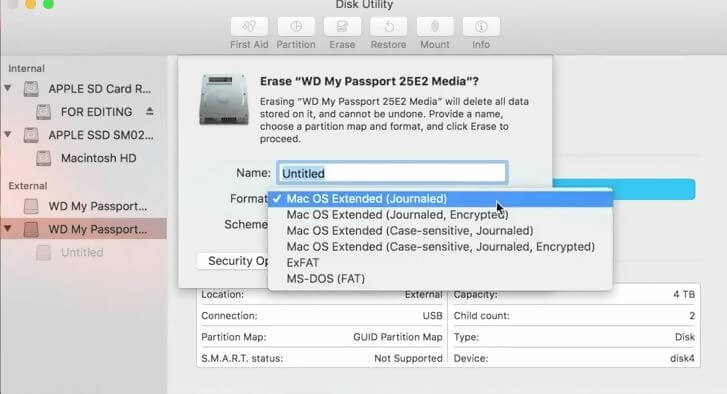
Step Three
Generally, the program will choose a new format for you. This is typically based on whatever the default is for your computer. If that isn’t the option you want, then you should be able to change it through the “Formatting Options” choice.
Step Four
Now, name your drive. You may want the name to be something that represents what you’ll be storing on it. However, this is totally up to you.
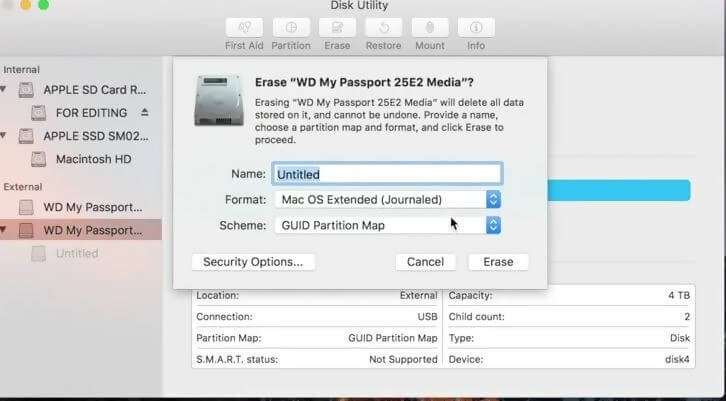
Step Five
You’ll also be able to choose whether you want to favor speed or security in your formatting by selecting the Security Options. Each of these options will have different benefits and downfalls, so make sure to choose carefully. You may also be able to choose something in between the two ends of the spectrum.
Security should be a priority in most situations, as it keeps others from being able to just get into your external hard drive at any time.
Once you’ve made your choice, press “Erase” and allow the computer to handle formatting the hard drive as instructed.
When the formatting is finished, you can begin copying files to it that you want to store.
What if You Want More Versatility?
Think about what devices you want to be able to share your external hard drive information with. If you want the highest level of versatility, then make sure to format your hard drive using the MS-DOS FAT option. If you’re only concerned about PC and Mac, then using the Ex FAT option will be all that you need to get the results you’re looking for.
What to Keep in Mind
When you’re using an external hard drive, there are a number of things to keep in mind. When using such a device correctly, it can prove to be a huge help. Otherwise, you may find that you run into annoyances and problems somewhat frequently.
Here are some tips that you’ll want to keep in mind for these handy tools:
- Make sure to choose the formatting option that suits your needs the most. Don’t use an option that only works for something like High Sierra when you want to be able to share it with devices that use Windows or Linux
- Whenever you are done using the external hard drive, make sure to safe eject
- If you’re having problems, make sure to check that hard drives and external disks are both verified in your preferences
- Always ensure that plug-ins are tight and secure
- You can get more power for your external hard drive when you plug the device into an outlet directly rather than just letting it feed off of your computer’s power. This can allow things to work more efficiently.
Sources