Disclaimer: This post may contain affiliate links, meaning we get a small commission if you make a purchase through our links, at no cost to you. For more information, please visit our Disclaimer Page.
From time to time, issues can show up on our computers that can become very frustrating. That said, they are typically issues that we can solve with the help of some troubleshooting and problem-solving.
Luckily, we’re here to help you with that process using 5 different methods. Each of these methods check something a little different so that you can attack the problem from multiple directions. Odds are that one of these methods will be able to solve the problem for you so that you can get back to working, gaming or browsing.
Table of Contents
What Happens When You’re Having a Video Scheduler Internal Error
If you’re restarting your computer and find that it freezes for a few minutes, you may have a problem with the video scheduler system. In some cases, you may also get a blue screen telling you that there’s an issue.
There are a number of issues that can cause the video scheduler problem. They may include system files that have become corrupted or malware that has begun to infect your computer. Additionally, the problem could also be caused by issues with the graphics card, software or hardware that is incompatible with your computer in some way or issues with the registry keys you have for Windows.
Using the methods listed below, you can check to see what might be causing the video scheduler issue. Once you’ve found the solution, you can also address the issue at hand to get your computer working correctly again.
Related Reading: What is Superfetch?
What Can You Do About It
While this can be an annoying issue, there are plenty of methods you can employ in order to resolve it. Follow the steps in these methods and make sure to check after each one to see if your problem has been solved. That way, you don’t end up doing more than you need to.
Look for Corruption
If There is corruption anywhere in your computer, it can cause issues with the video scheduler. Because of this, you’ll need to run a check for any of this corruption.
Step One
Start by pressing “S” and the Windows Key at the same time.
Step Two
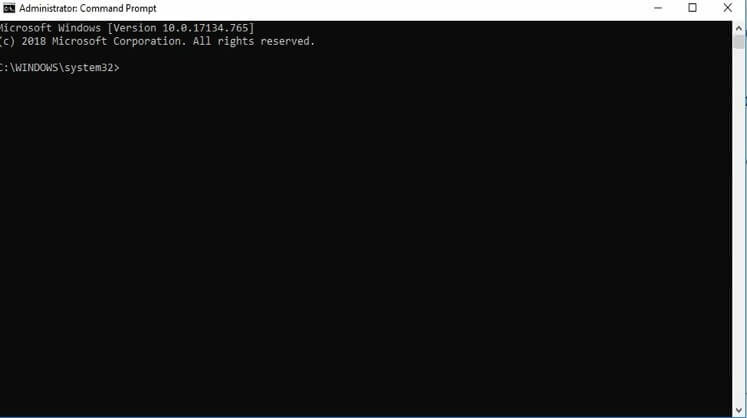
At this point, you should see a search box, type in “Command Prompt”.
Right-click on the command prompt option that comes up and select the option that allows you to run the program as administrator. A box should pop up, where you’ll need to select “yes.”
Step Three
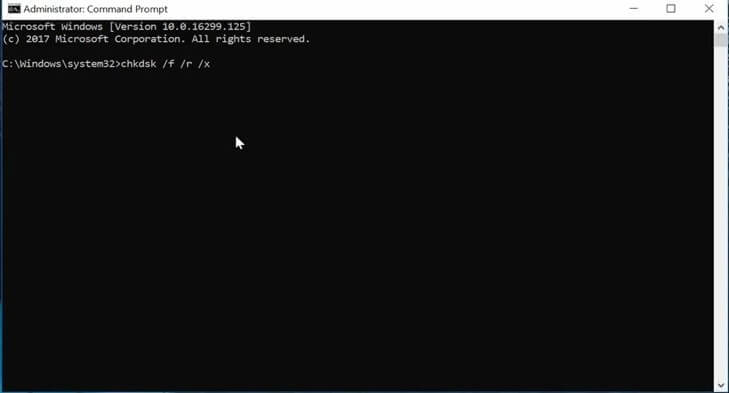
At this point, the command prompt should be running. Type “chkdsk /f /r” into the program. Then press Y. Now you’re going to have to restart your computer. This will get the hard disk check activated.
Step Four
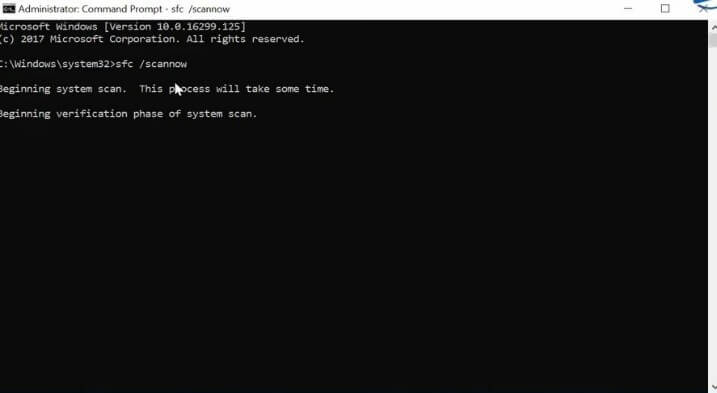
Give your computer time to restart, and then type “Cmd” into the search bar. Run the Command Prompt program as administrator again and type “sfc /scannow” into the program.
Step Five
From here, the device will run a check on your PC and work to fix any corruptions it happens to find. This may take some time, so it may be a good idea to go do something else and return to the computer when it has finished the task.
Run a Scan
In some cases, you may find that the problems with your video scheduler are due to a malware infection that you aren’t aware of. To search for such an infection, all you need to do is run a search.
Step One
To begin with, type “Windows Defender” into the search you’ll find in your taskbar.
![]()
Step Two
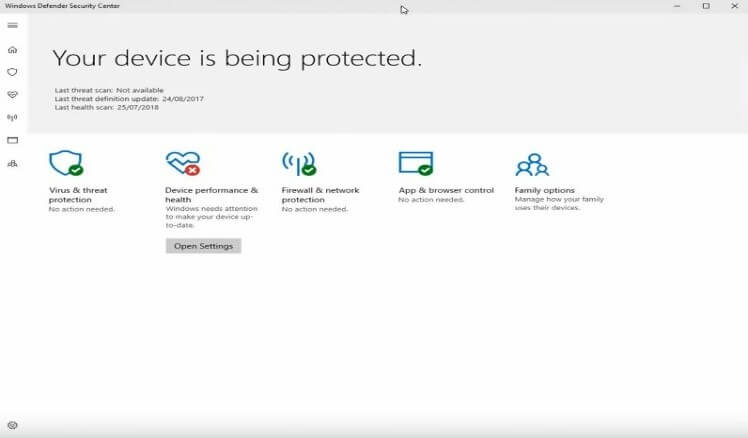
Open up Windows Defender. On the left-hand side, click on the option titled “Virus and Threat Detection.”
Step Three
Beneath the option to run a regular scan, you can also choose to “run an advanced scan”. Select this choice.
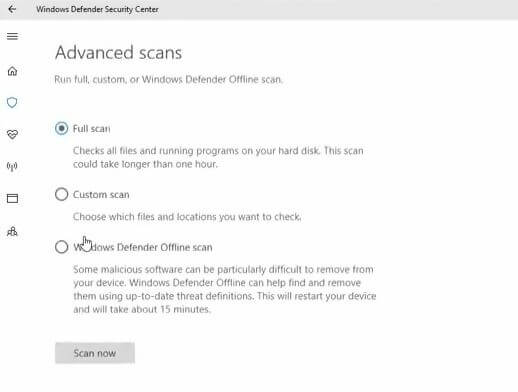
Step Four
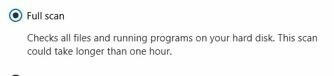
Select the option to run a full scan, and wait for the scan to be completed.
Step Five
From that point, the Defender will guide you through the process of handling any malware found. Otherwise, it’s time to move onto the next method.
Windows Updates
If there are systems in your computer that are outdated or just not working quite as you want. This can result in issues like the video scheduler error, so it’s going to be important to make sure everything is up to date. Luckily, this isn’t a difficult process.
Step One
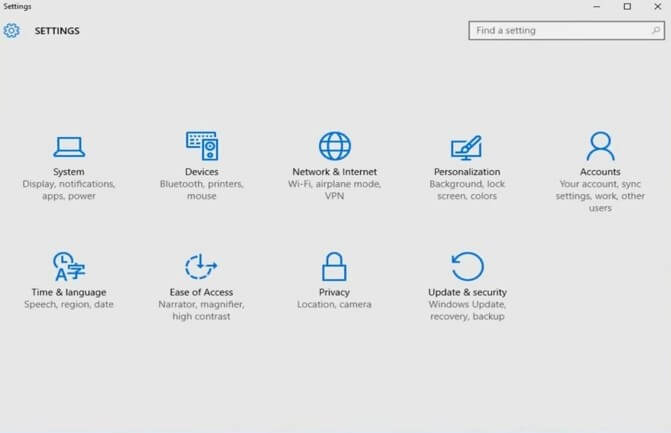
Start by pressing I and the Windows key simultaneously. This will bring up your settings.
Step Two
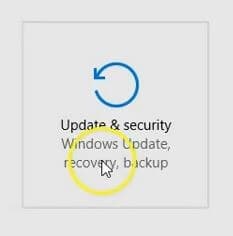
Choose the “Update and Security” option.
Step Three
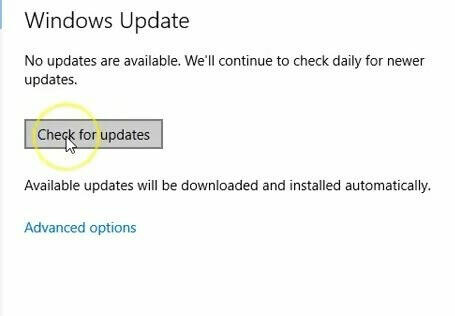
On the right-hand side, you’ll need to click on “check for updates.” At this point, the program will look for any Windows updates needed and begin to download them.
Once the Windows updates are ready, you’ll need to restart your computer in order to get them installed completely. Then, you can make a check to find out if the problem has been repaired.
Clear Out Recent Hardware
There can be times when hardware or software that you’ve recently installed may be causing problems. Because of this, it can be a good idea to check out both the hardware and software you’ve installed and uninstall them in an attempt to resolve the video scheduler problems.
Step One
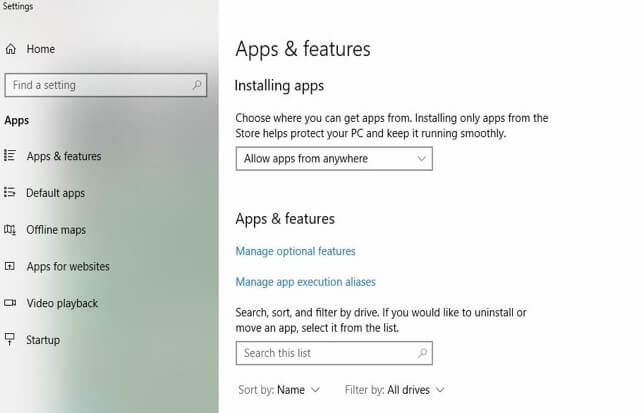
In the search you’ll find in the task bar, type in “Apps and Features”. Then click on the result that pops up. You can also go through “All Apps.”

Step Two
Here, you’ll find a list of hardware and software that has been installed. Before getting started, it’s going to be best if you sort by “new” as it’s most likely that something recent would have caused the problem.
Go through your recent installations and uninstall whatever you think might be suspicious. In some cases, you may choose to uninstall everything from around the date when the issue started happening.
Step Three
You’ll then need to restart your computer and check to see if the problem is solved. You may need to do this several times, unless you’re okay with uninstalling several items at once.
Sources