Disclaimer: This post may contain affiliate links, meaning we get a small commission if you make a purchase through our links, at no cost to you. For more information, please visit our Disclaimer Page.
Do you still use the default DNS servers which was providing by your ISP (Internet Service Provider)? Have you ever seen any DNS errors on your computer? If you got too many DNS errors, then it’s time to change your DNS servers to these free third-party DNS services.
By reducing response times between your computer and DNS servers, these free DNS services will help to increase the Internet speed, not much, but will improve. These services will also help to protect your computer from phishing websites and enable web content filters. The filters will prevent your children visit websites with inappropriate contents.
If you don’t know what a DNS server is, I would suggest you read this article. You will find out and understand more about what exactly DNS server is and how does it work.
Read Article: Fix DNS Probe Finished No Internet Error In Google Chrome – Dns_Probe_Finished_No_Internet
Why Should You Change Your DNS Servers?
By default, your computer will automatically pull DNS information from the ISP. Sometimes, these DNS servers aren’t stable and prevent you from visiting websites. Or these default DNS servers are blocked a few websites for some reasons.
Use third-party DNS servers like Google Public DNS will help you:
- Eliminate DNS errors
- Increase response times between your computer and DNS servers
- Have the ability to access blocked websites
- Provide protection for your information and computer against phishing and malicious attacks.
In this article, I will show you ways to change the DNS servers on Windows, Mac OS X, as well as iOS and Android. These instructions come with images, easy to understand and doing follow.
A few DNS errors that can be solved by changing DNS servers:
- Fix Err_Name_Not_Resolved Error
- Fix This Webpage Has A Redirect Loop Error
- Fix Err_Internet_Disconnected On Your Computer
- Fix This Webpage is Not Available Error In Google Chrome
- Fix DNS Probe Finished No Internet Error
How To Change DNS Servers On Windows?
In order to replace the default DNS servers on Windows PC, press Windows key on your keyboard and search for “Network and Sharing Center”. Then select it from the list.
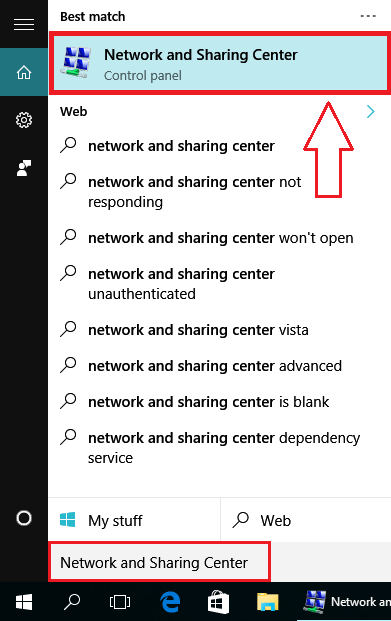
You can also open “Network and Sharing Center” by opening Control Panel > Network and Internet > Network and Sharing Center.
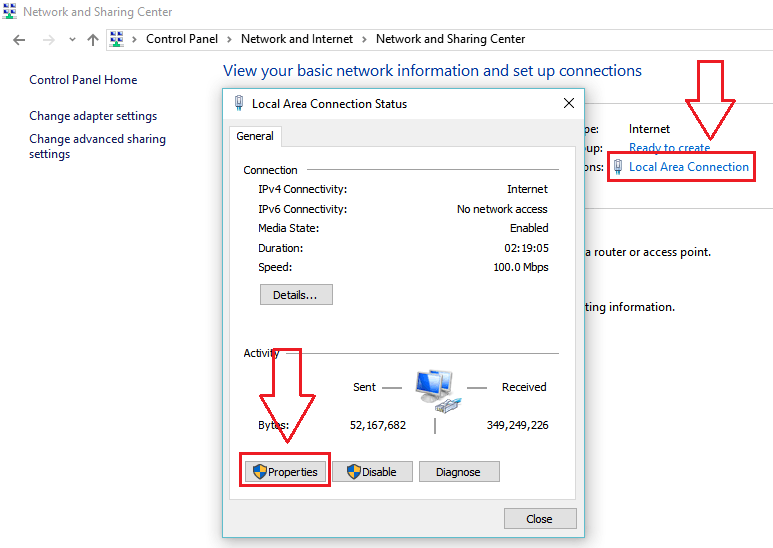
Click on the current Internet connection you are using right now and then select Properties.
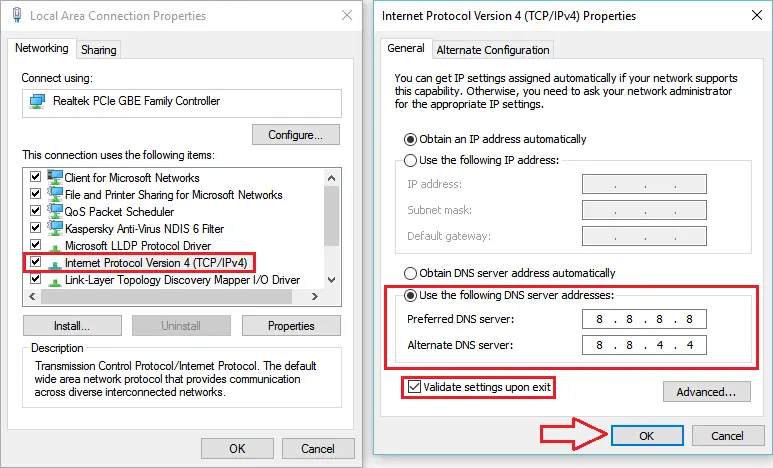
Double-click on the Internet Protocol Version 4 (TCP/IPv4)
Select “Use the following DNS server addresses”, enter preferred and alternate DNS server. Check the “Validate settings upon exit” option and click “OK” button.
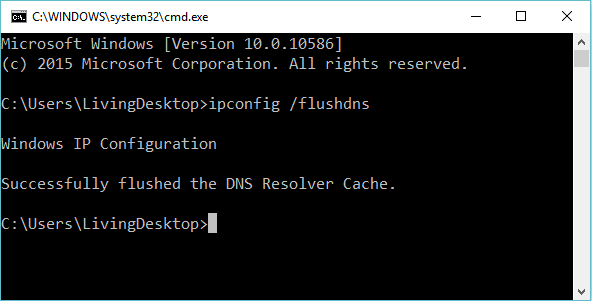
After that, open Command Prompt program and type: ipconfig /flushdns to clear all current DNS caches.
How To Change DNS Servers On Mac OS X?
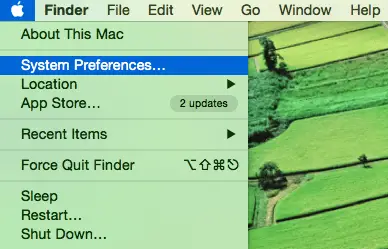
In order to change DNS servers in Mac OS X, click the Apple logo and select System Preferences.
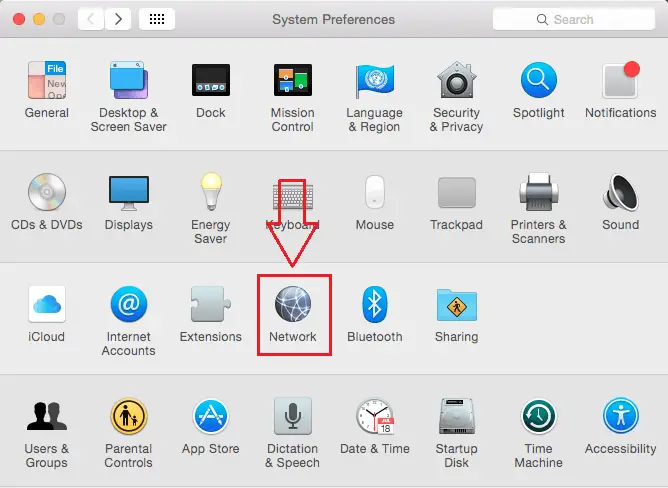
Select “Network”.
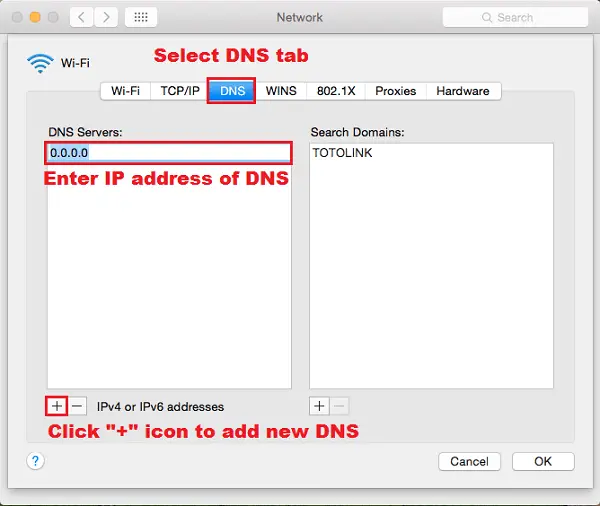
Select “DNS” tab.
Click “+” icon to replace/add new preferred DNS server IP address.
Click “+” icon once again to replace/add new alternate DNS server IP address.
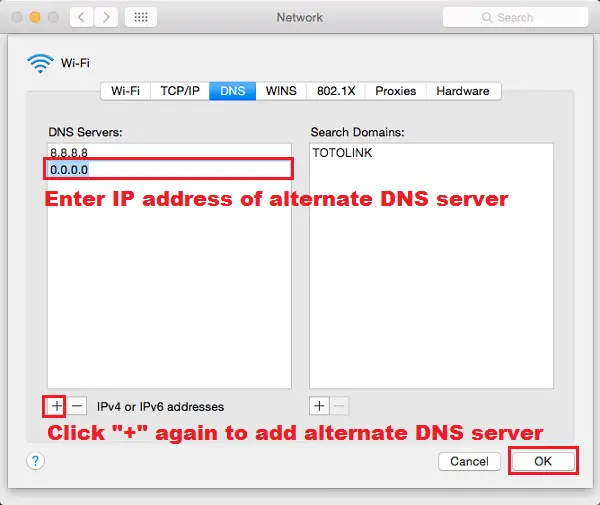
Then click “OK”, and then “Apply” button to save the changes.
How To Change DNS Servers On iOS?
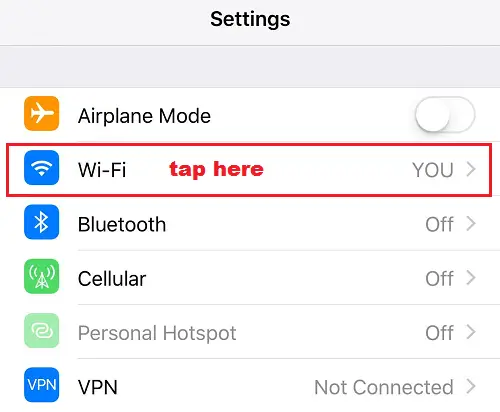
In order to change the DNS server on iOS, go to Settings > Wi-Fi.
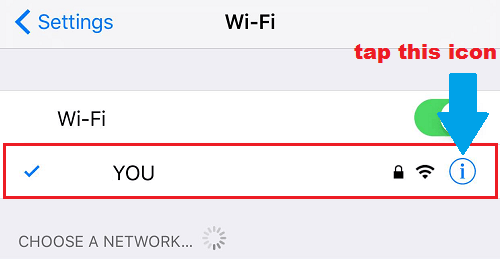
Tap the current Wi-Fi connection.
Tap on the DNS section and replace the current DNS servers with the new one (like the image below).
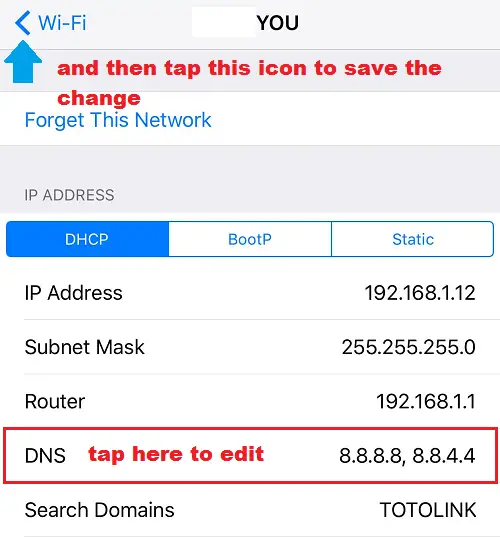
Tap backward icon to save the change.
How To Change DNS Servers On Android?
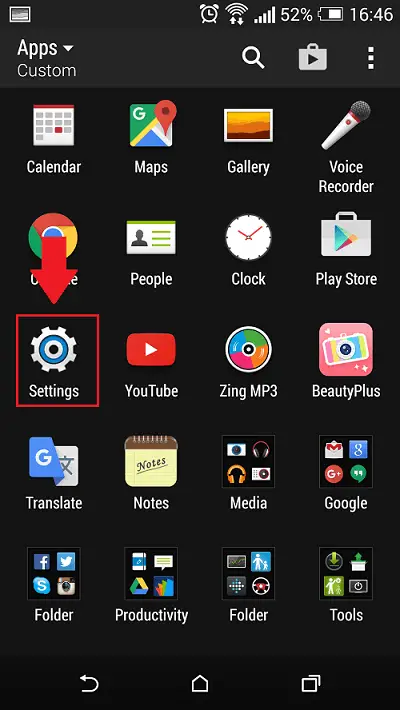
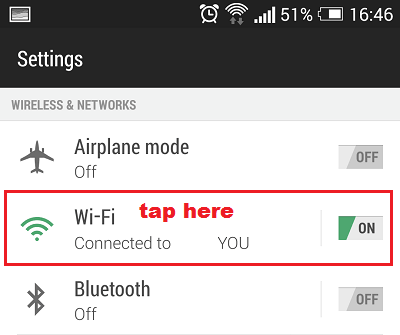
To change default DNS servers in Android devices, tap on “Settings” icon.
Select the “Wi-Fi” section.
Press and hold the current connected Wi-Fi until you see a small popup window.
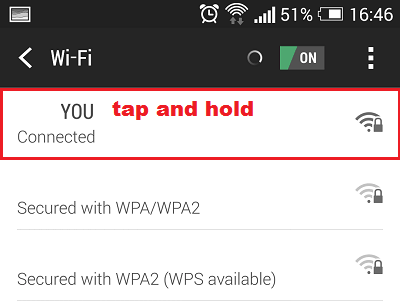
Select “Modify network”.
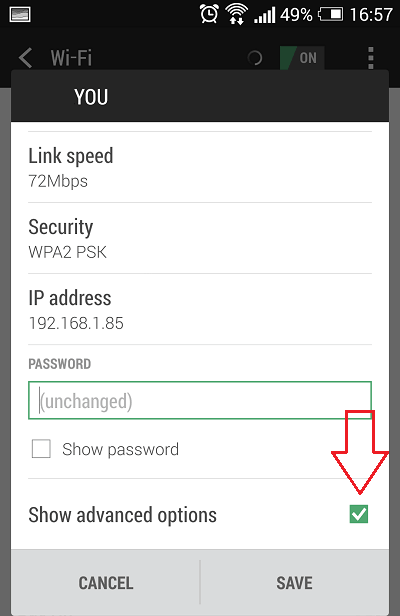
Check the “Show advanced options” box and then scroll down for more options.
Tap “IP Settings” to change from “DHCP” to “Static”.
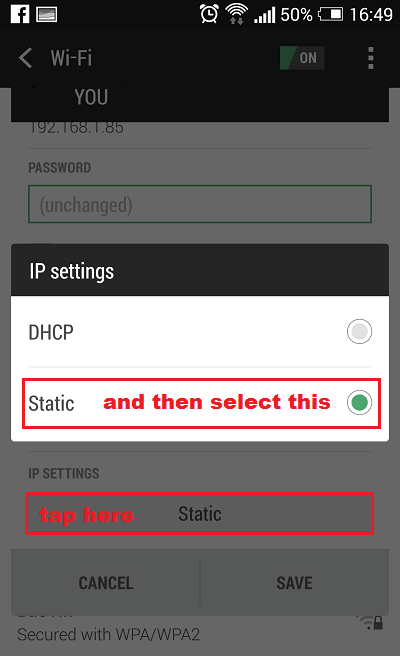
Fill “DNS 1” and “DNS 2” sections with preferred and alternate DNS servers. Then click “Save” button to save the changes.
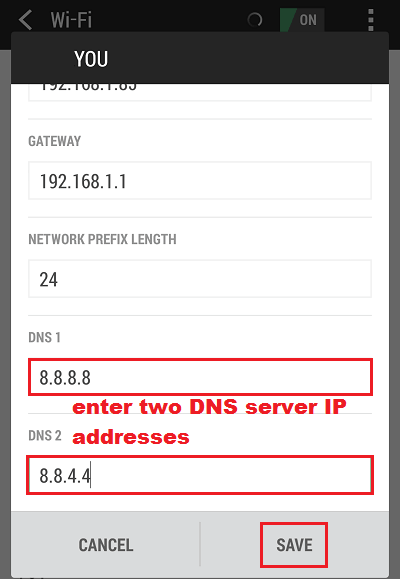
A few names of sections could be different, depends on the version of Google’s Android.
I hope this article will help you to learn how to change DNS servers on your devices, no matter what platform is it. Need further help? Don’t hesitate to ask by leaving your comment below.
For the list of best and popular DNS servers, take a look at this article. You will have a list of top 10 best free third-party DNS services.