Disclaimer: This post may contain affiliate links, meaning we get a small commission if you make a purchase through our links, at no cost to you. For more information, please visit our Disclaimer Page.
If your computer turns on but the screen is black after a power outage, don’t worry – you’re not alone. This article is dedicated to help you figure out where the issue lies and try to fix it.

Table of Contents
Can a Power Outage Damage a Monitor?
It’s unlikely that a power outage on its own will damage your computer. However, sometimes a power surge occurs immediately after a power outage. This surge is what you should be concerned about as it can damage your PC alongside other electrons.
There are some damages that a power surge could cause to your monitor, including:
- PC slow performance
- Damage the motherboard
- Fast draining battery
- Damage your PC hard drive
Whether you’re using a laptop or desktop, it’s recommended that you install surge protectors with your PC to prevent these issues. Doing this will help ensure that your PC is protected in the event of a surge. This way, you’re assured that your computer won’t endure any electrical mishap.
That said, it might still affect your PC if a power outage occurs, even with a “quality” surge protector. Your PC might not get damaged, but you may experience difficulties booting it afterwards.
Why Does My Computer Turn on but the Screen Is Black After a Power Outage?
Most, if not all, PC users must have experienced screen blackout at one point or the other. So what do you do in such a situation?
To begin with, try switching on your PC. Check if the sidelights will come on, and you can hear the fan running. If they’re both on, then it’s a pointer that a power outage or surge has affected your PC.
- Disconnect the black power cable behind your computer. If you’re using a laptop, also take out the battery.
- Press down the power button for a few seconds to turn off your computer.
- Replug the black power cable to the back of your computer, and then turn your computer back on.
If these steps resolve the screen blackout challenge, everything should be fine.
This issue could also be fixed by switching off your computer for several hours, a day or two. However, this method may not be a better alternative, especially if you’ll need your computer back on asap.
If the problem persists, there are other checks you can perform to detect the problem:
Check the Power Source
If your PC isn’t coming on at all, check the power outlet it’s connected to. If it’s connected to a surge protector, it could be that it tripped when there was a power surge.
Check the AC Adapter
Power surge “dirty power” could affect the AC adapter, interfering with the charging process.
Check the Battery
Remove the battery and try booting the laptop with AC power for those using a laptop. If it comes on normally, then your battery may need replacement.
Check Computer Fans
If you notice that the PC fan isn’t running with the power source turned on, you may need to replace your power supply.
Another reason for computer fan issues would be the cpu or motherboard. Do some inspections on those parts before determining that you need to replace them.
After doing all the necessary checks and the problem remains unresolved, contact a third party repair service. You could also visit the computer shop closest to you.
How Do You Fix a Computer That Turns on but No Display
One of the many problems a PC could develop is display issues. For example, you could turn it on, yet it displays nothing. If this challenge is peculiar with your computer, follow the detailed steps below to resolve it.
Test Your Monitor
You need to ensure your monitor functions correctly before commencing more complex and delayed troubleshooting.
Unplug your monitor from the computer, then switch it off and on. If diagnostic information pops up, know that your device functions and can display content.
Start Your PC
Ensure that your computer has restarted fully and running even while there’s no display.
Your PC may appear off when in fact, it’s just experiencing resumption issues. Maybe it’s just unable to return from a power-saving mode, hibernate mode, or the sleep/standby mode on Windows.
Turn off your PC while it’s on the power saver by pressing down the power button for three to six seconds. Then, when you’re certain the computer is off, switch it back on to test if it’ll boot like it normally would.
If you receive diagnostic information on the cause, which will help resolve the issue, then troubleshoot.
Clear the CMOS
If your computer’s BIOS isn’t properly configured, that may be another reason it’s not starting up fully. So first, clear your PC’s BIOS memory (from the motherboard) to return the configuration to factory default mode.
If this resolves the issue, ensure that whatever setting you perform in BIOS is done one after the other. This will help you detect what settings caused the issue should it happen again.
Check to see if the power source voltage switch is properly set. If the intake voltage for the power source isn’t right, then your PC might not boot fully.
There’s a great chance that your computer won’t come on at all if the voltage switch is incorrect. Also, a wrong power source voltage could keep your PC from booting correctly.
Reseat All That You Can Inside Your Pc
When you reset, it’ll re-establish several connections inside your PC. This type of deep reset is the quick fix to similar issues.
Make Sure All the Cables Are Correctly Connected
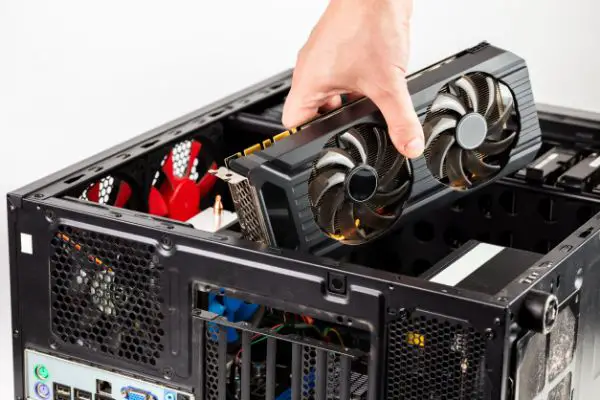
Confirm that all the necessary cables are connected at the right places. For instance, if the video card onboard is disengaged, connecting your VGA cable to it will yield no result. Not even with your PC turned on.
To prevent this, you’d want to confirm that the VGA cable has been plugged into the appropriate video card.
Afterwards, try restarting the components listed below and then check if your PC’s screen will display anything:
- Reset the PC’s memory modules
- Reset any available expansion cards
- Reset all the power cables and internal data
Reset The Cpu
Only reset the CPU only if you are suspicious about its installation or believe it has been loosened.
I’d urge you to leave your CPU alone unless it’s your final option. This is because there is a minimal risk that your CPU became loose, and installing CPUs is a delicate operation. A mistake in resetting it could cause more damage and time to repair.
Check for Electrical Shorts
Examine your PC for any indications of electrical shorts. If you find any, you must investigate the likely source of the observed electrical shorts.
Check The Power Supply
Even though your PC’s lights and fans are operating, it’s possible that your power supply isn’t working properly. This is because the power supply unit causes more obstacles than any other piece of hardware. It’s what often causes PC components to act strangely or inappropriately.
If your power supply does not react to the tests you do, rapidly switch it back on. If you do this, plug in your computer for around 10 to 15 minutes before turning it on. If your CMOS battery runs out of power, the little delay should give it enough time to recharge.
Use Only the Essential Hardware to Restart Your Computer
This is important to avoid as much hardware contact as possible while ensuring your computer can still come on.
Unplug all auxiliary devices that can stop your PC from running properly.
Disconnect any peripheral devices that aren’t required for your computer to function correctly, such as extra monitors connected through HDMI, Mouses, USB-connected storage devices, and keyboards. Your PC should turn on at this moment.
Replace Hardware
Replace all hardware removed in the previous steps and test it after reinstallation. If your computer boots up with just the essential hardware (which it should), the problem has been resolved. This means that one component you disconnected was causing the machine to malfunction.
You should be able to identify the element that caused the problem by reinstalling and testing each individual hardware component on your computer. When you find the problem, get a new replacement for the faulty hardware.