Disclaimer: This post may contain affiliate links, meaning we get a small commission if you make a purchase through our links, at no cost to you. For more information, please visit our Disclaimer Page.
When we talk about VPN, I think it’s not strange to you anymore. If you don’t know what VPN is, I would recommend you to read more here.
Usually, we use shared VPN services that allow many users connect to the same servers and share its bandwidth. For this reason, the speed of these VPN services isn’t fast enough or very slow. On the other hand, some Premium & Private VPN services cost you around $10 per month. That’s a high price, right?
In this guide today, I will show you a way to set up your own VPN that based on Digital Ocean server. You can use this VPN to bypass geo-blocked sites and services, such as Netflix, Google Play Music or Spotify. All steps are very easy to follow and don’t need much knowledge about Linux at all. When it’s done, you can connect to this VPN from your Windows PC, Mac OS X, Android, iOS or any other platforms you want.
However, to get this VPN to use for almost a year (10 months) for only $6, there are two things you need to do first:
- Grab a .EDU email address from Fiverr.com or somewhere else.
- Use that .EDU email account and apply for GitHub Student Developer Pack. This process may take up to two weeks to get approved but usually done within a week.
When you have done two steps above, you will be able to get a $50 Digital Ocean coupon from GitHub. Just register a new Digital Ocean account and then add the coupon there. You will have $50 to spend within 12 months. Otherwise, it will be expired.
For further information, read the article that I posted a few days ago, which talks about benefits of having an .EDU email account.
How To Set Up Your Own VPN From Digital Ocean
Technically, you will rent a Virtual Private Server (VPS) from Digital Ocean and then install VPN into it. Every time you connect to this VPN, all of your connections will go through the VPS of Digital Ocean to access the Internet. All of sites and online services you are accessing through this VPN will recognize you are from the U.S, where the VPS are located.
This is a great method to bypass Netflix, right?
Create VPS And Install VPN In Digital Ocean
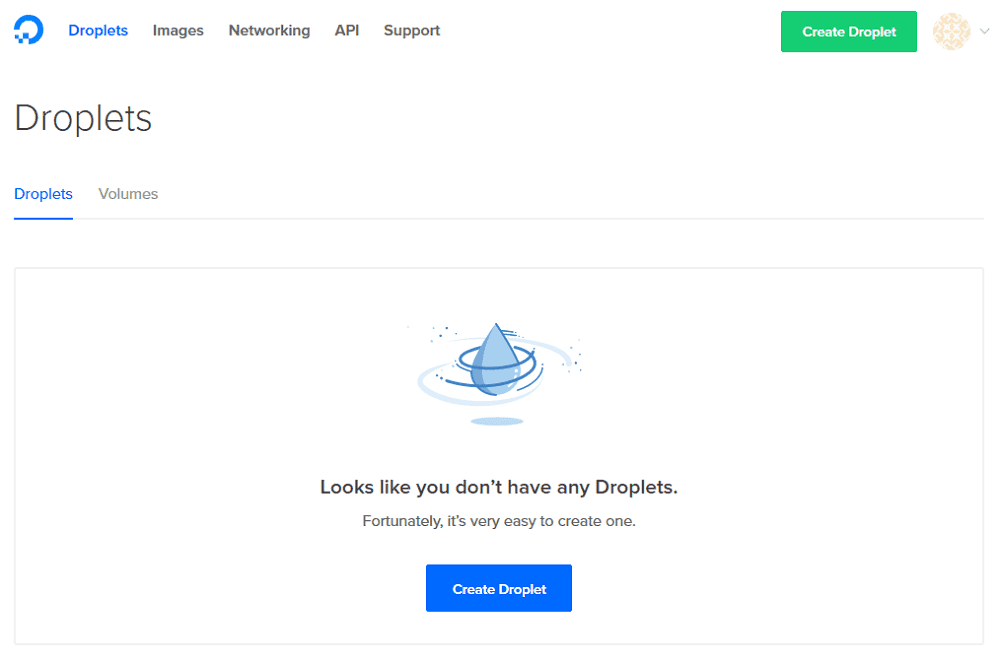
Firstly, log into your Digital Ocean account and then create a new Droplet. It’s just a name that Digital Ocean call its VPS.
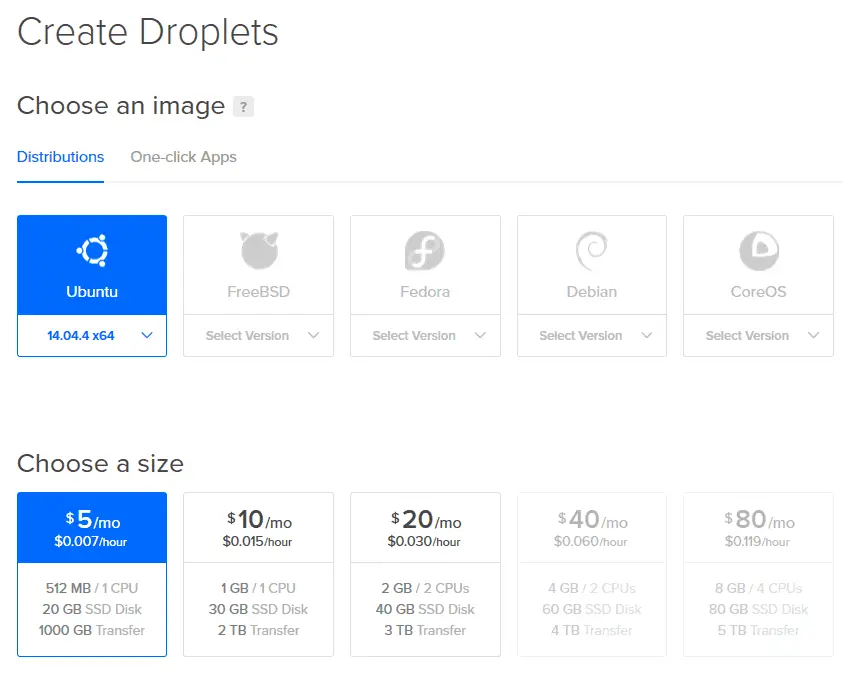
Next, choose “Ubuntu” from “Distributions” tab and then pick the $5/month plan.
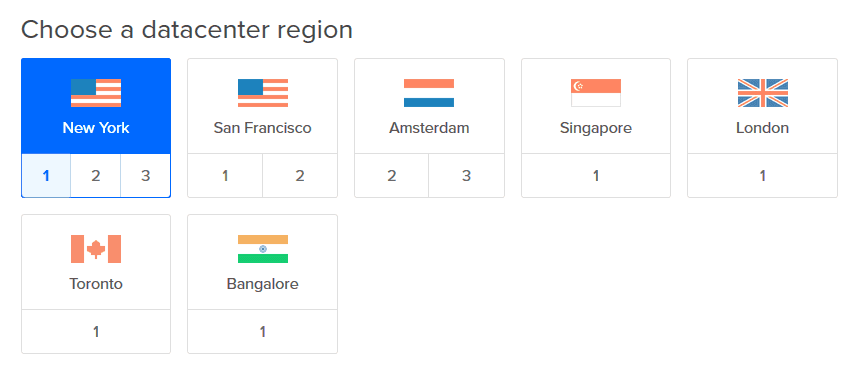
Scroll the page down and select the data center region. I would recommend you to pick New York or San Francisco.
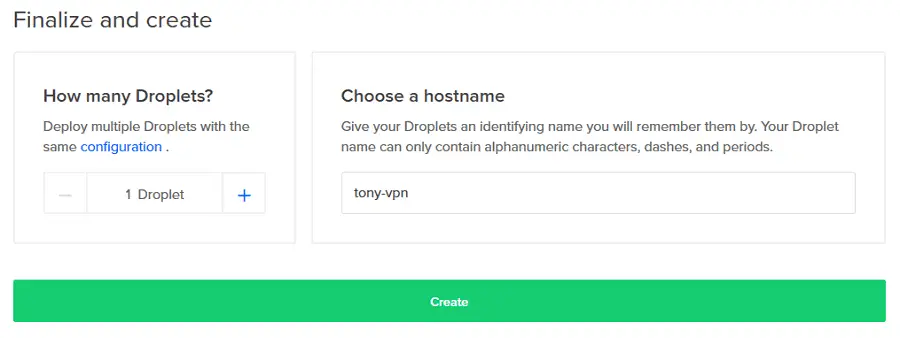
Next, scroll the page to the end and choose a hostname. In this case, I use “tony-vpn” as my hostname. Press “Create” button!
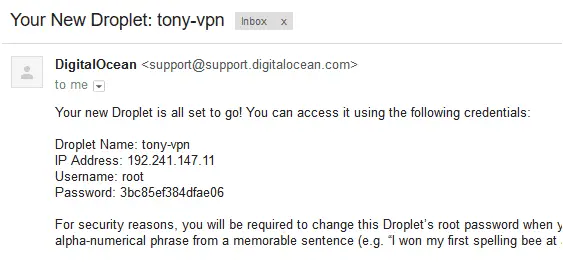
It may take up to a minute to create your VPS. When it’s done, you will receive an email from Digital Ocean about your Droplet information, including IP, username, and password.
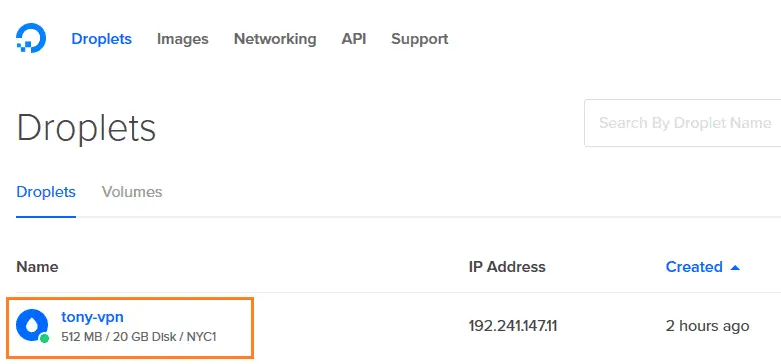
In the next step, click on your Droplet.
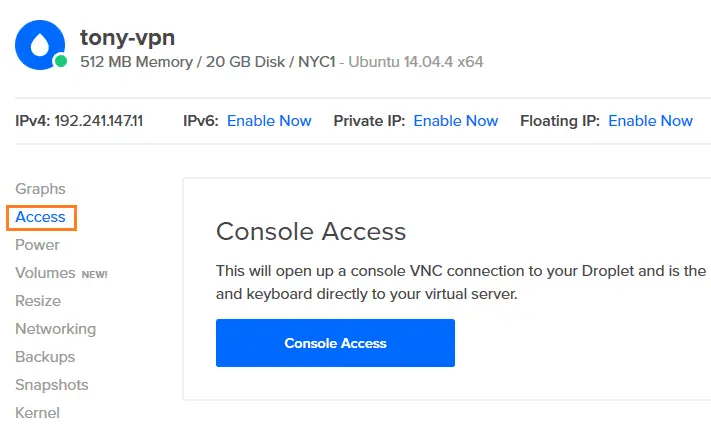
Click on the “Access” link on the left sidebar. Then click on “Console Access” button.
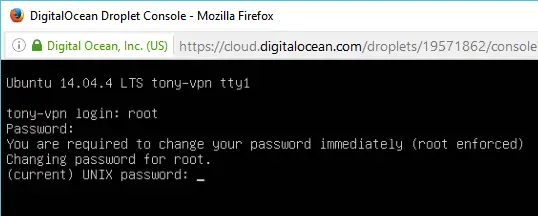
A new console window will be shown up, ask you to enter your username and password. Simply enter “root” as your username – the password as you have seen in your email.
Note: When you type the password, it won’t show and seems like you don’t type anything. Don’t worry – it’s just a security feature of Linux to protect your password from others.
After filling your password, it will ask you to change your password for security purpose.
Now it’s time to install VPN into your new Ubuntu VPS. There’s nothing complicated, just follow my steps below.
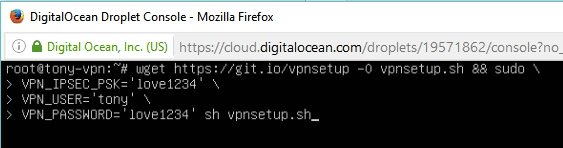
Note: Please replace “tony” and “love1234” with your selected VPN username and password.
Type:
wget https://git.io/vpnsetup -O vpnsetup.sh && sudo \
press Enter. Then type:
VPN_IPSEC_PSK=’love1234′ \
press Enter. Then type:
VPN_USER=’tony’ \
press Enter. Then type:
VPN_PASSWORD=’love1234′ sh vpnsetup.sh
and finally press Enter.
After pressing Enter, it will automatically download VPN and install on your VPS with provided details. This process may take up to a few minutes to complete.

When the process is completed, you will see your VPN server information on the screen.
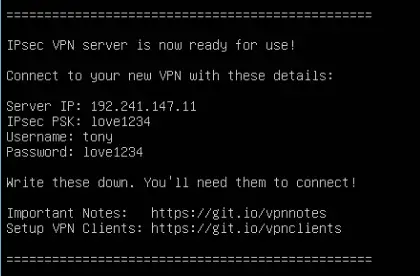
Note: I would recommend you to choose a stronger password for your own VPN server. Do not use a simple password like me: LOVE1234 because it’s very easy to guess and insecure. Choose a stronger password but easy to remember.
Now you are able to connect to your own VPN and enjoy Netflix or any other services you want, without worrying about geo restrictions.
How To Connect Your Device To Your Own VPN In Digital Ocean
Your VPN is using L2TP protocol with IPSec that many operating systems support it. In this guide, I will show you how to set up and connect to your own VPN from Windows, Mac OS X, iOS, and Android.
How To Set Up VPN Connection In Windows 10 And Windows 8, 8.1
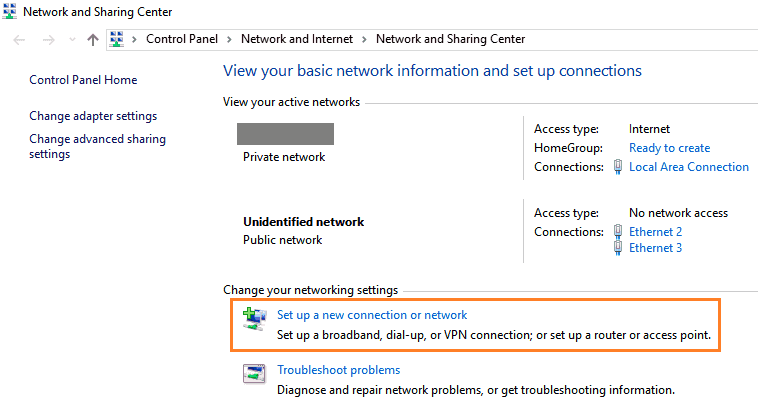
The first step you have to do is open “Network and Sharing Center“.

Next, choose “Set up a new connection or network“.
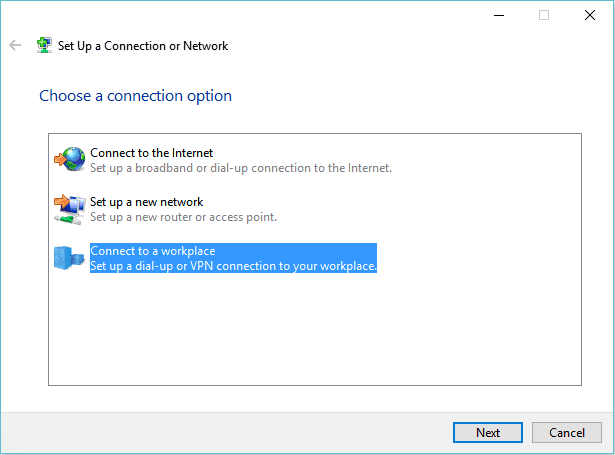
Select “Connect to a workplace” and click on the “Next” button.
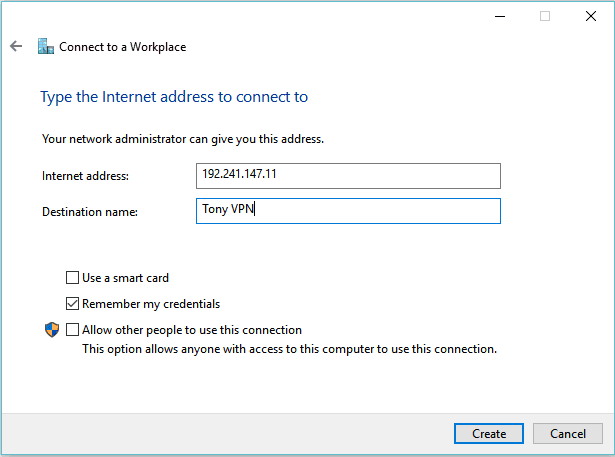
Type the IP address of your VPN into “Internet address” field. Then choose any name you want and type into “Destination name” field.
Get back to “Network and Sharing Center” and then choose “Change adapter settings” on the left side.
Right-click on the VPN you have recently created and select “Properties“.
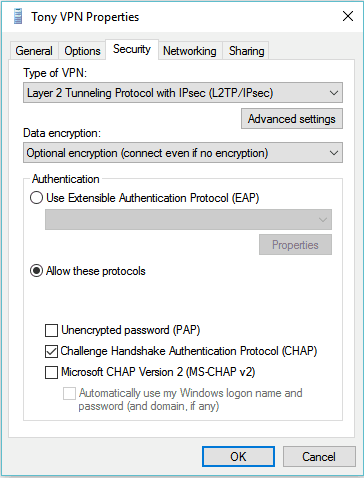
Select “Security” tab and choose “Layer 2 Tunneling Protocol with IPsec (L2TP/IPSec)” from Type of VPN.
Select “Allow these protocols” and then tick the checkbox named “Challenge Handshake Authentication Protocol (CHAP)” and uncheck the other options.
In the next step, click on the “Advanced settings” option, select “Use preshared key for authentication” and then type your VPN password there.
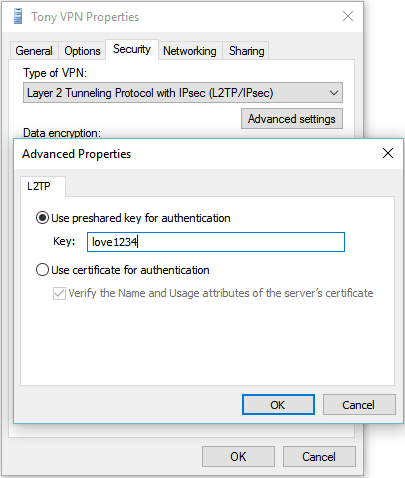
Press “OK” double times to close all windows and save the changes.
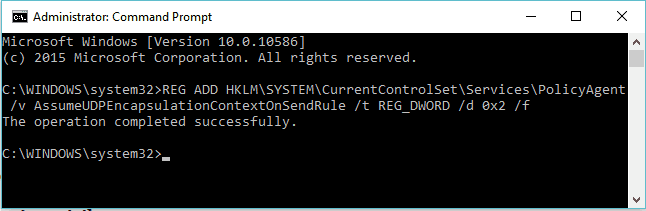
Open the Command Prompt program as Administrator by pressing Windows key + X and then choose A > Yes.
Copy:
REG ADD HKLM\SYSTEM\CurrentControlSet\Services\PolicyAgent /v AssumeUDPEncapsulationContextOnSendRule /t REG_DWORD /d 0x2 /f
Paste it into Command Prompt and press Enter.
After that, reboot your computer.
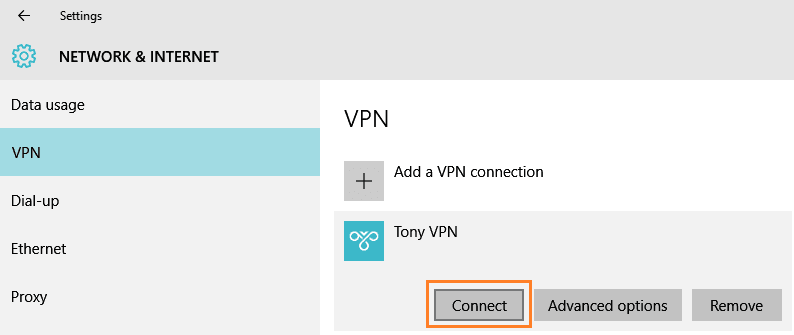
From now on, you can easily connect to your VPN by pressing Windows key, choose “Settings” > “Network and Internet” > “VPN” > click on your VPN name and choose “Connect“.
That’s it!
How To Set Up VPN Connection In Windows 7, Vista And XP
If you are using Windows 7, Vista or even XP, then:
- Go to Start Menu > Control Panel > select “Network and Internet” and then “Network and Sharing Center“.
- Next, select “Set up a new connection or network” and then “Connect to a workplace” and click on the “Next” button.
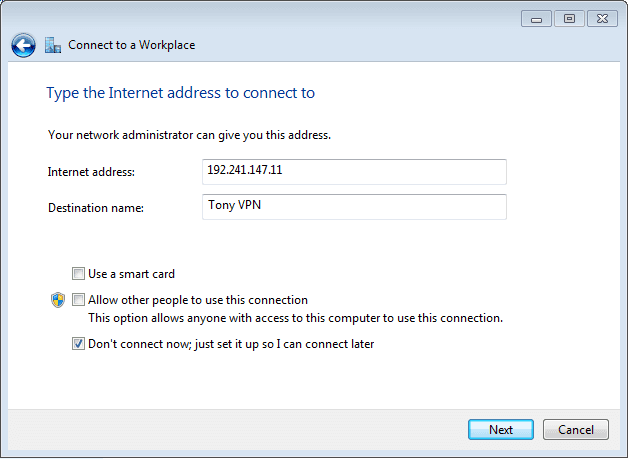
- Choose “Use my Internet connection (VPN)“, type the IP address of your VPN into “Internet address” field. Type whatever you want into “Destination name” field.
- Choose “Don’t connect now; just set it up so I can connect later“, click on the “Next” button.
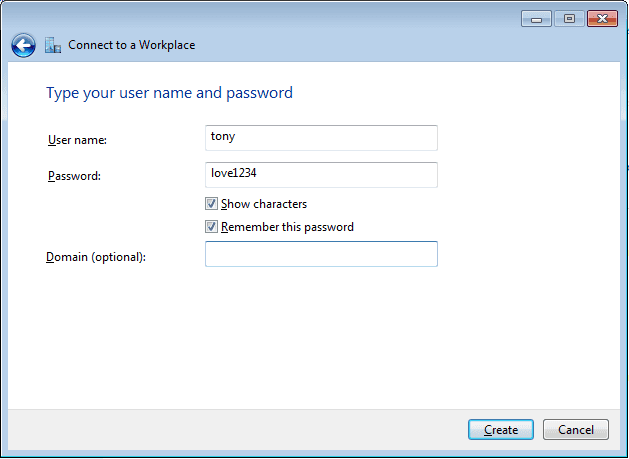
- Type your username and password of your VPN, and select “Remember this password“.
- Click on the “Create” button and then “Close“.
- Get back to your Network and Sharing Center and then select “Change adapter settings“.
- Right-click on the VPN adapter you have just created and choose “Properties“.
- In the Options tab, uncheck the “Include Windows logon domain“.
- In the Security tab, choose “Layer 2 Tunneling Protocol with IPsec (L2TP/IPSec)“.
- Next, select “Allow these protocols“, and tick “Challenge Handshake Authentication Protocol (CHAP)“, but uncheck all other options.
- Click on the Advanced settings button, select “Use preshared key for authentication“, type your VPN password into the text box and then click “OK” twice.
- Run the Command Prompt as Administrator and then run the command below.
Windows 7 & Vista:
REG ADD HKLM\SYSTEM\CurrentControlSet\Services\PolicyAgent /v AssumeUDPEncapsulationContextOnSendRule /t REG_DWORD /d 0x2 /f
Windows XP:
REG ADD HKLM\SYSTEM\CurrentControlSet\Services\IPSec /v AssumeUDPEncapsulationContextOnSendRule /t REG_DWORD /d 0x2 /f
How To Set Up VPN Connection In Mac OS X
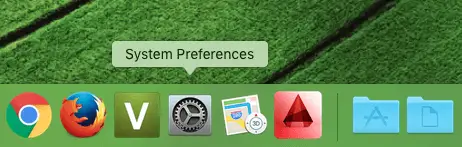
In your Mac computer, open System Preferences and then select Network.
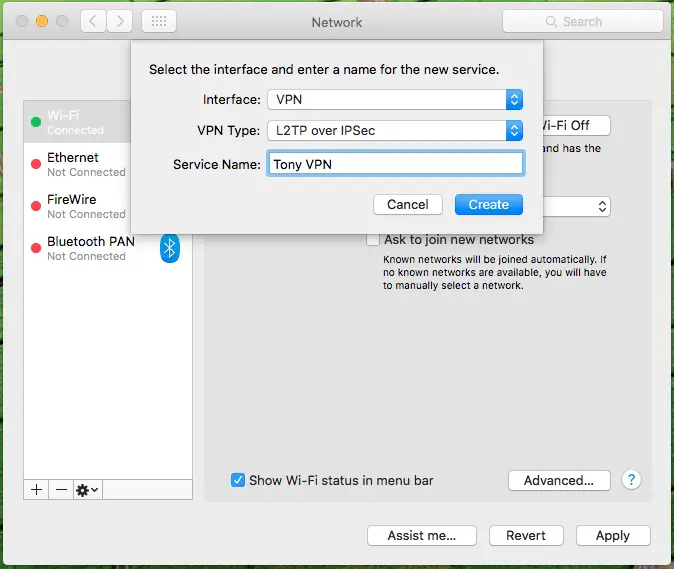
Click on the “+” icon in the left and then choose VPN.
Choose L2TP over IPSec from the Type.
Enter the name for your VPN into the Service Name field. Choose whatever you want to use and then click on “Create” button.
Next, enter the IP address and username of your VPN server.
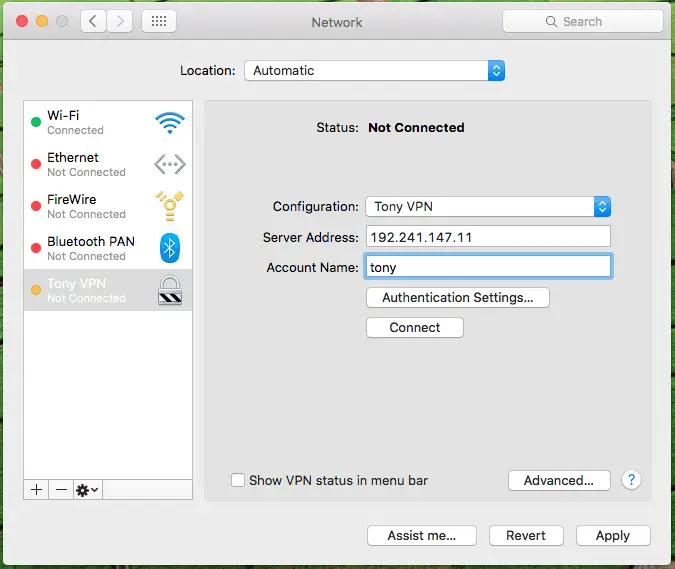
Then, click on the “Authentication Settings“.
- In the User Authentication section, choose Password, and then type your password there.
- In the Machine Authentication section, choose Shared Secret, and then type your VPN password once again.
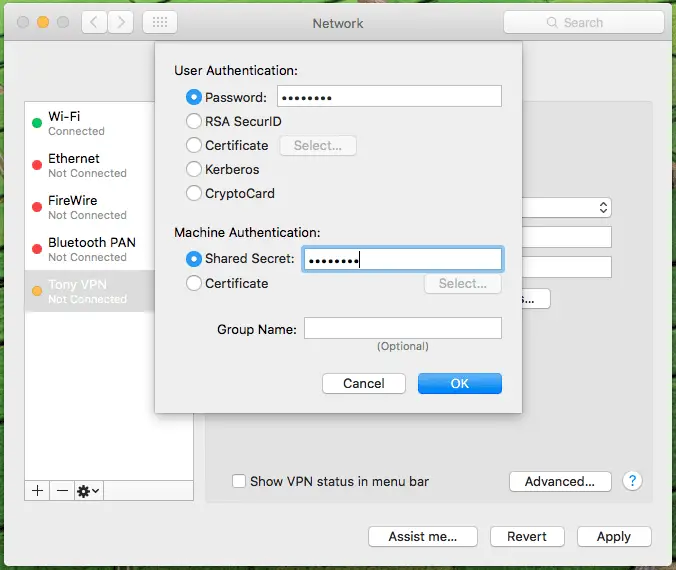
Click on the OK, and then choose “Show VPN status in menu bar”
In the next step, choose Advanced > tick on the “Send all traffic over VPN connection”
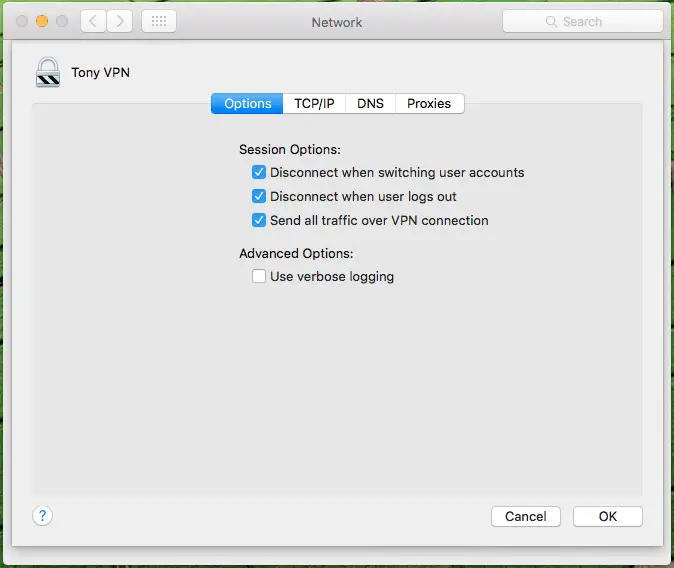
Select the TCP/IP tab and make sure the “Configure IPv6” option has been turned into Link-local only
Click on the OK button and then Apply.
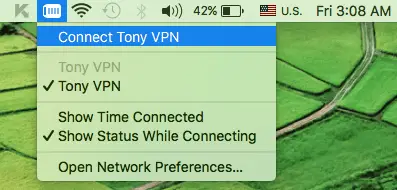
From now on, you can connect to your own VPN from your Mac computer by clicking on the VPN icon in the menu bar and then choose your VPN and connect to it.
How To Set Up VPN Connection In iOS
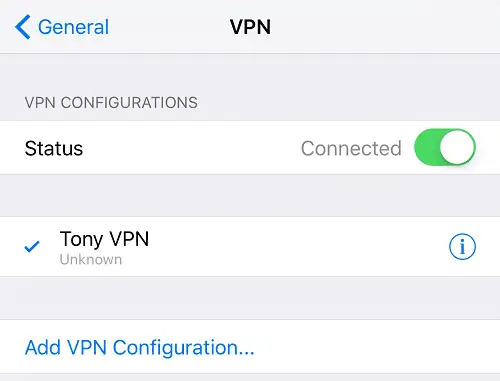
In order to connect to a VPN from iOS, go to Settings > General > VPN
In the next step, choose “Add VPN Configuration” and select “L2TP” from the “Type” of VPN.
The “Add Configuration” interface will ask you to enter a few details, including Description, Server, Account, Password and Secret. All you need to do is just enter these fields with your VPN details. In this case, you have to enter VPN’s username into the Account field, VPN’s password into both Password and Secret fields – and whatever you want in the Description field.
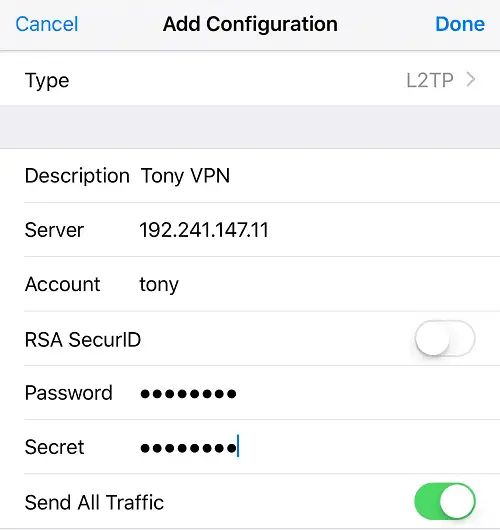
Next, enable the “Send All Traffic” option and then just switch on to connect to your VPN server.
That’s it!
How To Set Up VPN Connection In Android
- Firstly, go to Settings > More > Wireless & Networks > VPN
- Choose “Add VPN Profile” to add a new VPN profile.
- Enter any name that you want to use for your VPN.
- Choose L2TP/IPSec PSK from the drop-down menu.
- Enter the IP address of your VPN into the “Server” field.
- Enter the password of your VPN into the “IPsec pre-shared key” field.
- Choose “Save“.
- Tap on the VPN that you have just created, it will ask you username and password.
- Type the username and password of your VPN,
- Choose the VPN that you have just created, type username and password of your VPN into it.
- Tick on the “Save account information” checkbox
- Choose “Connect” and then it will connect to your VPN automatically.
That’s it!
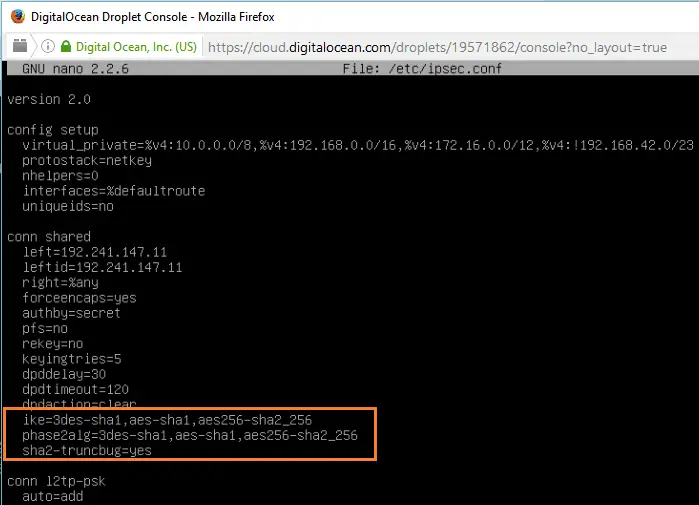
Note: If you are using Android 6 Marshmallow or above, then you should edit /etc/ipsec.conf file on your VPN server and add “,aes256-sha2_256” at the end of both “ike=” and “phase2alg=” lines.
To doing so, type:
nano /etc/ipsec.conf
and then press Enter.
Next, find the “ike=” and “phase2alg=” lines and then add “,aes256-sha2_256” right after its content, without the quotes, but remember the comma.
After that, add a new line:
sha2-truncbug=yes
right after those.
Finally, press Ctrl + X, type Y and press Enter to save the changes and exit the editor.
When finished, just run:
service ipsec restart
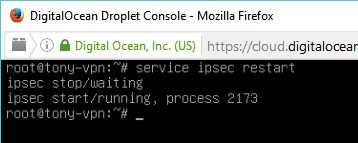
You are now able to connect to your own VPN from Android 6.0 Marshmallow without any issues.
How To Set Up VPN Connection In Chrome OS
If you are using a Chromebook with Chrome OS, then here are steps to set up a new VPN connection that works with your VPN server.
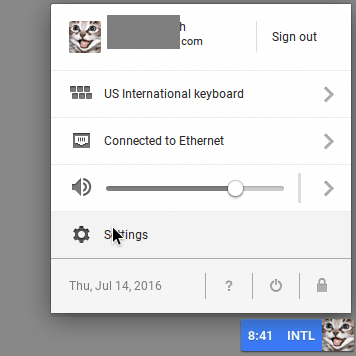
Firstly, log in to your Chromebook with your Google account and then click on the status section, where your account image located.
Next, click on the Settings.
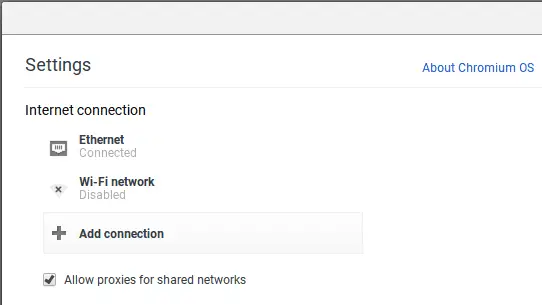
From the Internet connection section, choose Add connection and then “Add OpenVPN / L2TP“.
It will ask you a few information about your VPN server, including server IP, username and password. In this case, make sure the details you have provided below are following the instructions:
- Server hostname: VPN IP address
- Service name: Choose anything you want
- Provider: L2TP/IPSec + pre-shared key
- Pre-shared key: VPN password
- Username: VPN username
- Password: VPN password
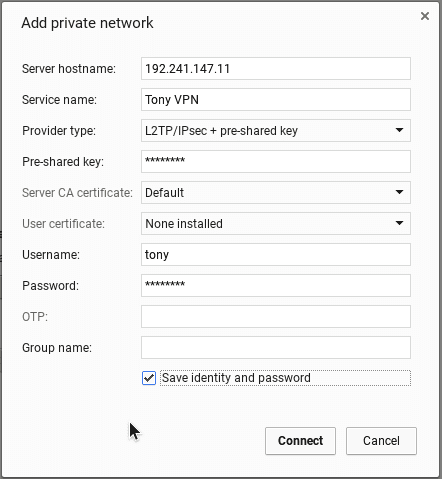
Finally, click “Connect” to start to connect to your VPN server.
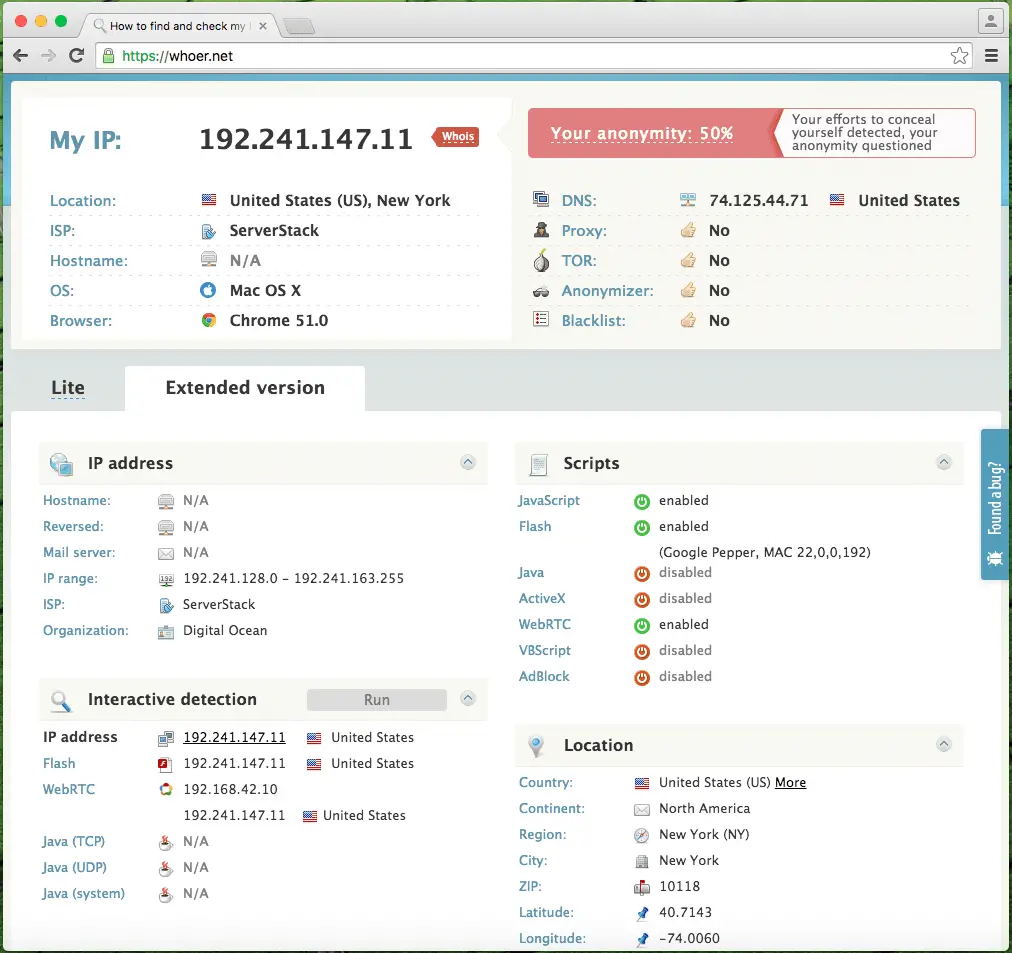
You can now use Whoer.Net or Encrypted Google to check your current IP address. I would recommend you to use https://whoer.net because it will return you many other details that you may interested in.
The point of this article is to show you how to create your own VPN server from your Digital Ocean with free credits. But if you plan to pay $5 per month for this type of VPNs, it’s still fine. The good point of Digital Ocean is that they are offering 1TB of transfer data for the $5/month plan. So you don’t need to worry about running out of bandwidth.