Disclaimer: This post may contain affiliate links, meaning we get a small commission if you make a purchase through our links, at no cost to you. For more information, please visit our Disclaimer Page.
You can take a screenshot of any platform, including Mac OS, Linux, iOS, Android, and Windows isn’t an exception. In a previous post, I’ve introduced a Print Screen Mac guide, to present ways you can use to capture a screenshot on your Mac. Today, I’m going to show you how to take a screenshot on Windows computers.
A screenshot will be taken when you press a particular key or combination of keys on your keyboard. You can also use built-in or third-party programs to assist you to capture a screenshot of your computer screen.
Depending on the key, the combination of keys, and applications you use, the screenshot will be stored in different locations.
Methods To Take A Screenshot On Windows Computers
There are many ways you can use to take a screenshot on your Windows PC. However, in this article, I will show you three major solutions to do so.
How To Take A Screenshot On Windows PCs With The Print Screen Key
If someone asks me how to take a screenshot on a Windows computer, I would tell them that I use the Print Screen key (or also known as PrtScr) on my keyboard. It’s the simplest method you can use to take a screenshot of the screen of your Windows PC.
Don’t know how to use Print Screen key? Here are the instructions:
- Look at your keyboard and find Print Screen or PrtScr key – depending on the keyboard.
- Press it to take a full-sized screenshot and save to Windows’ clipboard.
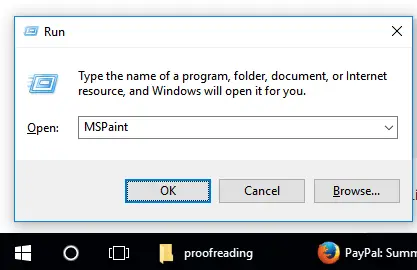
- Press Windows + R, type: MSPaint and then press Enter. Uppercase or lowercase isn’t a problem.
- Press Ctrl + V to paste the screenshot from the clipboard to Microsoft’s Paint.
- Crop, resize, add text, or do whatever you want with your screenshot.
- Press Ctrl + S, choose the location you want to save the screenshot and then click on the Save button.
That’s it!
How To Take A Screenshot On Windows PCs With The “Windows” Key + PrtScr
This method is quite similar to the way above. However, your computer will take a screenshot and save it directly to the “Screenshots” folder instead of saving it to Windows’ clipboard.
To use this method, you need to press Windows + PrtScr. Your computer will automatically take a full-sized screenshot and save to:
C:\Users\LivingDesktop\Pictures\Screenshots
Note: LivingDesktop is the username of my Windows computer. So the path on your PC should be:
C:\Users\your-Windows-username\Pictures\Screenshots
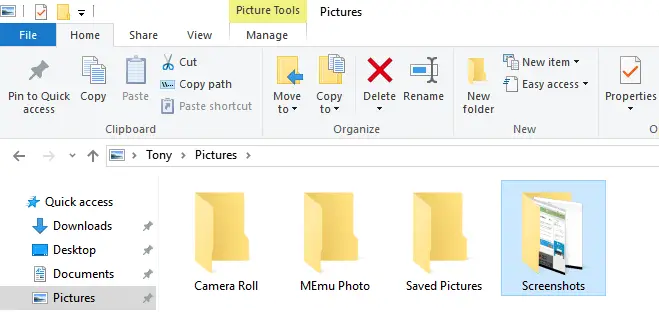
The simplest way to access the Screenshots folder is:
- Press Windows + E.
- Look at the left sidebar and click on “Pictures”.
- Double-click on the “Screenshots” folder.
Once you have accessed the Screenshot folder, you will find your recent screenshot images there. Choose a screenshot file, right-click on it and select “Edit” to open it in Microsoft’s Paint to crop, resize or add texts.
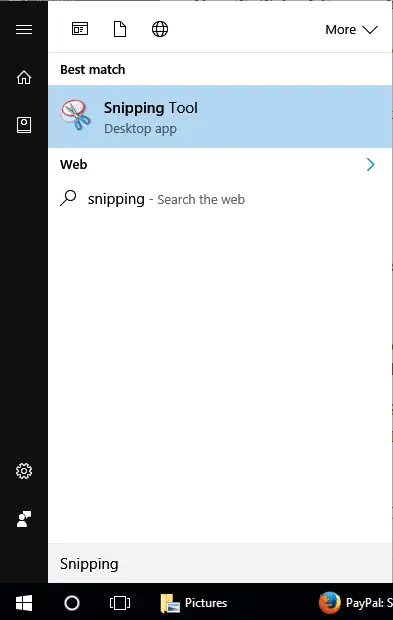
How To Take A Screenshot On Windows PCs With The Snipping Tool
You might not know that Microsoft added a Snipping tool to Windows OS since they launched Vista. Since then, it’s been part of the operating system and hasn’t got any new features yet, just a few bug fixes.
The Snipping tool allows you to take a screenshot of:
- The entire screen.
- Rectangular area.
- A free-form area.
- An open window.
All you need to do is to choose the mode, and move your cursor to select the area.
That’s it!
Also Read: How To Take A Screenshot On A Mac?
With the Snipping tool, you can quickly annotate with the Pen or Highlighter. You can also remove things you have added with the Eraser, one by one. Further, you can send the screenshot to a friend through email, as well as save it as PNG, JPG, GIF, and HTML.
However, you can’t use the Snipping Tool to take a screenshot that involves mouse movements when running Windows Vista, Windows 7, and Windows 8, 8.1. To take a screenshot of something like that, such as tooltips or pop-up menus, you will need to use the Print Screen key.
Luckily, the Snipping tool in Windows 10 has a “Delay” feature, which allows you to take a screenshot of pop-up menus and tooltips.
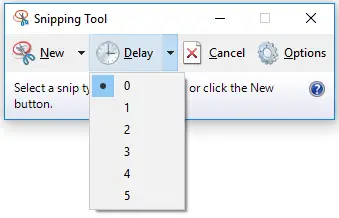
To use it, follow these instructions:
- Open the Snipping tool.
- Click on the Delay option, choose the number of seconds you would like to wait until the screenshot is taken, from the drop-down list.
- Click on the arrow next to “New” and select the type of the screenshot you want to take.
- You will have up to five seconds to set up the screenshot, depending on the number of seconds of the delay you selected.
- Once the time has passed, your Windows screen will fade out so you can move your cursor to choose the area of the screenshot.
After reading this article, I hope you will know how to take a screenshot on Windows computers, by using both the Print Screen key and Snipping tool.
If you have any questions regarding this article, don’t hesitate to ask by using the comment form below.