Disclaimer: This post may contain affiliate links, meaning we get a small commission if you make a purchase through our links, at no cost to you. For more information, please visit our Disclaimer Page.
The “parameter is incorrect” error often pops up when transferring photos from your iPhone to PC, a process that Apple has done very little to streamline over the years. For those who try to use iTunes on PC, you know exactly what we mean.
There are a number of potential causes behind it, including bad hard drive sectors, iTunes needs to be updated or reinstalled, iPhone software is outdated, the format of the photos, and photos that are deleted but still in your deleted files on the iPhone.

It also seems to be more prevalent on older iPhones. It’s not at all uncommon to find your old iPhone lying around remember you have a ton of pics on there that should be transferred off. So, let’s cover these various possibilities and see if we can get rid of the “parameter is incorrect” error.
Table of Contents
5 Fixes To iPhone Problem: The Parameter Is Incorrect
1. Bad Hard Drive Sectors
For the uninitiated, a bad hard drive sector is nothing more than a unit of information on your hard drive that is corrupted either from malware affecting your system or it is buggy because you shut down Windows when the hard drive was in use.
These sectors are divided into two categories: soft sectors and hard sectors.
In this case, it is probably not a hard bad sector because that would mean the hard drive is physically damaged, which is hard to do unless you drop your computer a lot.
To fix it, you need to do a couple of things. First, check for errors.
- Press Windows Key + E
- Right-click on the drive you’re trying to transfer the photos to
- Click on “Properties”
- Click on the “Tools” tab
- Click “Check”
If any errors pop up, you will have an opportunity to repair them. You can also try and fix things by defragmenting your hard disk.
It’s not a good idea to do this if you are using an SSD as it has a tendency to shorten the lifespan of the disk.
- Press the Win key
- Type “Defragment” into the search bar
- Select Defragment and Optimize Drives
- Select the drive in question
- Select “Optimize”
- Restart Windows when the process is complete
You can also go through the Recovery process and troubleshoot from there or use Windows Powershell to repair the disk errors.
2. Update or Reinstall iTunes
On a PC, you can set iTunes to automatically update for you whenever new updates are released. However, if you haven’t done that in the past and you haven’t updated the software recently, this could be the source of your problem.
Updating iTunes is fairly simple. All you need to do is open the iTunes app and select “Help” from the side column. Click on “Check for Updates.”
If there are any available updates out there, they will pop up here. Select the update and follow the prompts. Apple iTunes will do the rest.
You can also set it up to automate the process in the future so you don’t have to ensure that iTunes is always firing on all cylinders. Jump into Preferences and select “Advanced.” Look for the tab that says “Check for new software updates automatically” and select it.
If iTunes is not updated to its latest version, there’s a good chance that it will give you problems, especially when you are using it to connect to an iPhone and transfer photos from the iPhone to a file on your PC.
Worst case scenario, you may have to completely delete iTunes and reinstall it. For one, that will clear up any underlying issues with the software.
For two, you will install the latest version of iTunes, so it’s like a long-form way of updating the software.
- Click on the Windows icon or tap the Win button on your keyboard
- Enter “Settings” in the search bar
- Select “Settings Menu”
- Select “Apps”
- Select “Installed Apps”
- Locate iTunes and select the three, horizontal dots to the right of it
- Select “Uninstall”
- Follow the remaining prompts
Once the app is uninstalled, you will find the latest version of the iTunes app in the Microsoft Store. Simply open the store app and type “iTunes” into the search bar. When you see iTunes, select “Get” in the upper, right-hand corner of the iTunes box.
The app will install once you select “Get.” All you need to do from here is open the newly installed app and sign in using your Apple ID and password.
3. Update Your iPhone
For your iPhone and iTunes to work in concert, without any issues, both iTunes and your iPhone should be running on the latest software.
You need to make sure your iPhone is on the latest iOS version. Like iTunes, iPhones are set up to locate and download updates automatically as the default feature.
However, for one reason or another, it might not update as it should or you may have inadvertently turned it off in the past.
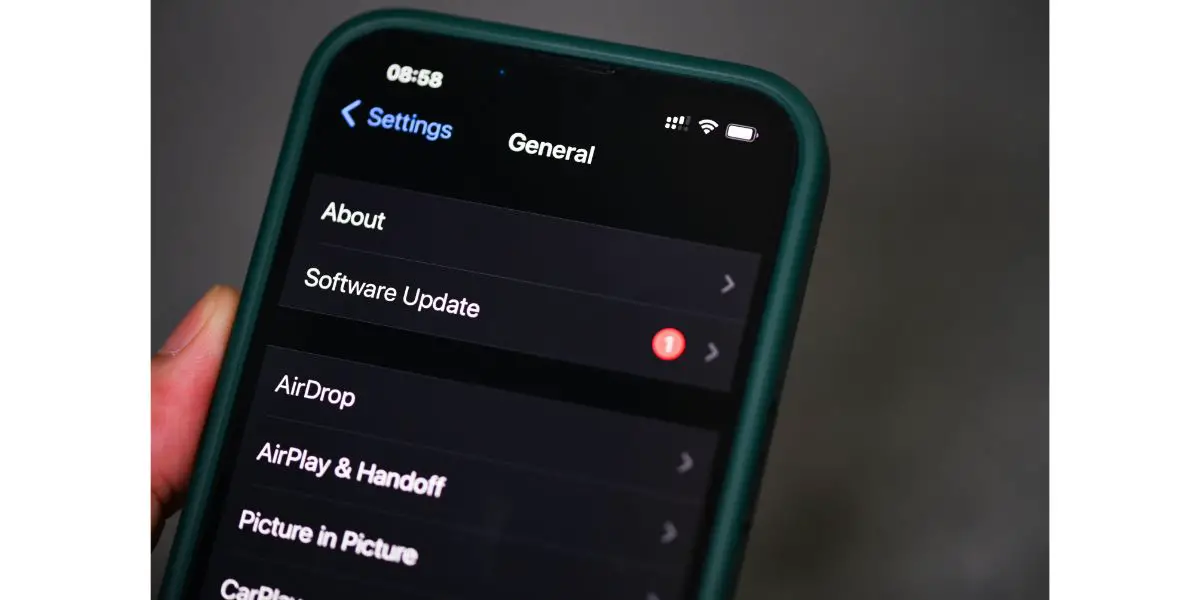
- Go to the Settings menu on your iPhone
- Select “General”
- Select “Software Update”
- If an update pops up, select it
- Follow the remaining prompts to finish updating your iPhone
Once the update is complete, your iPhone will automatically restart. Once it’s back up again, plug it into your PC via the lightning to USB ports and try to make photo transfers via iTunes again. The problem should be resolved. If not, move on to the next step.
4. iPhone Deleted Photos
iPhone has a feature where you can delete photos but the photos remain on your iPhone in either a hidden or recently deleted tab within Albums. Sometimes, if you are trying to transfer large photo groups to your PC, these deleted photos gum up the works.
The PC is trying to transfer them because their information is still in the folder but the photo itself is now in a different folder.
To fix this, you can either transfer individual photos that you know are not in your deleted folder (a process that will take forever), or you can jump in your deleted album and dump all of the pics there permanently.
- Open your iPhone photos app
- Select “Albums” on the bottom tab
- Scroll down and select “Hidden” or “Recently Deleted”
- Delete individual photos by pressing and holding, then selecting “Delete”
- Delete them all at once by touching the “Select” tab in the top, right-hand corner
- Once you hit the select tab, swipe your finger from the top left photo to the bottom right photo, which will select them all.
- Select the garbage can symbol to delete
Once the photos in your Hidden and Recently Deleted Albums are gone, connect your iPhone to your PC and try to transfer the photos again.
5. Photos Format
Your PC should be able to recognize just about any photo format, however, sometimes it just doesn’t work out as it should.
This issue rears its ugly head mostly when transferring RAW pics from newer iPhones since they have the capability of taking RAW photos.
The only way to get around this is iCloud. When you take photos, unless you change the Settings, your photos are automatically saved to iCloud, assuming you have the space. A RAW photo is saved to iCloud as a high-resolution photo.
Since the RAW photo won’t transfer, you need to download the high res version from your iCloud, back to your iPhone. Don’t worry, you get to keep the original, RAW file. Now, try and transfer the hi-res version to your PC.
The RAW files are really nice for photo software and optimization but they play havoc when attempting to transfer to other devices.
Final Thoughts
Those are five of the most common issues that plague iPhones when trying to use the truly archaic version of iTunes you get on a PC.
Transferring photos to Macs is generally streamlined and issue-free. Transferring to a PC is like trying to use 2023 hardware with 2010 software.
However, one of the five troubleshooting fixes should get you back up and running. Keep taking pics and saving them as RAW. They are a lot of fun to play with in the various photo apps and software out there. Just remember, it doesn’t play well with PC.