Disclaimer: This post may contain affiliate links, meaning we get a small commission if you make a purchase through our links, at no cost to you. For more information, please visit our Disclaimer Page.
Has your computer ever crashed? Have you ever had a laptop stolen?
If not, you’re lucky. It’s happened to plenty of us.
Ask anyone who’s ever lost their computer and they’ll tell you:
It’s not fun.
After all, most of us store everything on our computers. School work, work files, family photos, finances – it’s all on there.
But when your computer crashes… or you leave it on the train… or you drop it in the toilet (for some weird reason, we won’t ask)…
Read Article: The 5 Best (Free) Tip Calculator Apps for iPhone and Android
It can all go away in a second.
That’s why it’s crucial to backup your hard drive.
Your Mac may be in good shape and a crash may seem impossible right now, but you never know what could happen.
And when it does, you want to be prepared.
Luckily, there are a number of different ways to create a backup drive. They’re all pretty easy, too, and should take you less than an hour.
We’ve outlined a few methods below.
Take our advice and use one of these techniques to copy your hard drive. If that Venti cold brew iced coffee from Starbucks ever comes crashing down on your laptop and fries the hard drive, you’ll be happy you followed our instructions.
Table of Contents
Technique #1: Back Your Mac Up with Time Machine
Apple makes it very easy to backup your computer by creating a copy of your hard drive.
How?
Since 2007, they’ve equipped every laptop and desktop device with a software application called Time Machine.
Essentially, this program is program is a built-in backup feature that allows you to create a copy of your hard drive at any time.
It’s great because it not only allows you to restore your computer if it happens to die entirely, but it also allows you to recover individual files if you happen to delete them.
Accidentally emptied your Recycle Bin with an important folder in it?
No worries! If you’ve backed your computer up with Time Machine, you can get it back in just a few minutes!
Oh, and here’s the best part:
Once you enable Time Machine, it will periodically archive all of the files on your computer depending on your Time Machine preferences. We suggest you set up automatic backups for weekly backups or daily backups (you can even do hourly backups if you want). That way, you don’t have to set time aside specifically to back your stuff up because your computer will do it automatically.
Sounds awesome, right?
Here’s how you use it:
First, you’ll need an external drive to store your files on.
This can be a traditional external that connects via USB, FireWire, or Thunderbolt. Or, you can use one of Apple’s proprietary Time Capsule devices if you happen to own one.
You could even store your stuff on another computer in your network as long as that computer is compatible with the Apple File Protocol (AFP) File Sharing feature.
This drive is where all of the file duplicates will go once they’re rendered. So, to back anything up, it will have to be plugged in. The copies won’t have any place to live otherwise.
So, before you get started, you’ll have to take your external drive and plug it in. If you want to store your stuff on another computer via File Sharing, you can skip that and move on.
Then, you’ll want to follow these steps:
- Open System Preferences.
![]()
- Double-click the Time Machine icon in the System Preferences menu.
![]()
- Click the Select Disk button in the middle of the window.
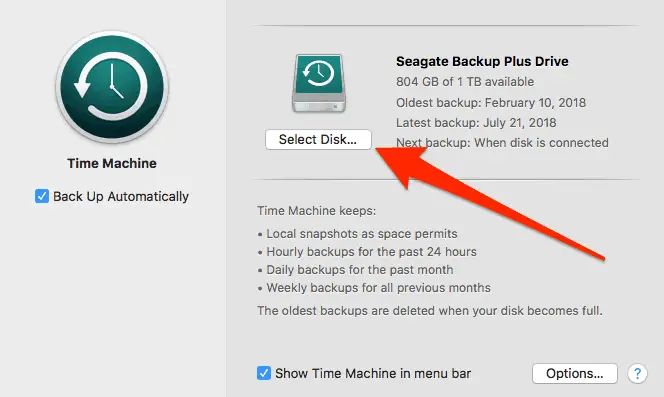
- Then, you’ll have the option to choose which disk you’d like to store your backups on. If you’re using an external hard drive, for example, select that.
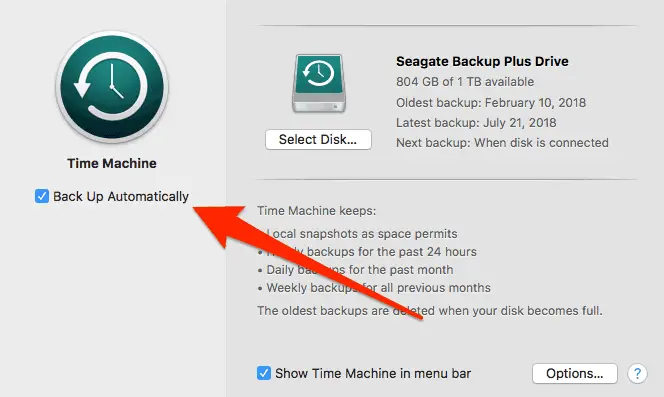
- Once you select backup disk, return to the Time Machine menu and make sure that the box reading “Back Up Automatically” is checked. Once you’ve selected it, your computer will back itself up to the chosen drive each time it’s connected.
Does Time Machine Backup Everything Every Time?
New users often wonder when they use Time Machine if it creates a copy of every single file every single time it backs up the computer.
The answer… YES!
The program automatically copies everything on your hard drive.
So each time it runs, it will copy your system files, accounts, apps, preferences, pictures, videos, docs, music, and even emails.
It might seem strange for there to be a complete copy of your computer on an external drive. But don’t worry. If anything ever goes wrong, you’ll be happy you have it.
Read Article: How to Back Up Windows Computers [Step-by-Step Guide]
Technique #2: Backup Your Mac to iCloud
Don’t have an external hard drive to use as a backup?
Well, don’t worry too much. There are things you can do to keep your files safe, even without an external drive.
One of the best ways to do this is with iCloud.
The best thing about using the cloud as a backup is that you can access your data from anywhere. Well, that and the fact that you don’t have to carry around a big, clunky drive with your entire computer on it.
And, it’s pretty easy to use. All you have to do is drag-and-drop your files right into the magical hard drive in the sky.
You’ll sleep sound at night knowing that your files are safe even if your computer kicks the bucket and your external hard drive gets run over by a car.
Here’s how to use it:
- Before you use iCloud drive, you should always make sure to update your OS. You want to have the latest version of the Mac Operating System whenever you attempt to access the cloud. You may have difficulty otherwise.
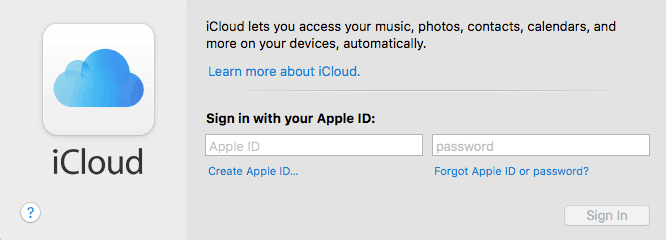
- Once everything is updated, you’re ready to begin. Start by opening the System Preferences menu (click that little wheel on your desktop menu bar). Click the iCloud icon.
![]()
- to access your iCloud account, you’ll probably have to enter your Apple ID and Password. Punch those in and click the Sign In button.
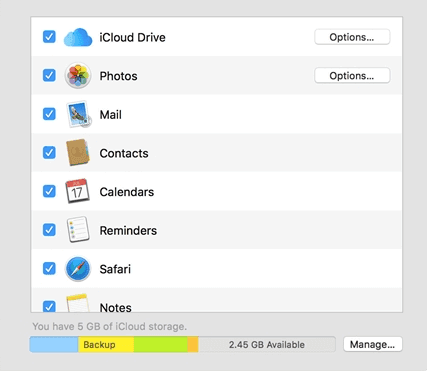
- Once you’re signed in, you’ll be able to choose all of the applications that you want to integrate with your iCloud account. By checking the box next to the Photos icon, for example, you’ll be able to backup all your photo files to your account. If you check the box next to the Safari icon, you’ll backup all of your Safari preferences to the account.
- After you’ve logged into iCloud, you’ll also have the option to drag individual files into the iCloud folder on your Finder menu. Anything you drag into the iCloud folder, located on the left side of the Finder window, it will save automatically.

Can You Back Your Entire Computer Up to iCloud?
Wondering create a copy of your hard drive and upload it to iCloud?
Short answer: Yes.
But, it’s kind of a pain in the butt.
See, the problem is that Apple gives you a limited amount of space in the cloud.
After all, even if it seems like all that data is invisible, it’s stored in giant data servers somewhere out in the desert.
So, Apple is probably paying a lot of money for us to store our data. And while they give you 5GB of storage space for free in your account, they make you pay for more.
The cost of data varies from region to region. Currently, you can buy 50GB of extra cloud storage space for $0.99 a month. Or, you can invest in 2TB of extra space for $9.99 a month.
Unfortunately, your computer probably has more than 5GB of data on it. So, if you want to backup your entire hard drive to iCloud, you’ll probably have to pay Apple’s monthly fee.
And there’s another hurdle in this process…
You’ll need to create a copy of your hard drive before you can export it to the cloud. Chances are that your device doesn’t have enough room to hold two copies of itself.
So, you’ll probably need an external drive no matter what. That way, you’ll have a device to hold your copy. Once it’s copied, you can drag that file into your iCloud account.
There are some benefits to having two copies of your hard drive. As I said before, it’s nice to have a local backup and a cloud-based backup to ensure you never lose your files.
But, you’ll have to pay for it – in both cloud space and physical space.
Technique #3: Upload Everything to Google Drive
One more way to backup your Mac is to store all of your files on Google Drive. Similar to iCloud, this option gives you a way to keep all of your data in a safe and secure folder online.
Now, we understand that Google Drive isn’t every Apple user’s first choice in storage solutions. I mean, why would you use that when you already have access to iCloud?
We get it. As a Mac owner, iCloud would be your first choice. Who wants to open a whole new site when they can just drag their files to a folder that’s already on their computer?
That’s fine. But if you’re looking for some extra storage space, Drive might be a better option.
When you register for a Drive account, Google grants you 15GB of free storage space. That’s more than the 5GB that comes with an iCloud account.
And, you can still purchase more storage if necessary. You can get 100GB for $1.99 per month, which could be worth it considering the 15 free gigs they already give you.
Google Drive is relatively easy to use, too. In fact, you probably already have an account if you have a Gmail address, so all you have to do is head to https://drive.google.com. Or, you can download the app through the App Store.

Whether you install it or use it through their website, all you have to do is drag and drop files or folders into the Drive. They’ll upload instantly.
It’s that easy!
How Do I Use Backup and Sync?
The one downside of Google Drive is that you’ll have to upload every folder individually. There’s no way to drag and drop your entire hard drive into the app all at once.
But with Google’s Backup and Sync app, you can create a copy of your hard drive and store it online.
It’s kind of inconvenient that you have to download an additional app. But, if it’s going to prevent me from losing all my files if my computer breaks, I’m all about it.
Here’s how it works:
- Download Backup and Sync here.
- Open the application and log into your Gmail account.
- Once you’re logged in, you can choose the folders that you’d like to sync with your Drive.
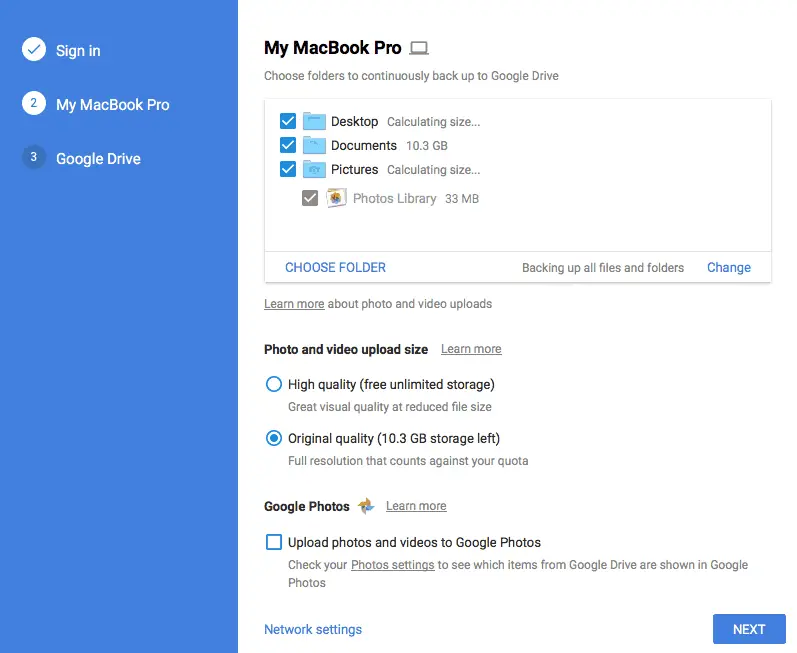
- After you’ve selected your folders, you can click the NEXT button and then START to backup your drive.
- Remember, you’ll need sufficient space to backup your entire computer.
You can get a reading of your total data by clicking the Apple icon in the top left-hand corner of your desktop and selecting “About This Mac.” When the Overview window shows up, pick the “Storage” tab to see how many GB you have stored on your computer.
Make sure to invest in enough Drive (or iCloud) storage space to hold all of the files you plan on storing.
Save Yourself the Headache and Backup Your Mac ASAP
Backing up your computer can be tedious. Spending an hour dragging image files into a folder doesn’t sound like anyone’s idea of a good time.
But losing your entire hard drive is WAY less fun. It’ll ruin your week, I guarantee it.
So, it’s super important that you have some form of external storage. Whether you have a physical hard drive that you leave on your desk or a cloud-based account through Apple or Google, it’s necessary for you to have something.
And again, when the day comes that your computer fries up like a science experiment gone wrong, you’ll be happy you took our advice.