Disclaimer: This post may contain affiliate links, meaning we get a small commission if you make a purchase through our links, at no cost to you. For more information, please visit our Disclaimer Page.
Your CPU fan is super important. Without it, your PC will overheat and shut down. It’s also a bummer when your CPU fan dies and you need to replace it. Luckily, it’s not hard to clean it.
To thoroughly clean a CPU fan, apply a few blasts of compressed air to remove loose dust. Open up your PC case to blow all the dust out so it doesn’t settle down on other parts of the computer.
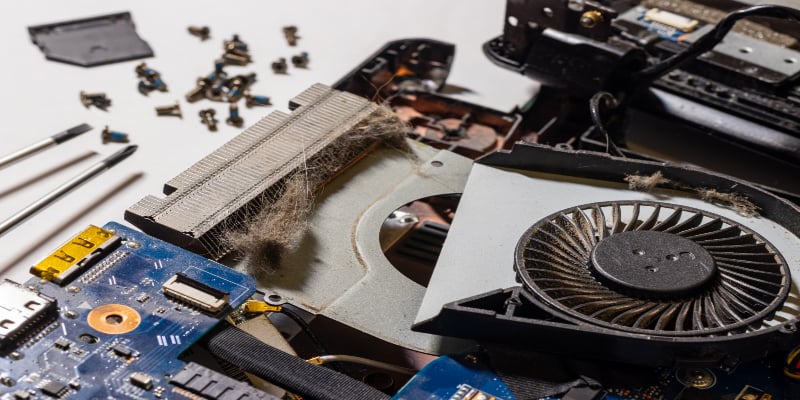
Table of Contents
Why Clean A CPU Fan?
Like any other hardware part, your CPU fan needs cleaning. Cleaning at some point is essential no matter how clean your surroundings are.
Whether you use many dust filters or keep your PC away from dusty carpets, your CPU fan will get dirty eventually. After all, cleaning your CPU fan isn’t only about hygiene.
A clean CPU enhances the efficiency of your PC and prevents overheating.
Thus, when cleaning a CPU fan, you want to make sure as much cool and fresh air can get into the PC case and hot air can get out. You want to ensure things such as dust filters are clean and no thermal paste is leaking.
How Do I Know When To Clean My CPU Fan?
You can notice many signs when your computer’s CPU fan needs cleaning. In most cases, time alone renders the necessity to clean your CPU fan. If you haven’t cleaned your CPU fan for some time, chances are that you need to clean it.
But, this is not the only indicator for when a CPU fan needs cleaning. Another indicator that your CPU fan needs clean is through the leakage of thermal paste.
Thermal paste is a silvery gray substance applied to the CPU fan and processor before adding a cooling solution.
Additionally, thermal paste helps to hide any microscopic imperfections inside the computer. These imperfections can potentially trap air particles between the CPU and heat sink. This, in turn, prevents the CPU from properly cooling your computer.
Adding the thermal paste to your CPU processor with the cooling solution helps to efficiently transfer heat.
But, if the thermal paste leaks onto the top of the chip or motherboard, it may risk ruining the CPU and motherboard. Thus, in this case, you most want to clean your CPU and wipe off the thermal paste to stop the leakage.
How To Clean A CPU?
There are several ways you can clean your CPU based on your needs at the time. However, most principles remain the same.
When you are cleaning your CPU fan, you want to avoid static damage. You can even invest in an anti-static wristband. Alternatively, you can ground yourself by holding on to the case or PC housing.
Regular CPU Fan Cleaning
To clean your CPU fan, follow the steps below;
- Wear a dust mask or respirator to protect you against dust.
- Switch off your computer, unplug the power cable from the wall, and remove it from the PC.
- Place your PC in a well-ventilated place such as a covered back porch
- Remove the panels from the computer case
- Clean up any dust resting on your CPU fan using a lint-free cloth or canned compressed air. When wiping or blow off the dust, some of it will fall to the base of the PC case. Make sure you clean up this area as well.
- Some of the dust from the CPU and other parts of the computer will end up on your floor. Before you put the PC back together, use a vacuum cleaner to pick up this dust. Doing so will also help to pick up some of the residue dust from the PC case. Make sure you don’t blow directly into the PC case.
Cleaning Off Thermal Paste
To clean off the thermal paste from your CPU, you need to first take the computer case apart.
- Start by detaching the heat sink.
- After removing the heat sink, clean off the excess thermal paste from the bottom of the heat sink.
- Continue to remove the excess thermal paste from the top of the CPU chip and around the CPU chip. To effectively remove the paste, use a cloth soaked with isopropyl alcohol on one side.
- Once done wiping off the paste in all areas of the CPU, reinsert the CPU chip, and apply fresh thermal paste on top of the chip.
- Make sure you don’t want to add too much of the thermal paste that it starts to leak again. But, also make sure that you don’t apply too little of the thermal paste and risk overheating. As a general rule of thumb, apply thermal paste the size of a small pea.
Thoroughly Cleaning A CPU Fan
If your CPU fan hasn’t been cleaned for a long time, you will most likely find a thick deposit of dust on the fan, vents, and sinks. Thus, you want to thoroughly clean the CPU fan to remove all of the dust.
During this process, clean up all components of the PC as well. Cleaning the CPU fans alone will still risk dust residue from other parts falling onto the CPU. To deep clean your CPU fan, start by removing all the parts from your PC case.
This is because you will be cleaning everything from the CPU fan’s dust cake to draining the cooling solution. Again, you want to ensure you use an anti-static wrist band. To clean your CPU fan, follow the steps below;
- Put on a dust mask or respirator to protect you from dust
- Take your PC case apart and lay the components on a non-conductive surface
- Around the top of the CPU, sides, and on the heat sink, wipe off the thermal paste
- Using a clean lint-free cloth or canned compressed air, clean out the dust from the fan, crevices, plastic shrouds, and heat sinks.
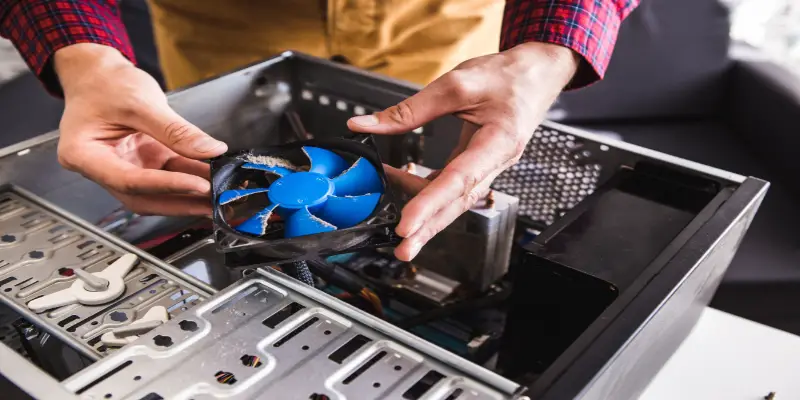
- To clean the fan blades, hold them steady and blow them with compressed air or wipe them with a cloth.
- Use a clean cloth soaked with isopropyl alcohol to clean out thermal paste on the CPU and heat sink
- If dust from the CPU and other parts of the computer falls on the floor, use a vacuum cleaner to pick up this dust. Make sure you don’t blow directly into the PC case.
- If there are still any residues or oily marks on any part, use the cloth soaked with isopropyl alcohol to wipe them clean.
- If you want to clean smaller components such as graphics cards, use specialized tools such as a small hex to remove them first. Then, carefully wipe them with a lint-free cloth.
- Some interior components can’t be removed as you may risk voiding the PC’s warranty. Instead, gently blow dust from these areas using compressed air.
- When you are done cleaning, reattach the components where they should be. When you re-attach the CPU heat sink, apply fresh thermal paste. If you can, arrange cables inside and outside your PC to avoid premature future dust build-up.
How Often Should I Clean My CPU Fan?
To prevent excess dust build-up, you want to lightly dust the outside of your PC every week. During this process, make sure you also dust the area around the PC.
Every three to size months, you also want to light dust components such as the CPU fan. Stick to this routine if you live in a dusty environment or have furry pets.
Furthermore, you want to thoroughly clean your PC and CPU fans every six to twelve months to ensure optimal PC performance. The thorough cleaning process is when you clean up all components inside and outside your PC case.
Conclusion
Cleaning your CPU fan and the rest of your PC is not only done for aesthetics purposes. Consistent clean-ups help to enhance the efficiency and performance of your PC. Ultimately, ensuring you clean your PC from time to time will help to preserve its durability as well.