Disclaimer: This post may contain affiliate links, meaning we get a small commission if you make a purchase through our links, at no cost to you. For more information, please visit our Disclaimer Page.
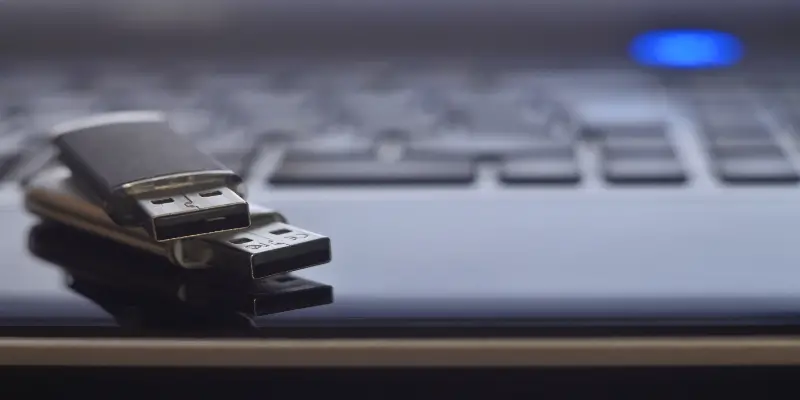
In today’s world, where USB drives have become universal tools of trade among computer users, write-protecting your device will guarantee the safety of your data. It will ensure that your content is not manipulated in any possible way or accidentally deleted. But how do you manage to do that? How do you make your USB drive write-protected?
A USB drive can be write-protected on your windows through a third-party utility in the hidden settings. Optionally, it can also be done through Regedit but either way, some devices come with an inbuilt write-protect switch.

I will explore what write-protecting your USB device is all about. This will help you navigate through privacy options to safeguard your sensitive data. However, it is very important to note that it is not possible to selectively choose the devices that can have access to your drive.
Table of Contents
What Does it Mean when USB is Write Protected?
When a USB device is ‘write protected’, it means the Windows operating system has set restrictions to prevent unauthorized formatting and manipulation of the data in the device.
In a layman’s language, it means that no data can be added to the drive or altered.
A USB drive can be made completely unreadable in the Windows operating system. This is a useful security measure that will deny any unauthorized access.
It will also help to prevent careless insertion and usage of devices with malicious files such as a virus.
If I had sensitive data that needs to be archived or transported, a write-protected USB drive would be the most convenient and safe tool to use.
This will ensure that the files are not accidentally deleted or interrupted by malware when using a public computer.
Can You Make a USB Drive Read Only?
A USB drive can be made ‘Read Only’ either through a universal solution or a PC. If the universal solution is used, the read-only status will be 100% permanent. This will remain so in all the computers and it can never be formatted.
To set your USB drive permanently on the read-only mode, it has to be done on the USB controller chip. This method will work by blocking the write command to the flash memory.
Since this is done at the controller level, the PC will no longer command the USB drive.
On the other hand, to temporarily set a drive to the read-only status, a Windows machine is required. Mostly a Windows 7 and above. This works by connecting the device to Windows and running a specific command prompt to make a registry entry.
Making a USB drive read-only will secure important content from being deleted or altered off the drive. It also ensures that the original files are not formatted or manipulated without being authorized.
Most importantly, when a USB drive is set to read-only, it blocks viruses from being spread to and fro other PCs.
Why Should You Write Protect USB Drive?
Most storage drives come with an inbuilt write protection system which makes them safe and secure.
However, for the USB drive, it has to be set into the read-only status to ensure that your data is well archived and can safely be transported. A write-protected drive can safeguard both your data and PCs.
· Protects Against Malicious Content Interference
A visible write-protected drive will only allow you to read and copy the content.
However, you will not be able to add or copy any data to it. This is really a good thing in itself because no one will be able to manipulate or change the original data of the device.
On top of that, a write-protected USB device will help restrict any malicious or accidental deleting of files.
This means that the files are kept permanently intact, but this mostly depends on the method used to write-protect.
· Protects Against Virus Infections
Careless usage of a USB drive can cause a rapid spread of a virus if the device is not write protected.
Before transferring any software package, it is always good to ensure that the disc is safe to avoid distributing the virus to other PCs.
This is mostly done through write-protecting the USB drive before using it on different PCs.
· Protects Content from Malware
Write-protecting a USB drive will help protect from malware especially when using the device on public computers.
If your device has the toggle button, it becomes easier and safer to switch to the read-only mode.
This will automatically ensure that your data cannot be deleted, corrupted, or formatted by malware.
How Do You Make a USB Write Protected?
There are many steps available online that can be followed to write-protect these devices. Some of these USB drives come with a hardware switch.
These can easily be set to the write-protect status by simply toggling the switch button. This method is very convenient because all you need to do is simply lock using the button to turn it to read-only.
As I had indicated earlier, you can also use the Windows settings to activate the drive into the write-protect status.
This method is a bit more elaborate and it requires time to write-protect your USB drive. For this method, you will be required to use the Windows DiskPart to write protect the USB drive.
Once you open the Run box on your Windows, and type diskpart, you will be prompted to allow and continue to type list disk. At this point, more than one disk might be displayed on the screen and you can easily know yours through the size.
After you have selected your USB drive, proceed to indicate its attributes that are indicated on your Windows. This will redirect you to a command section where you will have to delete the read-only attributes. By doing this, you will have set your disc to be writable and voila, you are ready to exit because your disc is now write protected!
Sometimes, for some strange reasons, this process might not allow you to alter the read-only attribute. In this case, you have to change the security permission on your USB drive to be able to proceed.
You can do this by checking the formatting of the USB device on the File system. You have to select the correct link between the NTFS file system and the FAT file system.
To go back to the read-only mode, all you have to do is to uncheck all the boxes. Be careful, however, to leave the Read entry box unchecked.
Why is My USB Drive Write Protected?
It is very common to wake up one day and find that your USB disc has been write-protected. There is no cause for alarm because this is a situation that can easily be sorted. The problem is most probably on your Windows PC and not your USB drive.
You will receive a warning that “the disc is write protected”. What do you do? Stash your USB drive in a bin and forget all those important files?
This message most often pops up on your healthy USB drive when you try to copy, delete or format your files but fortunately, there are ways you can revert that.
Since you can still read data from your USB drive, I don’t think there is a cause for panic. This is because you can unplug your device and try to format it in a different Windows.
If the write-protected error is still popping up, you will have to follow either of the simple processes below to unwrite protect your device.
How to Remove Write Protection from Your USB Drive
Sometimes you want to format your USB disc, maybe because it is full or maybe you just want to add or copy some files from it.
But what happens when the error message keeps popping up and you cannot proceed? Perhaps it doesn’t even display that your device is write-protected.
Here are some of the steps you can follow to fix the persistent error on your flash disc.
· Use the Mechanical Switch
If your device is one of those with a dedicated mechanical switch, you can easily sort your problem.
Check to find out if the switch has been accidentally locked and unlock it to remove the write protection from your tool.
Sometimes, this method might not work, and the error is persistent.
There are other methods you can still use to remove the write protection from your USB to tweak your data as desired.
· Ensure your SD Card is Not Full
Sometimes, the write-protected error happens when the USB disc is full. This mostly happens when you try to copy or move data from the disc perhaps to another storage.
In this case, view the size of your files on the properties. This will allow you to see both the free and used space. The error might persist regardless.
If it does, check the size of the file you are trying to copy. If it is too large, it is most likely the cause of the error.
· Uncheck the Read-Only Files
Sometimes, your file can show that it has been write-protected because a few files in the disc have been set to the read-only mode.
To find out, check the properties of the file you are trying to copy and uncheck it from the read-only mode. This process will remove the write-protected error from your USB disc.
· Run the DiskPart
This can be done by adopting the command prompt and running the CMD as an administrator.
Once you type and run the diskpart, you will be able to modify the settings in your USB drive.
Once that is done, follow the prompts by listing your disc attributes, selecting your disc number, and in the attributes disc, clear the read-only status. This operation should allow you to copy your files.
· Edit the Windows Registry
If all the above-listed commands fail, try editing the registry of your USB drive. All you have to do is to type Regedit on the command box and run.
This should open the Registry Editor that will allow you to navigate to the write-protect location. If you receive a specific key, change the value from 1 to 0. That should remove the write protection from your USB disc.
· Format the Disc
Sometimes, the write-protect error might persist even after trying all the above methods.
The best thing to do in this case would be to completely format your USB disc and start all over again. This method should disable the error but while at it, ensure that your files are recovered.

Conclusion
After all has been said and done, you must have now realized that write-protecting your USB drive is not rocket science. It is just as easy as removing the write protection from it!