Disclaimer: This post may contain affiliate links, meaning we get a small commission if you make a purchase through our links, at no cost to you. For more information, please visit our Disclaimer Page.
CPU-Z is a free detection program for Microsoft’s Windows, which helps gather system information and then shows the details on a single screen. It’s developed by CPUID, and updated on a regular basis, supported most of processors & chipsets.
If you don’t intend to view detailed information about the hardware of your computer, you might sometimes want to know what kind of processor or how much RAM your PC has. As for instance, do you know the sort of your RAM or its bus speed? It’s important in the case of upgrading your PC to add more RAM.
So, do you want to learn more about CPU-Z? Like where to download it, and how to use it, as well as read the information from this free detection tool.
Download The CPU-Z Portable Version
As I mentioned above, CPUID updates this tool regularly to add more features and supports for new CPUs and chipsets. The good news is that it’s available as a portable version, which you can download and run – no need to install.
But if you don’t want to use the portable app, there is also a version for you to download and install. No matter which version you have selected, visit the official website here to download.
How To Use CPU-Z To View Your PC Information
Well, the interface of CPU-Z is simple and very easy to use. After opening the tool, it automatically scans all of your hardware and then returns the information back to the screen of the tool.
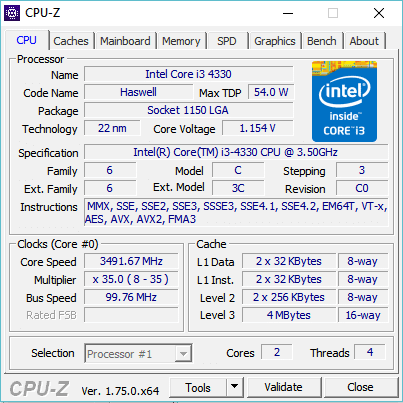
The first tab is to show CPU information, as seen below. From there, you can view processor name, how many cores & threads, code name, socket, max TDP, technology, clock speed, cache and much more. If you are using two processors in one mainboard, there is a drop-down menu to select “Processor #1” and “Processor #2“.
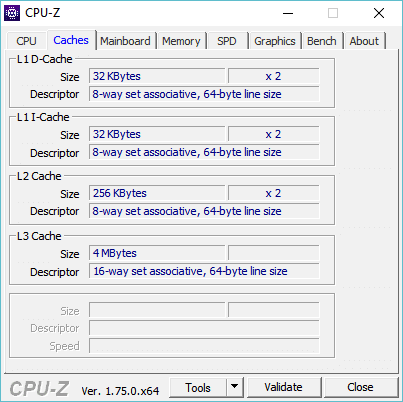
The second tab is the “Caches” tab that shows L1, L2 and L3 cache of your processor.
The “Mainboard” is the third tab, where displays all of the details about your mainboard, as well as current BIOS version. This is where you need to go and find your BIOS version before updating the BIOS of your mainboard.
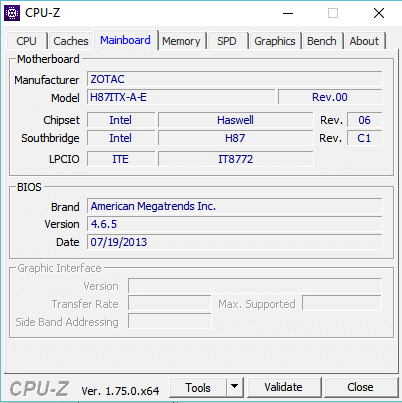
Also, know and remember the exact manufacturer and model of your mainboard is useful because it helps to find latest drivers easier.
Read Article: How To Fix Err_SPDY_Protocol_Error In Google Chrome
The “Memory” tab is also helpful for most of the users, who are planning to upgrade their PC and add more RAM. In the image below, you can see that my desktop computer has a total of 16 GB of RAM memory. The type of memory is DDR3, and it’s running in the dual-channel mode.
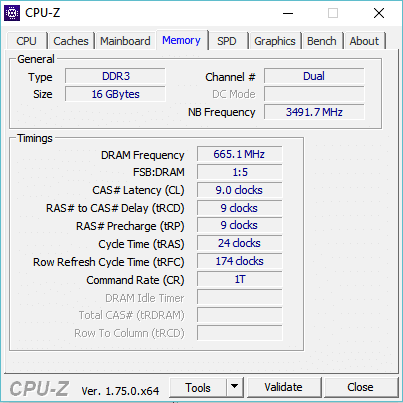
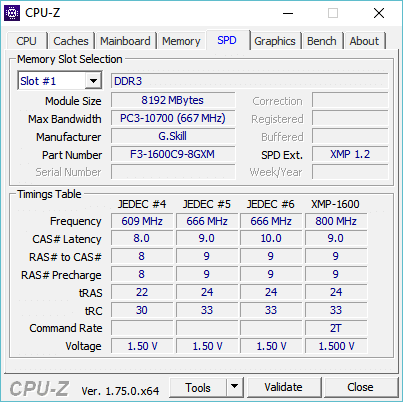
Most of the other details are for advanced users. You don’t need to remember them unless overclocking. For further details about each RAM slot, such as manufacturer, module size, part number and timing information, read it in the “SPD” tab.
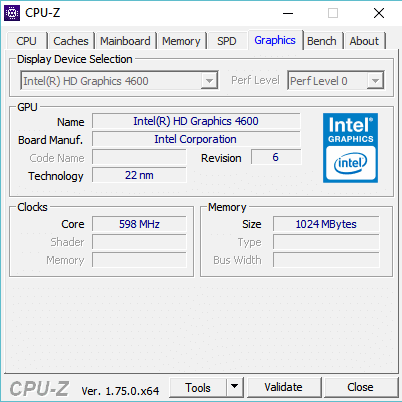
If you want to find out information regarding your graphics card, take a look at the “Graphics” tab. From there, you only can view a few basic information, such as GPU name, manufacturer, technology, clock speed and memory size. If you want to see detailed information about your graphics card, you should use GPU-Z, which better.
Read Article: How To Fix 0xc000000f Error While Booting Your Windows PC
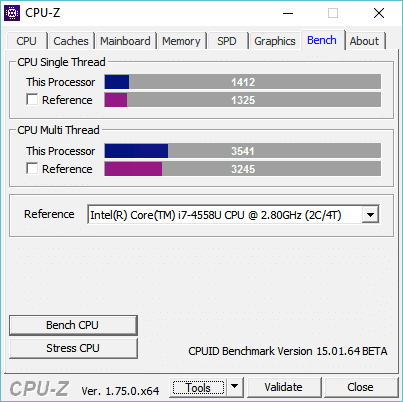
There is a “Bench” tab in CPU-Z that allows you to do a benchmark for your CPU and then compares to other CPUs. Do you want to try it?
There is also a version of CPU-Z for Google’s Android. If you want to see hardware information about your Android smartphone or tablet, download the app from the Google Play store.
If you have any questions about CPU-Z, let me know by leaving your comment below.